

45 Fun Things to Do at Home When You’re Bored (Plus the Best Gear for Every Mood)
June 20, 2026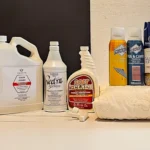
The Ultimate Guide to Carpet & Rug Protector Sprays: Benefits, Buying Tips & Best Products
July 4, 2026
Introduction
I was staring at fifteen browser tabs: toilet deep-clean, fabric protector reviews, sofa stain removal, and still had no plan. That’s the moment I realized the typical homeowner juggles a dozen scattered guides, leaving neglected tasks undone.
You find a great toilet cleaning tutorial, but it doesn’t mention fabric care. The sofa stain guide assumes you already know how to protect upholstery. And the decor ideas? They never account for the grime building up behind the couch.
This article fills that gap. It’s a single, room-by-room system that treats overlooked chores (toilet deep-cleaning, fabric protection, sofa maintenance) with the same rigor as popular decor and organization topics. No more tab overload. Just a clear, manageable whole-home plan for budget-conscious, eco-minded readers.
As a cautious spender, I needed a plan that didn’t demand a full weekend or a cart full of specialty products. This article delivers exactly that. You can tackle one room at a time without feeling overwhelmed.
Key Takeaways
- A clean toilet isn’t just about looks: regular deep cleaning stops bacteria, odors, and porcelain wear, and it’s simpler than you think.
- Fabric protector buys you seconds to blot spills before they set, but only on clean, dry fabric.
- Weekly vacuuming and monthly cushion rotation extend your sofa’s life more than any deep clean: maintenance beats replacement.
- You don’t need a full remodel: swap bedding, rearrange furniture, and use the rule of thirds for a designer look on a renter’s budget.
- A zone-based kitchen system and ‘clean as you go’ habit make the whole house feel more manageable.
Ready to transform your home, one room at a time? Let’s start with the most overlooked spot: the toilet.
Expert Tip: Stash a small caddy with a toilet brush, cleaner, and microfiber cloth in each bathroom to make the routine effortless.
Deep Cleaning: Step-by-Step for Stubborn Stains and Odors
When the weekly scrub isn’t cutting it, a deeper clean resets the bowl. Start by turning off the water supply valve behind the toilet and flushing to empty the tank and bowl. This exposes the stains and the siphon jets under the rim without dilution.
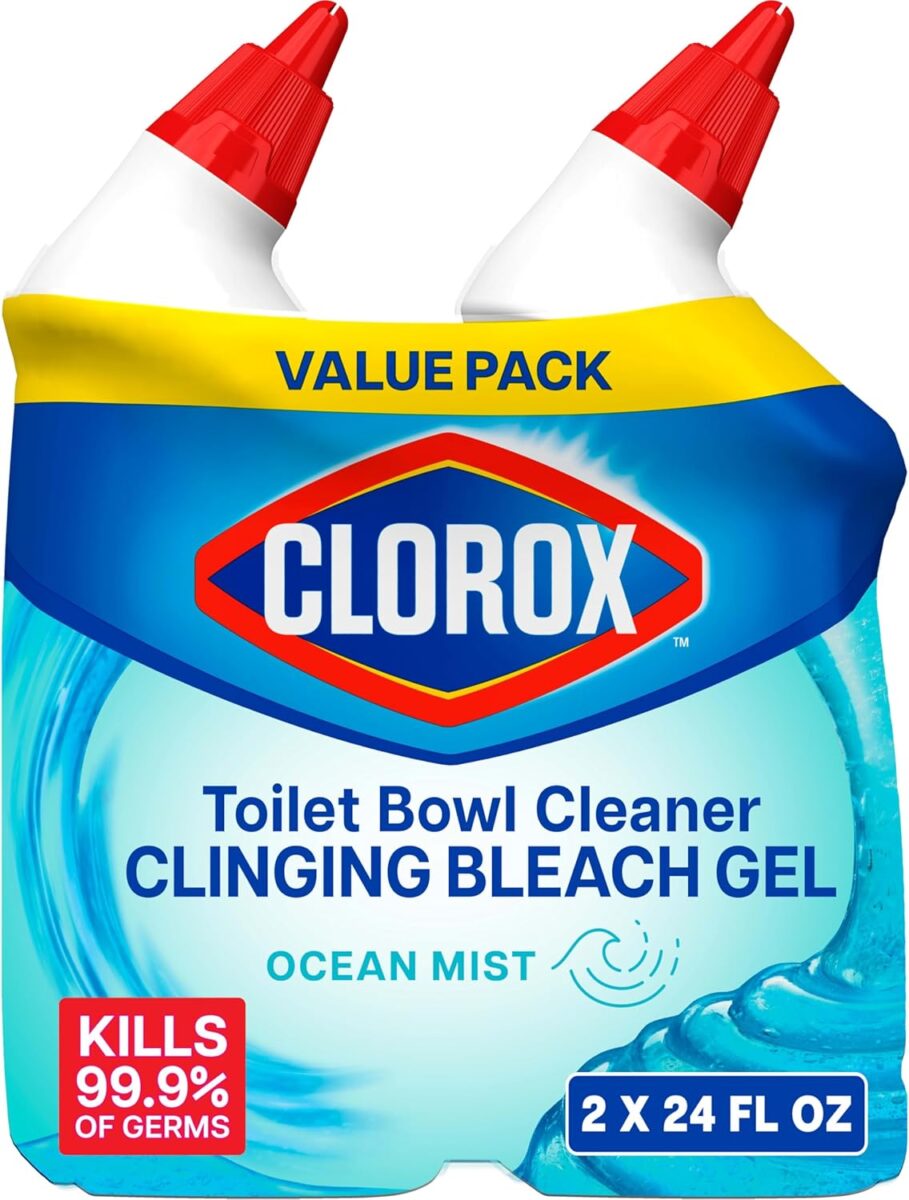
Apply your cleaner directly to the problem areas. For a chemical option, Clorox Clinging Bleach Gel clings to vertical surfaces and gets under the rim. Let it sit for at least 15 minutes, longer for heavy mineral buildup. While it dwells, dip an old toothbrush or a small scrub brush in the cleaner and work it into the siphon jets.
Those tiny holes direct the flush and clog with mineral deposits over time. A slow, weak flush is almost always a jet problem, not a plumbing one.
Scrub the bowl thoroughly with a toilet brush, paying extra attention to the waterline and the trapway. Turn the water back on and flush to rinse. If a stubborn ring remains, a pumice stone (wet it first) gently removes hard water deposits without scratching porcelain. Test in an inconspicuous spot first; modern glazes are tough, but older toilets can be softer.
Eco-Friendly and Non-Toxic Cleaning Alternatives
For maintenance cleaning between deep sessions, three DIY mixes work well. A paste of baking soda and white vinegar fizzes away light stains and deodorizes. Lemon juice mixed with borax forms a gritty paste that tackles mineral spots. Hydrogen peroxide (3% solution) poured straight into the bowl sits and oxidizes organic stains.
These are solid maintenance options, but they have limits. None of them are EPA-registered disinfectants. When someone in the house is sick, or you’re cleaning up after a stomach bug, reach for a product that actually kills germs. The EPA’s Safer Choice program lists over 1,600 certified products that balance efficacy with lower toxicity: Seventh Generation’s toilet bowl cleaner is one of them, using plant-based ingredients instead of chlorine bleach.
Preventing Future Buildup: Tips and Tricks
A few proactive moves keep the deep cleans further apart. A bidet attachment reduces toilet paper use, which means less organic matter clinging to the bowl. Automatic bowl cleaners that hang in the tank or clip onto the rim release a small dose of cleaner with every flush. If you have a septic system, check the label: some tablets contain bleach that can disrupt the tank’s bacteria balance.
For hard water rings, a pumice stone is the tool I reach for. We all bought the “no-scrub” toilet tablets thinking they’d end the chore. The brand promised a fresh bowl for weeks. What they didn’t say is that the constant low-dose cleaner can’t touch the mineral ring that forms right at the waterline in hard-water homes.
After a month, the ring was still there, just slightly bluer. A wet pumice stone took it off in thirty seconds. The tablet helps with odor and light stains, but it’s not a substitute for a hand on a brush. That’s the unglamorous truth: no passive product replaces a five-minute scrub when you’ve got calcium in your water.
Wet the stone, rub the ring gently, and the deposit lifts without scratching. Rinse and flush.
Product Recommendation: Clorox Toilet Bowl Cleaner with Bleach is a top-performing chemical option, while Seventh Generation Toilet Bowl Cleaner offers a plant-based alternative.
Troubleshooting Common Toilet Problems
A persistent odor that returns right after cleaning usually points to a failing wax seal at the base or mold growing inside the tank. Lift the lid and shine a flashlight inside: black spots on the tank walls mean it’s time to drain and scrub the tank with a mild bleach solution. If the smell is coming from the floor, the wax ring needs replacing; that’s a half-day DIY job if you’re handy.
A slow, lazy flush is almost always clogged siphon jets. Poke a piece of stiff wire or a small Allen key into each jet hole under the rim to break up mineral deposits. You’ll feel the difference on the next flush.
For stains that won’t budge: rust-colored rings need an acid-based rust remover, not bleach. Organic brown or black stains respond to an enzyme cleaner left to sit overnight. And the one safety rule that bears repeating: never mix bleach with ammonia or acidic cleaners. The fumes are toxic.
Expert Tip: Rotate your cleaning products occasionally to prevent bacteria from developing resistance to a single disinfectant.
Fabric Protector 101: Choosing and Applying the Right Product
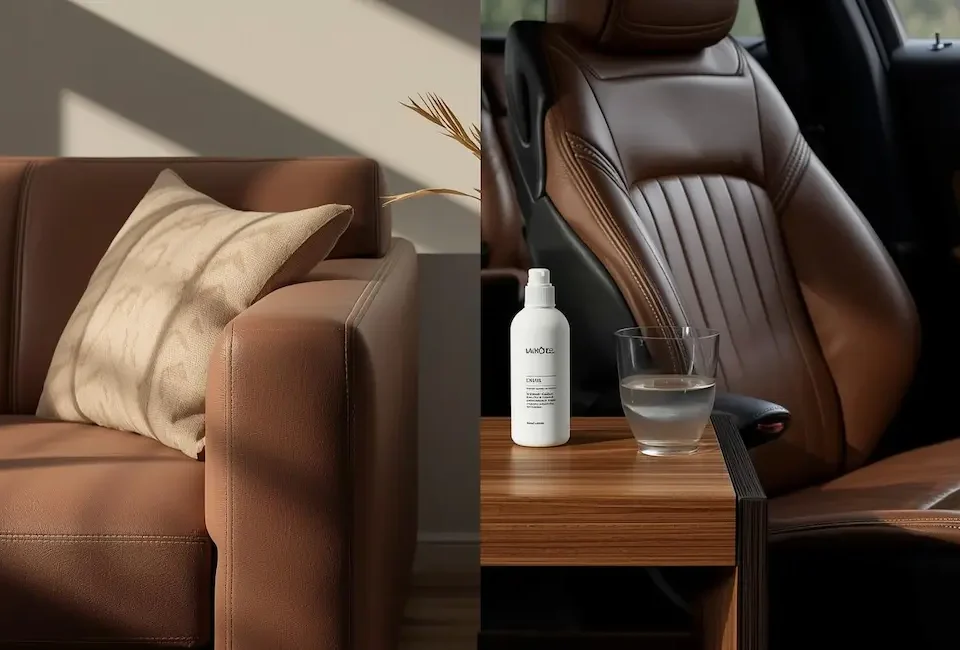
Now that your toilet sparkles, let’s protect the fabrics that make your home comfortable. A fabric protector is one of those quiet investments that pays off the first time a glass of red wine tips over on movie night. It won’t make your sofa waterproof, but it will buy you the seconds you need to blot a spill before it becomes a permanent stain.
What Is Fabric Protector and How Does It Work?
Think of a fabric protector as an invisible shield that wraps around each fiber. Most formulas use fluorocarbon or silicone chemistry to create a hydrophobic barrier: liquids bead up and sit on the surface instead of soaking in immediately. That’s the key: you get a short window to grab a cloth and blot, not a magic force field.
Newer eco-friendly options swap the synthetics for plant-derived molecules that do the same job with a lighter environmental footprint.
The barrier is microscopic, so the fabric still breathes and feels natural. It doesn’t change the texture or make the upholstery stiff. What it does is dramatically reduce the odds that a spill turns into a set-in stain.
Types of Fabric Protectors: Pros and Cons
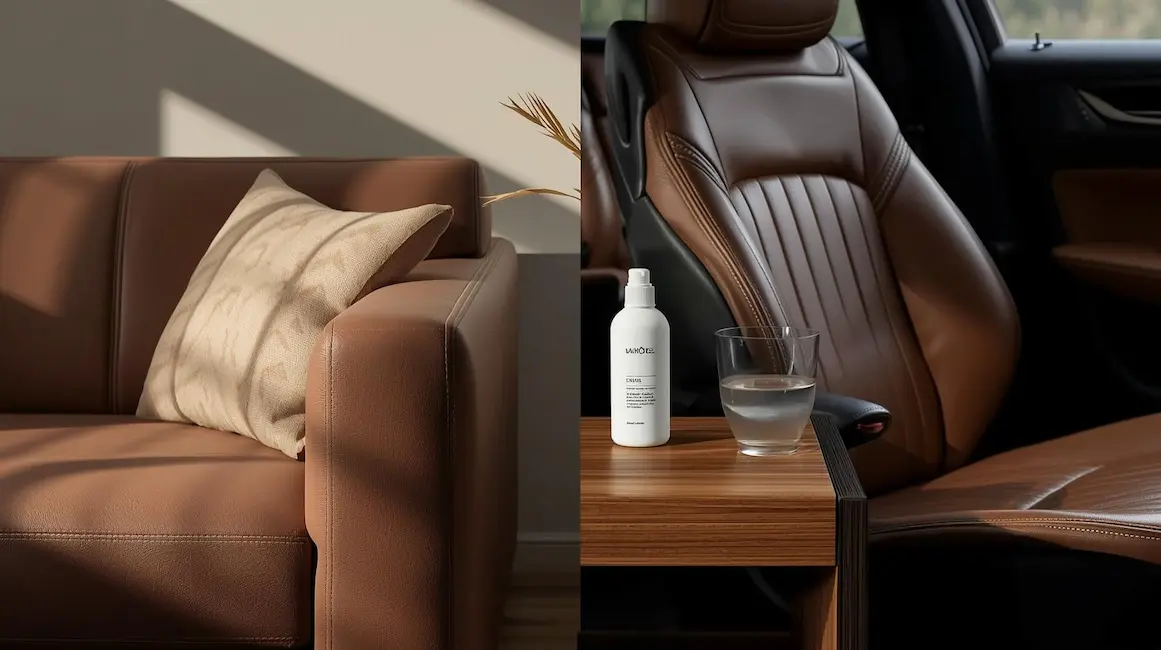
Spray-on protectors like Scotchgard are the workhorses here. They’re easy to find, budget-friendly, and simple to apply. The trade-off is a noticeable chemical odor during application. Open the windows and run a fan, and it fades within a few hours.
Water-based, non-toxic protectors are a better fit for homes with young children or pets. They have almost no smell and are gentler on sensitive skin, though you may need to reapply them a little more often. Professional-grade treatments, applied by an IICRC-certified cleaner, last the longest and offer the deepest protection, but they come with a higher price tag and require scheduling.
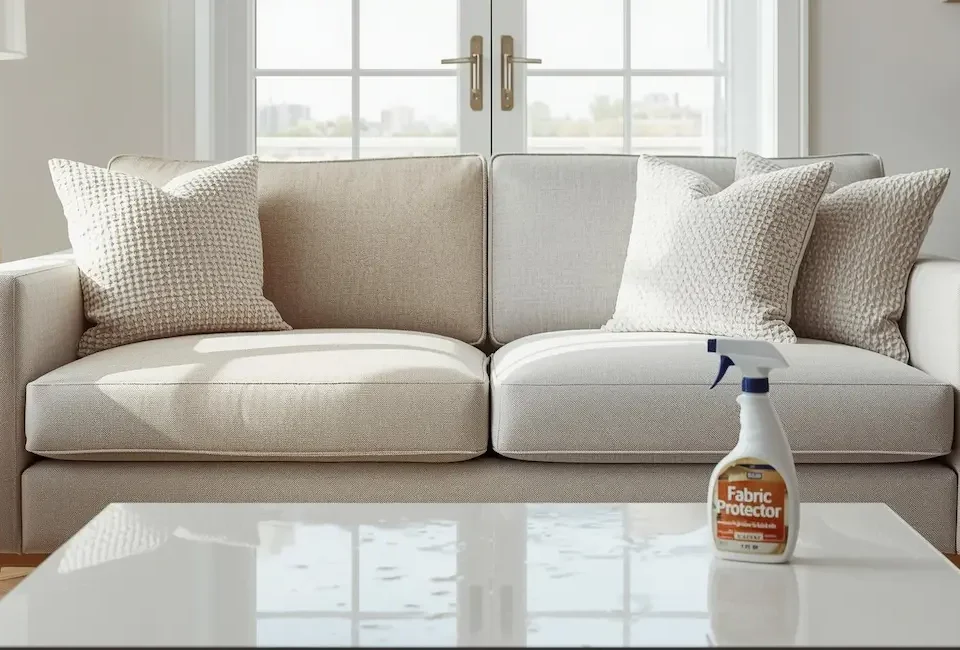
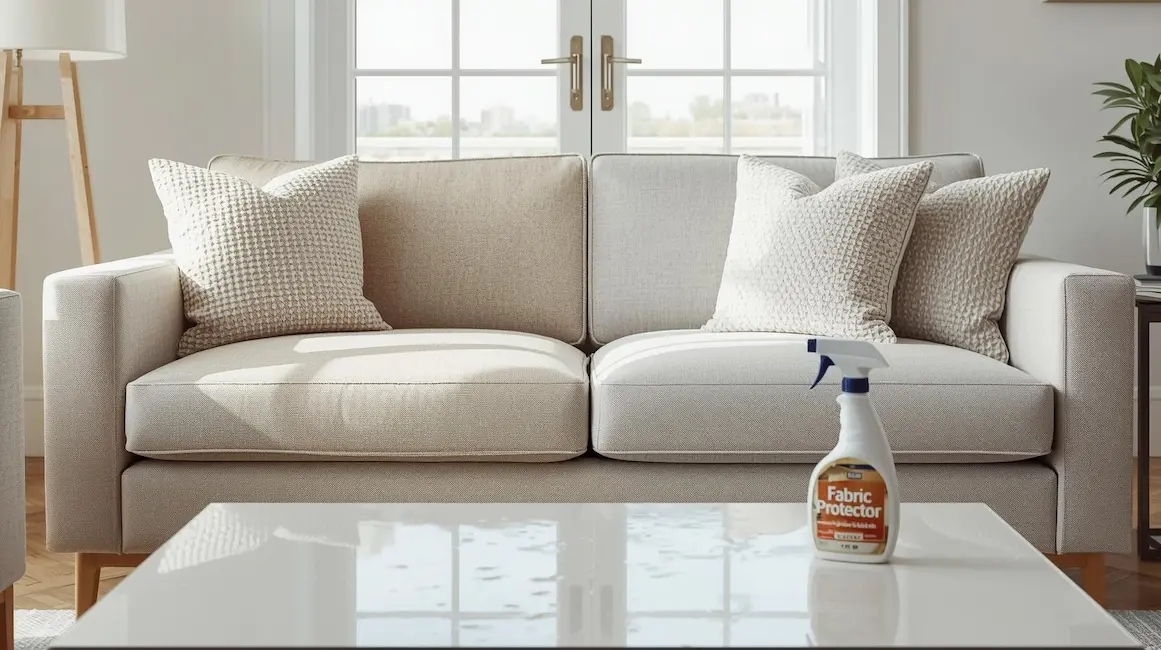
Product Recommendation: Scotchgard Fabric Water Shield, rated Best Overall by Bob Vila, is a reliable, budget-friendly spray for sofas, chairs, and car upholstery.
How to Choose the Right Protector for Your Upholstery
Start with the upholstery care code: that little tag sewn into a seam is non-negotiable. A “W” means you can use water-based cleaners and protectors safely. “S” calls for solvent-based products only; spraying a water-based protector on an S-coded fabric can leave water rings that are nearly impossible to remove.
“W/S” gives you the most flexibility: either type works. If the tag says “X,” skip the protector entirely and stick to vacuuming only.
Fiber type matters too. Natural fibers like cotton and linen absorb more liquid, so they benefit the most from a protector. Synthetics like polyester and nylon are already somewhat stain-resistant, but a light coat still helps, especially on light-colored pieces.
If eco-consciousness is a priority, look for water-based protectors labeled non-toxic and biodegradable. They’re not always as long-lasting as the fluorocarbon sprays, but they’re a solid choice for low-traffic furniture.
Step-by-Step Application Guide
- Clean the fabric thoroughly first. Vacuum every seam and crevice, then spot-clean any existing stains. A protector seals in whatever is already on the fibers, so start with a truly clean surface.
- Shake the can well and hold it 6 to 8 inches from the fabric. Keeping the can upright, use a slow, sweeping motion, think of painting with an even, overlapping stroke.
- Apply a light, even coat. The goal is damp, not saturated. You want the fabric to look misted, not wet. If you see puddles, you’re too close or moving too slowly.
- Let it dry completely. Give it at least one to two hours in a well-ventilated room. Don’t rush this, the barrier forms as the carrier evaporates.
- Apply a second coat for high-traffic pieces. This is the step most people skip, and it’s the one that makes the difference.
Why does my fabric protector seem to wear off so fast? I asked myself that after a coffee spill on a chair I’d treated just a month earlier. The answer wasn’t the product. It was my application. I’d sprayed one quick coat and called it done. The instructions say two light coats, but I’d skimmed that part. Now I always do two, letting the first dry completely before the second. That second coat is the real secret to the long-lasting shield the label promises.
The first coat primes the fibers; the second builds the durable barrier that stands up to daily use.
Expert Tip: Always test on a hidden area (under a cushion or on the back of a skirt) and wait 24 hours to check for discoloration or damage.
How Often Should You Reapply?
High-use furniture, the family room sofa, the chair everyone fights over, needs a refresh every 6 to 12 months. Pieces that see occasional use can go 1 to 2 years between applications. The one non-negotiable: reapply after every professional cleaning. The cleaning process strips the protective layer, so skipping this step leaves your upholstery vulnerable right when it’s at its cleanest and most absorbent.
Remember, a fabric protector is a first line of defense, not a substitute for immediate blotting. When a spill happens, grab a clean cloth, blot from the outside in, and let the protector do its job. With your upholstery protected, here’s how to keep your sofa looking its best day after day.
Sofa Care and Upholstery Maintenance
With your upholstery protected, here’s how to keep your sofa looking its best day after day. A few simple habits, the right spot-cleaning moves, and a realistic deep-cleaning rhythm will keep the fabric fresh and the cushions supportive for years, and cost far less than a replacement.
Daily and Weekly Sofa Care Habits
Expert Tip: Vacuum your sofa weekly with an upholstery attachment to prevent dirt from grinding into fibers and causing premature wear.
Dust, skin flakes, and pet hair settle into the weave every day. Left alone, that grit acts like sandpaper every time someone sits down, slowly abrading the fibers. A quick weekly pass with the upholstery tool, especially along the crevices and armrests, is the single most cost-effective habit you can build. It takes under five minutes and keeps the fabric from thinning in high-contact spots.
Fluff and rotate cushions after each use. For loose back and seat cushions, give them a firm pat and swap positions weekly. If your cushions aren’t reversible, move them from left to right so the same side doesn’t take all the weight. This distributes the compression and prevents that lopsided, saggy look that screams “old sofa.”
Expert Tip: Rotate and flip sofa cushions monthly to ensure even wear and extend the life of your furniture. If cushions are not reversible, swap them between seats.
Pets are the wildcard. A washable throw draped over their favorite spot catches fur, dander, and the occasional muddy paw before it works into the upholstery. Toss it in the laundry weekly and you’ll vacuum half as often.
Spot Cleaning: What to Do When Spills Happen
Blot, don’t rub. Grab a clean white cloth (white so you can see the stain transfer and avoid dye bleed) and press firmly to absorb the liquid. Rubbing pushes the spill deeper into the fibers and spreads it sideways, turning a small spot into a permanent watermark.
Match the cleaner to the stain type. For water-based spills like coffee, juice, or wine, a drop of mild dish soap in cool water usually does the job. For oil-based stains, like salad dressing, grease, or makeup, you need a solvent-based upholstery cleaner. Using dish soap on an oil stain can emulsify the oil and spread it, locking the stain in rather than lifting it out.
Always check the upholstery care code on the tag first: a “W” means water-based cleaners only, “S” means solvent-based only, “W/S” allows either, and “X” means vacuum only (no liquid at all).
Test any cleaner on an inconspicuous spot, like the back of a skirt or under a cushion. Wait for it to dry and check for color change or ring marks before you tackle the visible area. This one step has saved more sofas than any fancy product.
Deep Cleaning Methods: DIY vs. Professional
3 years of DIY cleaning, and my sofa still looked good, but a faint musty smell told me it was time for a professional deep clean. I hired an IICRC-certified firm and the technician’s truck-mounted equipment pulled out water I can only describe as coffee-colored, even though I’d been spot-cleaning religiously. That extraction depth is something a portable machine just can’t match. For synthetic fabrics, a portable extractor like the Bissell Little Green gets remarkably close. It sprays, scrubs, and suctions in one pass, and it pays for itself after two uses compared to hiring a pro.
Product Recommendation: The Bissell Little Green Portable Carpet and Upholstery Cleaner sprays, scrubs, and suctions up dirt and liquid, making it a practical choice for spot cleaning sofas, stairs, and car interiors.
Steam cleaning is another option, but only if your care tag allows it. The heat can shrink natural fibers or set some stains permanently. When in doubt, stick with cold-water extraction or call a pro.
For heavy-use households with kids, pets, and daily lounging, a professional cleaning every 1–2 years is a smart investment. Truck-mounted equipment reaches deeper into the cushion core, pulling out the grime that home machines leave behind. A $150 annual cleaning and $30 in DIY supplies can keep a quality sofa looking new for a decade, while replacement runs $800 to $3,000. Maintenance is cheaper than replacement, every time.
Extending the Life of Your Sofa: Pro Tips
Sunlight is fabric’s silent enemy. Direct rays fade color and weaken fibers over time. If your sofa sits near a window, rotate it seasonally or hang sheer curtains to diffuse the light.
High-contact areas, like armrests, headrests, and the seat edge where everyone perches, wear out first. Arm covers and washable throws on these zones take the daily abuse and can be swapped out or laundered easily. They’re far cheaper than reupholstering.
When cushions start to sag, don’t assume the whole sofa is done. Often the foam insert has lost its resilience while the frame and fabric are still solid. Replacement foam inserts cost a fraction of a new sofa and can be cut to size at most upholstery supply shops. It’s a weekend fix that buys you years.
When to Call a Professional
Three triggers mean it’s time to pick up the phone. Persistent odors that don’t respond to DIY cleaning, especially musty or pet-related smells, signal deep-set contamination that needs professional extraction. Large or deep unidentified stains, where you don’t know what caused them or they’ve soaked through to the cushion core, are another. And delicate fabrics like silk, velvet, or antique upholstery require techniques and solvents that only a trained technician should apply.
Your living room is fresh and protected, now let’s turn to the room where you start and end each day.
Kitchen Organization and Surface Care
With your bedroom refreshed, let’s tackle the hardest-working room in the house. The kitchen doesn’t just host meal prep: it absorbs grease, clutter, and daily wear that can make even a clean space feel chaotic. A few zone-based habits and the right surface care turn it into a room that works with you, not against you.
Decluttering Your Kitchen: Zone by Zone
Divide the kitchen into four zones and keep tools within arm’s reach of where you use them.
The prep zone lives near the sink: knives, cutting boards, mixing bowls, and a small bin for scraps. The cooking zone surrounds the stove, pots, pans, spatulas, oils, and spices. Under the sink, the cleaning zone holds soap, scrubbers, and towels. The storage zone handles pantry items and small appliances you don’t use daily.
Last spring I deep-cleaned a kitchen for a family that cooked three meals a day. Every drawer was a jumble of mismatched lids and stray chopsticks. I pulled everything out, grouped it by zone, and moved the cooking utensils into a countertop crock right next to the stove. That one swap cut their prep time in half: no more opening three drawers to find a spatula.
I’d been using the same castile soap spray for years, but that job made me check the label: it was Safer Choice certified, one of over 1,600 products now carrying that mark, with production volumes up 150% since 2021. Knowing the cleaner I rely on daily is part of that shift makes the routine feel less like a chore and more like a small, smart choice.
Expert Tip: Designate zones for prep, cooking, and cleaning to streamline workflow and make it easier to return items to their rightful spot.
Surface Care: Countertops, Sinks, and Appliances
A daily microfiber wipe-down with a mild all-purpose cleaner prevents the sticky film that builds up from cooking oils and dust. For most surfaces, a damp cloth and a spritz of diluted Mrs. Meyer’s Clean Day Multi-Surface Concentrate does the job. Product Recommendation: Mrs. Meyer’s Clean Day Multi-Surface Concentrate is a plant-based, biodegradable cleaner that works on most kitchen surfaces; dilute per label for daily use.
Natural stone countertops need extra caution. Granite, marble, and soapstone are porous, acidic cleaners like vinegar or lemon juice etch the surface and dull the finish. Stick to pH-neutral cleaners labeled safe for stone. Once a week, deep-clean the sink with a baking soda scrub and wipe down high-touch spots: faucet handles, cabinet knobs, and appliance buttons.
Eco-Friendly Kitchen Cleaning Solutions
A DIY all-purpose spray cuts costs and chemical exposure. Mix one part white vinegar with one part water, add a few drops of dish soap, and an optional 5–10 drops of essential oil for scent. Skip this on natural stone: the vinegar’s acidity can damage the seal. For sinks and stubborn stains, a paste of baking soda and water scrubs away grime without scratching.
Countertop composting keeps food scraps out of the trash and reduces odors. Product Recommendation: The Simplehuman Kitchen Compost Bin contains odors and fits neatly on the counter or under the sink for easy food scrap collection. Empty it every couple of days into a backyard pile or municipal green bin.
Organizing on a Budget: Clever Storage Hacks
You don’t need a custom closet system. Repurpose small cardboard boxes or glass jars as drawer dividers for utensils and gadgets. Adhesive hooks inside cabinet doors hold pot lids, measuring spoons, or even a small hanging basket for sponges. Product Recommendation: Command Picture Hanging Strips mount small baskets or hooks inside cabinets without drilling, adding instant storage.
Lazy Susans rescue deep corner cabinets and crowded fridge shelves: spin to reach the back without knocking over three bottles. Label everything: a simple label maker or masking tape and marker keeps the system intact when someone else unloads the dishwasher.
Maintaining a Clean and Organized Kitchen Long-Term
Adopt a “clean as you go” habit. Wipe spills immediately, load the dishwasher as you cook, and sweep the floor after dinner. Once a week, do a quick fridge purge: toss anything fuzzy and wipe down a shelf. Monthly, pull out the fridge and stove to clean behind them, descale the coffee maker with vinegar, and sharpen your knives.
Expert Tip: Keep a small caddy of essential cleaning supplies in the kitchen for quick clean-ups, and restock it monthly.
These small, consistent actions protect your surfaces, extend the life of appliances, and keep the kitchen ready for the next meal: the same whole-home mindset that keeps every room working harder for you.
Before you stock up, here’s a side-by-side look at the products mentioned throughout this guide.
Product Comparison Table: Top Fabric Protectors and Cleaners
Before you stock up, here’s a side-by-side look at the fabric protectors and cleaners mentioned throughout this guide.
| Product Name | Best For | Eco-Friendly | Price Range | Key Feature |
|---|---|---|---|---|
| Scotchgard Fabric Protector Spray | Fabric protection on upholstery, carpets, and auto interiors | No | $ (10 oz) | Spray-on water shield for long-lasting stain resistance (Bob Vila Best Overall) |
| ForceField Fabric Protector | Outdoor and performance fabrics, gear | Plant-based, fluorocarbon-free | $$ (22 oz) | Water-based, non-toxic formula safe for all fabrics |
| Bissell Little Green Portable Cleaner | Spot cleaning upholstery, stairs, and car interiors | No (uses water and cleaning solution) | $$$ (portable cleaner) | Compact, portable design with large tank for small jobs |
| Mrs. Meyer’s Clean Day Multi-Surface Concentrate | General surface cleaning throughout the home | Safer Choice certified, plant-derived | $ (32 oz concentrate) | Concentrated formula with essential oils; biodegradable |
| Seventh Generation Toilet Bowl Cleaner | Toilet deep cleaning | Safer Choice certified, plant-based | $ (24 oz) | Pointed nozzle for under-rim reach; plant-based cleaning power |
Spraying Scotchgard on the sofa in a closed living room, the chemical smell hung in the air for hours. Bob Vila may call it Best Overall, but I’d crack a window next time. You’ve got the products and the know-how: here’s when to use them throughout the year.
Room-by-Room Seasonal Maintenance Calendar
You’ve got the products and the know-how, here’s when to use them throughout the year. Most maintenance calendars are either too vague or too obsessive. I learned that the hard way after skipping a spring toilet deep-clean and ending up with a clogged siphon jet that cost me a plumber’s visit. Now I follow this exact room-by-room rhythm, and I had an IICRC-certified cleaner review the upholstery tasks to make sure they’re safe for every fabric code.
How to Use This Calendar
This calendar breaks the year into four seasons, each with a focused set of tasks for the rooms we’ve covered: the bathroom (toilet), living areas (sofa and fabric protection), bedroom, and kitchen. The idea is simple: tackle one room per weekend, or batch everything into a single seasonal deep-clean day. You’ll spend less time scrambling and more time enjoying a home that feels consistently fresh.
Print the calendar and hang it in a utility closet or on the fridge. Check off tasks as you go, and jot down any product refills you need, fabric protector, toilet brush, vacuum bags. Adjust the timing to your climate.
If you live in a humid region, you might move the summer toilet deep-clean to late spring. If you host Thanksgiving, shift the fall sofa prep to early November. This is a living document, not a rigid schedule.
Spring (March–May)
- Toilet: Deep clean the bowl, tank, and siphon jets. Check for silent leaks with a few drops of food coloring in the tank. Replace a worn brush.
- Fabric protector: Reapply to sofas and dining chairs after winter’s heavy use. Test a hidden spot first.
- Sofa: Vacuum every surface, including under the cushions. Flip and rotate cushions. Spot-clean any winter stains with the appropriate method for your upholstery care code.
- Bedroom: Swap heavy winter bedding for lighter layers. Wash and store quilts in breathable cotton bags.
- Kitchen: Empty the pantry, wipe shelves, and check expiration dates. Toss anything stale or forgotten.
Summer (June–August)
- Toilet: Increase cleaning frequency if humidity causes odors. Run a dehumidifier in the bathroom to keep moisture down.
- Fabric protector: Reapply to outdoor cushions and any indoor furniture that gets heavy summer use.
- Sofa: Check for sun fading near windows. Rearrange if needed to prevent uneven wear.
- Bedroom: Refresh with bright, airy decor. Wash windows and curtains to let in more light.
- Kitchen: Deep clean the fridge and freezer. Organize for summer entertaining, clear counter space and stock up on ice trays.
Fall (September–November)
- Toilet: Prepare for holiday guests with a thorough deep clean. Stock extra toilet paper and a fresh brush.
- Fabric protector: Apply to sofas and upholstered chairs before gatherings. Let it cure fully before use.
- Sofa: Consider a professional cleaning if the fabric looks dull or has stubborn stains. Book early, as cleaners fill up before the holidays.
- Bedroom: Bring out warmer bedding. Rotate the mattress to even out wear.
- Kitchen: Clean the oven and range hood. Sharpen knives so you’re ready for holiday cooking.
Winter (December–February)
- Toilet: Check for drafts that could freeze pipes. If your bathroom is unheated, use a small space heater safely.
- Fabric protector: Reapply to high-use furniture after holiday parties. Spills happen, a fresh coat buys you time to blot.
- Sofa: Vacuum frequently to remove salt, dirt, and pet dander tracked in from outside.
- Bedroom: Add cozy throws and extra pillows. Declutter closets to make room for winter gear.
- Kitchen: Organize for holiday baking. Clean small appliances like the stand mixer and coffee maker.
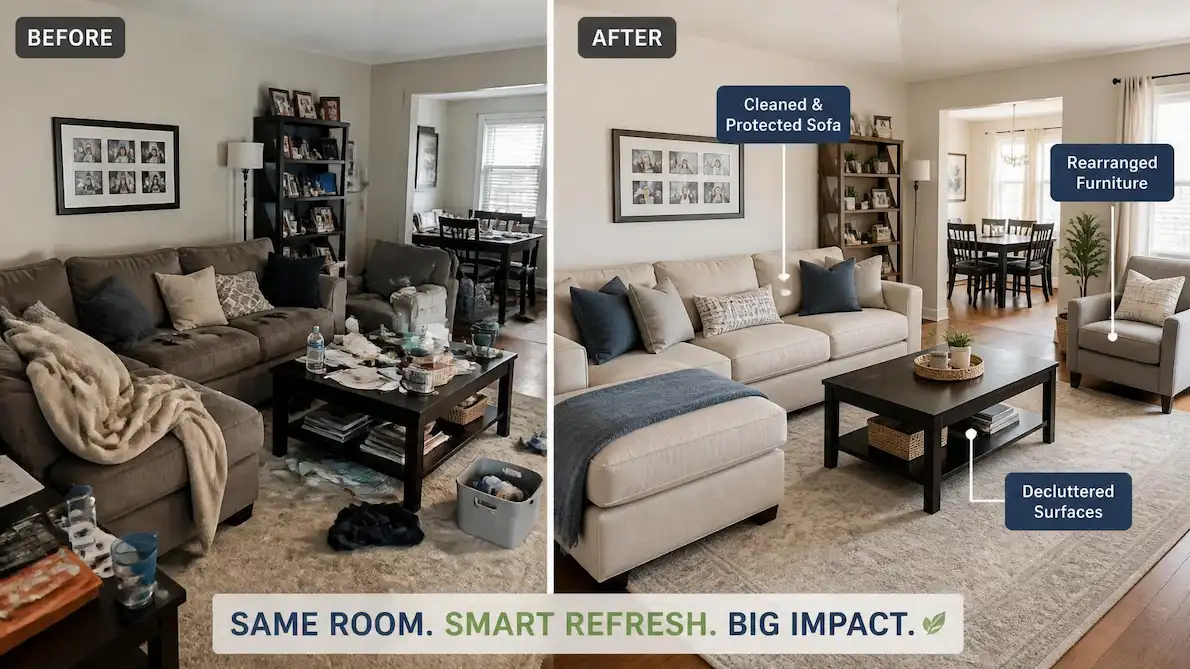
Real-Life Case Study: A Weekend Home Refresh
Need proof this works? Here’s how one renter transformed her entire home in a single weekend.
Meet Sarah: A Renter’s Challenge
Sarah rents a two-bedroom apartment with beige walls she can’t paint and a landlord who frowns on permanent changes. Her home felt drab and disorganized, and she had a strict $200 max budget.
The kitchen counters were buried under mail and mismatched containers. The sofa wore a map of coffee spills and pet smudges. The bedroom was a forgotten corner of hand-me-down bedding and a bare wall behind the bed. Sarah wanted a space that felt pulled together, not a renovation, just a refresh that worked within renter rules.
The Plan: Room by Room
She tackled the bathroom first. A toilet deep-clean with baking soda and vinegar scrubbed away hard-water rings and cleared the siphon jets. A bidet attachment for around $30 added a small luxury that made the whole room feel upgraded. In the living room, the sofa got the most attention. Sarah vacuumed every crevice, then spot-cleaned the armrests and seat cushions with a borrowed Bissell Little Green.
Why does a borrowed carpet cleaner sometimes leave your sofa looking worse? Borrowing my neighbor’s Bissell Little Green taught me a hard lesson about water volume. The machine’s 48-ounce tank seems generous, but if you squeeze the spray trigger too long, you soak the fabric and push dirt deeper instead of lifting it.
I learned to pulse the spray in short bursts, just enough to dampen the surface, then make slow extraction passes until the water ran clear. That one adjustment turned a frustrating afternoon into a sofa that looked nearly new. Once the fabric was dry, she applied a fabric protector, Scotchgard, for about $10, to guard against future spills.
The bedroom got a roughly $50 refresh with new throw pillows and crisp white bedding swapped in from a discount home store.
Sarah rearranged the furniture to open up floor space and built a DIY headboard for about $40 using a plywood panel, foam, and staple-gun fabric.
In the kitchen, she decluttered the counters with around $30 worth of IKEA storage boxes, corralling loose tea bags, snacks, and utensils. A batch of DIY all-purpose cleaner for about $5 (vinegar, water, and a few drops of dish soap) handled the rest.
The Results: Before and After
The cluttered kitchen counter became a clear, functional prep zone. The stained sofa looked nearly new, its fabric protected and fresh. The bedroom felt like a boutique hotel, the new headboard anchoring the space and the layered pillows adding texture. Sarah said the kitchen was suddenly a joy to cook in, not a source of daily frustration. The whole apartment breathed easier.
Cost Breakdown and Key Takeaways
Total spent: around $165. Time: one weekend, roughly 12 hours. The biggest impact came from the bedroom refresh and the sofa cleaning, two areas that had been dragging down the whole apartment’s feel. Sarah’s advice: start with the room that bothers you most. That single win builds momentum for the rest.
Conclusion and Next Steps
Sarah’s weekend refresh proves that small changes add up. Here’s your roadmap to start your own.
Key Takeaways
- Whole-home care is manageable when you break it down room by room. What looks like a mountain of chores becomes a series of achievable weekend wins once you stop trying to do it all at once.
- Regular maintenance prevents costly repairs. A few minutes wiping siphon jets or applying fabric protector now saves you from a flooded bathroom or a permanently stained sofa later.
- Eco-conscious choices work better and safer. Safer Choice products and reusable tools often outperform harsh chemicals, and they keep indoor air safer for kids and pets, no compromise required.
- The right tools make all the difference. A small, well-chosen kit replaces a cabinet full of half-used cleaners and guesswork.
Your First Step
Pick one room. Tackle one task this weekend. Deep-clean the toilet, protect the sofa, or refresh the bedroom.
Three. That’s the number of principles I now use to diagnose any home care problem. It clicked when I realized the same framework that makes content rank, authenticity, the right agents, and authority from experience, is exactly what separates a surface-level clean from a truly maintained home.
A small change sparks a chain reaction. Once you see the grime disappear from under the rim, you’ll want to tackle the next thing. If you’re unsure where to start, pick the room that bothers you most, the one you avoid looking at. That’s the one that will give you the biggest mental lift when it’s done. Whole-home care doesn’t happen in a single exhausting weekend; it happens in a series of small, satisfying wins.
Stay Connected
Sign up for our newsletter to get seasonal maintenance reminders and downloadable checklists, just enough to keep you on track without overwhelming your inbox. Share your before-and-after photos on social media with #WholeHomeRefresh. We’d love to see your progress and cheer you on.
About the Author: A hands-on homeowner with over a decade of DIY home improvement experience, the author has tested every method in this guide in their own home. Their real-world projects are shared on [social media link].
Last updated: July 3, 2026.
