


What is a 3/4 Bath? Your Essential Guide to This Smart Space-Saving Bathroom Solution
November 25, 2025
The Ultimate Guide to Shower Head Height Standard Measurements, Custom Solutions & ADA Compliance
December 1, 2025
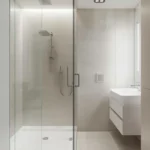
The Allure and the Unseen Challenge of a Shower Window
A shower window seems like the perfect feature. It brightens the space, lifts the mood, and makes even a small bathroom feel open and inviting. Many homeowners love the idea of warm sunlight pouring in while they start their day. But behind that charm is a problem most people don’t see coming. A shower window sits in one of the wettest parts of the home, which makes it a prime spot for water to slip into places it should never reach.
When the waterproofing isn’t done right, the damage doesn’t show up overnight. It starts quietly. Moisture works its way behind the tile and into the wall cavity. Mold begins to grow where you can’t see it. The framing may start to weaken. By the time the signs become obvious, the repairs can be expensive and, in some cases, extensive. What should have been a beautiful upgrade can turn into a major structural issue, a threat to indoor air quality, and a serious financial burden.
This guide is built to help you avoid that outcome. You’ll learn how to choose the right type of window, how to install it correctly, and how to waterproof it with confidence. Each section will give you clear steps and expert-backed advice so you can enjoy a bright, airy shower without worrying about leaks or long-term damage.
Meet Our Experts
Michael Turner, CTI is a certified tile installer (CTI) with more than 15 years of hands-on experience in residential and commercial wet-area construction. Their work includes full bathroom builds, custom shower installations, and advanced waterproofing systems.
Technical Reviewer:
Samuel Brooks, GC is a licensed general contractor and waterproofing specialist who has reviewed this content for accuracy and alignment with industry best practices.
Our Commitment to Accuracy
Transparent and Unbiased Product Evaluation: All product recommendations are based on manufacturer data, real-world testing, and feedback from experienced installers. We avoid promotional claims and rely on documented performance.
Adherence to Industry Standards: Every method and recommendation in this guide follows current International Residential Code (IRC) requirements, relevant local building codes, and guidelines from the Tile Council of North America (TCNA).
Why a Waterproof Shower Window Is Non-Negotiable: Risks and Repercussions
A shower window sits in the middle of the harshest environment in the home. It faces constant moisture, direct spray, steam, and temperature swings. When the waterproofing fails, the damage doesn’t stay on the surface. Water works its way into the structure, quietly causing problems that grow over time.
The Silent Destroyer: Understanding Water Damage
Most homeowners worry about leaks for a reason. Water doesn’t need much space to move, and once it finds a gap, it spreads. The first places to suffer are usually the parts you can’t see. Wood framing begins to rot. Sheathing weakens. In some cases, the moisture spreads far enough to threaten adjoining walls or even the foundation.
The visible signs tell their own story. Paint starts to bubble or peel around the window. Trim begins to warp. Drywall develops brown or yellow stains. Floors near the shower grow soft or buckle. These cosmetic issues are only symptoms of deeper structural problems unfolding behind the wall.
Water Damage Hall of Shame
To understand how fast things can go wrong, it helps to look at real situations that homeowners have faced. These examples are anonymized, but the patterns are common.
Example 1: The Invisible Leak
Everything looked perfect on the surface. Tile lines were clean, and the window looked well-sealed. But a small gap in the waterproofing at the sill allowed water to drip behind the wall every time the shower ran. Over several months, the framing behind the tile had rotted through. The leak wasn’t discovered until a major renovation uncovered the damage, turning a simple update into a full rebuild.
Example 2: The Mold Bloom
A homeowner noticed a musty smell but saw no visible mold. The real problem was inside the wall cavity. A thin bead of cracked caulk around the window let moisture in daily. The trapped humidity created the perfect environment for mold to spread. By the time the problem became obvious, mold had taken over the insulation and framing, posing serious health risks and forcing expensive remediation.
Example 3: The Structural Collapse
In the most extreme cases, years of unchecked moisture weaken the framing around the window so much that the wall loses stability. One homeowner discovered this when the tile began separating from the wall. Behind it, the studs had deteriorated to the point where the wall could no longer support its own weight. The repair required reframing, new waterproofing, and a complete shower rebuild.

A conceptual visual showing water stains spreading beneath a window a damp frame.
Expert Tip: Regular Inspection and Maintenance
Even a well-installed shower window needs attention. Checking seals, grout lines, and caulk on a regular schedule can prevent small issues from becoming major repairs. Early action is always cheaper and safer than waiting for trouble to show itself.
Health Hazards: Mold, Mildew, and Indoor Air Quality
Mold doesn’t stay contained once it starts. It spreads quickly and can affect people with allergies, asthma, or other respiratory issues. In many homes, a shower window becomes the entry point for moisture that feeds mold growth. Addressing the moisture source right away is more important than treating the surface. Without fixing the leak, the problem always returns.
Financial Burden: Costly Repairs and Lower Home Value
The cost of repairing water damage is usually much higher than homeowners expect. Remediation can involve demolition, drying equipment, mold removal, reconstruction, and replacement of finishes. If inspectors or buyers see signs of past water problems, it can also reduce the value of the home or complicate a future sale. For many families, the unexpected cost is the biggest concern, especially when the damage could have been avoided through proper waterproofing from the start.
Understanding the Foundation: Key Waterproofing Principles for Shower Windows
A shower window can only perform well when every part of the installation works together. Modern building science treats a shower as a complete system, not a collection of separate pieces. Industry standards like the International Residential Code (IRC) and the guidelines from the Tile Council of North America (TCNA) emphasize this approach. They require a continuous waterproofing envelope that protects the window, the wall, and the framing as one integrated assembly.
The Integrated System Approach
Instead of thinking about tile, grout, the window frame, and sealant as individual elements, it helps to see how each one relies on the others. When a shower is built as a system, every layer works in sync to keep water out of the structure. If one part fails, the entire assembly becomes vulnerable.
The Continuous Waterproofing Membrane
A shower window needs an unbroken waterproof layer that stops water before it reaches the framing. This membrane should extend across the sill, up the sides, and around the head of the window, tying into the waterproofing on the rest of the wall. Any gap, even a hairline crack, can invite long-term moisture problems.
There are two common types of membranes:
- Liquid-applied membranes that roll or trowel on like paint and cure into a flexible barrier.
• Sheet membranes that come in pre-formed rolls and are bonded to the wall with thinset or adhesives.
Each has its strengths, and both will be covered in more detail later.
The Crucial Role of Proper Drainage and Sloping
Water should never sit on a windowsill. A sill in a wet area must have a slope of at least a quarter inch per foot, directing water back into the shower instead of letting it collect near the frame.
Inside the wall, drainage planes and weep paths help move any stray moisture out of the assembly. These features add another layer of protection, especially in homes where daily showers create constant humidity.
Expert Tip: Ensure Proper Drainage
A precise slope on the sill is one of the simplest ways to prevent standing water. When done right, even heavy spray will flow away from the window instead of seeping into joints or cracks.
Vapor Management and Air Gaps
Waterproofing stops liquid water, but moisture vapor is a different challenge. A shower produces warm, humid air that can pass through gaps or weaknesses in the wall. If that vapor hits a cooler surface behind the wall, it can condense and create hidden moisture problems.
That’s why the vapor barrier must be tied directly into the window’s flashing and membrane. There should be no breaks where water vapor can slip behind the assembly.
Expert Tip: Integrate the Vapor Barrier Seamlessly
The vapor barrier behind the tile needs to connect with the flashing around the window, forming one continuous shield. This step is easy to overlook but crucial for long-term protection.
Expert Tip: Consider an Air Gap, If Possible
In colder climates, an air gap behind the window frame can encourage drying. It helps prevent condensation from settling on hidden surfaces and reduces the risk of moisture staying trapped.
Humidity levels and temperature swings affect how vapor moves. Homes in hot, humid climates may focus more on vapor barriers, while homes in cold regions often need added measures to handle condensation. Recognizing the difference between waterproofing liquid water and managing water vapor is an important part of designing a reliable system.
The Importance of Sealants and Flashing
Sealants fill the small gaps around the window where water can sneak in. They’re essential for the perimeter joints and any fastener penetrations. Flashing serves a different role. It redirects water away from weak points and delivers it to surfaces designed to handle moisture.
When both are installed correctly, they form the final line of defense around the window.
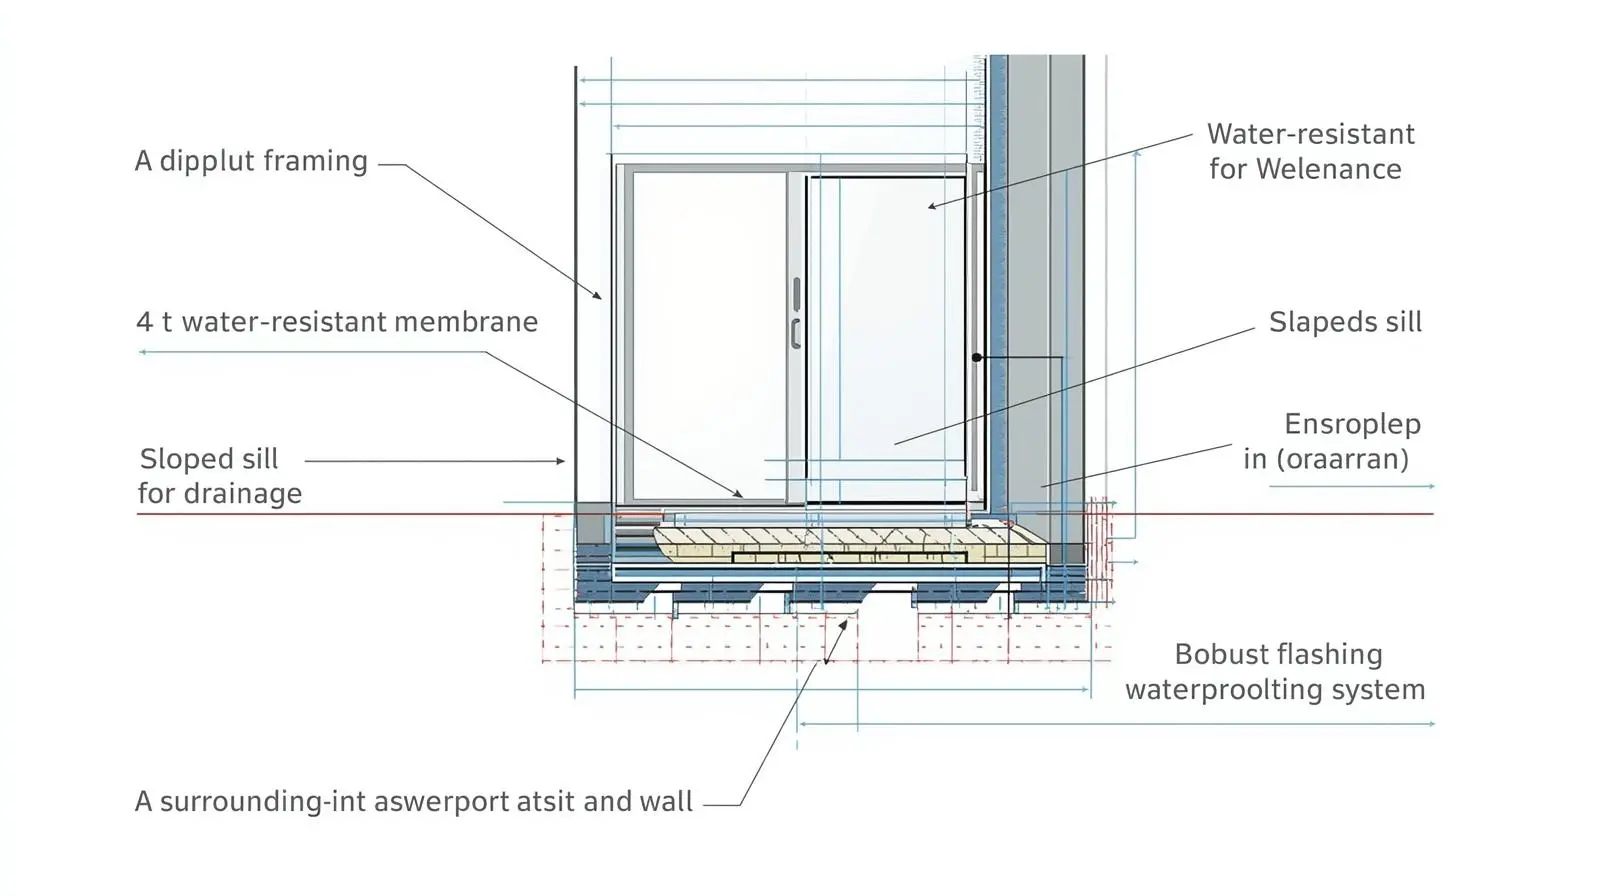
A layered diagram showing framing, membrane, sloped sill, flashing, and the surrounding waterproofing system.
Choosing the Right Window for Your Shower: Materials, Types, and Essential Features
Selecting a shower window isn’t just about style. It needs to handle constant moisture, protect your home from leaks, offer privacy, and stand up to daily temperature changes. The right choice can elevate your bathroom, while the wrong one can create a long list of problems.
Selecting Suitable Window Materials
Some materials perform far better than others in wet environments. Because a shower window faces direct water exposure, the frame must be stable, waterproof, and resistant to long-term damage.
Expert Tip: Choose the Right Window Material
Vinyl and fiberglass stand out for their durability and ability to handle high moisture.
Vinyl Windows
Vinyl has become one of the most common choices for shower installations. It doesn’t rot, it stays stable when exposed to humidity, and it needs almost no maintenance. It also offers good insulation and tends to be cost-effective, which makes it appealing for both renovations and new builds.
Fiberglass Windows
Fiberglass frames are stronger and more stable than vinyl. They resist swelling, shrinking, and warping, even with continuous moisture and heat. They can also be painted, which offers more design flexibility. Their thermal performance is excellent, and they hold up well over decades.
Materials to Avoid
Wood frames should never be installed inside a shower. They absorb moisture, swell, and rot, even when sealed. Aluminum frames are also a poor choice because they corrode in wet settings and create thermal bridging, which leads to condensation and potential mold growth.
Glass Types for Shower Environments
Tempered Glass
Safety is the priority. Tempered glass is required in any wet area because it breaks into small, dull pieces instead of dangerous shards.
Privacy Options
For bathrooms where the window faces a neighbor or a busy area, privacy glass can help. Frosted, textured, patterned, or obscure glass allows natural light in while preventing clear visibility. These options blend well with modern and traditional styles.
Beyond Basic Privacy: Smart Glass and Other Innovations
For homeowners who want something more advanced, smart glass is an option. Switchable privacy glass shifts from clear to opaque with a button. Some windows come with built-in blinds sealed between panes to stay clean and dust-free. Custom etched designs also bring a decorative element that doubles as privacy.
Energy Efficiency Enhancements
Low-E coatings and argon gas fills help control heat transfer and reduce condensation risk. These features are especially helpful in bathrooms that experience temperature swings.
Window Styles and Features for Showers
Fixed Windows
Fixed or picture windows are the simplest and most reliable option for a shower. With no movable parts, they’re easier to seal and maintain.
Casement and Awning Windows
These windows offer ventilation, which can help reduce moisture buildup. They work well when placed higher on the wall for privacy. However, because they open and close, they need careful sealing and more attention during installation.
Integrated vs. External Grilles
Built-in grilles, placed between the glass panes, make cleaning easier and prevent grime buildup. External grilles add depth but require more maintenance.
Integrating Aesthetics and Functionality
Many homeowners want a bathroom filled with natural light but still need privacy. Glass selection, window placement, and frame style all contribute to a balanced design. A well-chosen window can become a focal point that complements tile choices, color schemes, and the overall feel of the room.
The Sustainable Shower Window: Eco-Friendly Choices
For those focused on sustainability, look for windows made from recyclable materials or those with high energy-efficiency ratings. Certifications like ENERGY STAR can help guide your selection. Fiberglass is often favored for its long lifespan, and windows with advanced coatings reduce energy loss, which benefits both the home and the environment.
Recommended Waterproofing Systems & Products: A Comparative Analysis
Before diving into individual products, it's important to understand how to evaluate waterproofing systems. Our criteria are:
- Performance & Reliability, How well does the system resist water, bridge cracks, and protect over the long term?
- Ease of application: Is this suitable for a DIYer, or does it require a professional’s skill?
- Compatibility: How well the system integrates with other components (like seams, drains, corners, tiles).
- Cost: Both material cost (per square foot or per kit) and “hidden” cost (labor, waste, risk).
- Standards compliance, whether it meets relevant building standards (ANSI A118.10, etc.).
Comparative Table of Popular Waterproofing Systems
Here’s a breakdown of some top waterproofing membranes commonly used around shower windows (and concave wet areas), comparing their features, pros & cons, and typical use scenarios.
* Cost ranges are estimates. For your locale (e.g., Islamabad or Pakistan), local distributors or import costs will strongly affect real prices. Use this as a baseline, not a guarantee.
Analysis & Use-Case Guidance
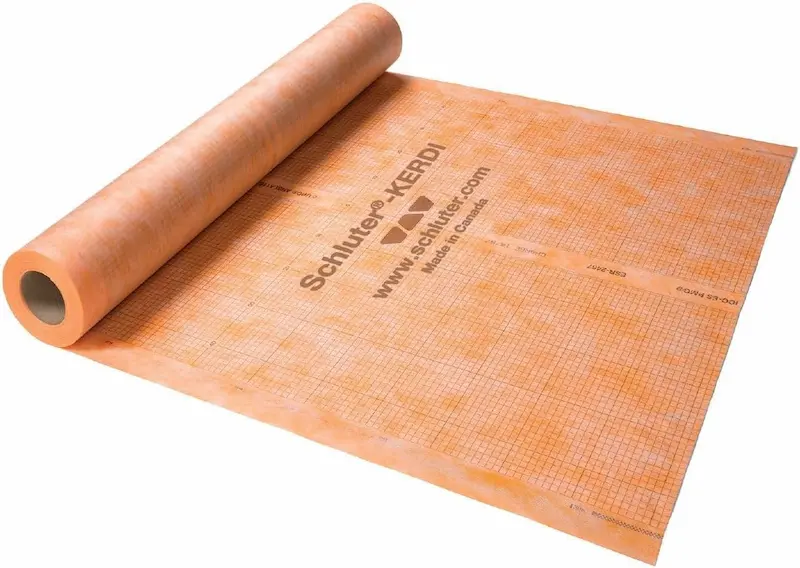
- When to Use a Sheet Membrane System (like Schluter Kerdi)
- Ideal for high-risk areas like shower walls and pans where you want a well-proven, highly reliable barrier.
- If you’re working with tile installers or contractors who are familiar with the system, the learning curve is manageable.
- Best for long-term performance, especially in places where cracks or structural movement might be a concern.
- When to Use Liquid-Applied Membranes
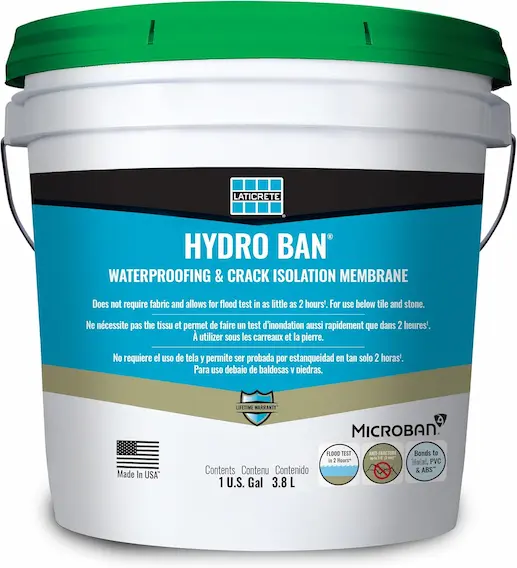
- Liquid systems (Hydro Ban, RedGard, Mapei) are great for custom or irregular shapes, or when you want a seamless, continuous coat.
- If you're working on a shower window niche, low-wall areas, or want to reduce seams and joints, a liquid membrane is very convenient.
- Ideal for a DIYer with some experience, especially for less-complex geometry.
- High-Performance / Fast-Cure Options
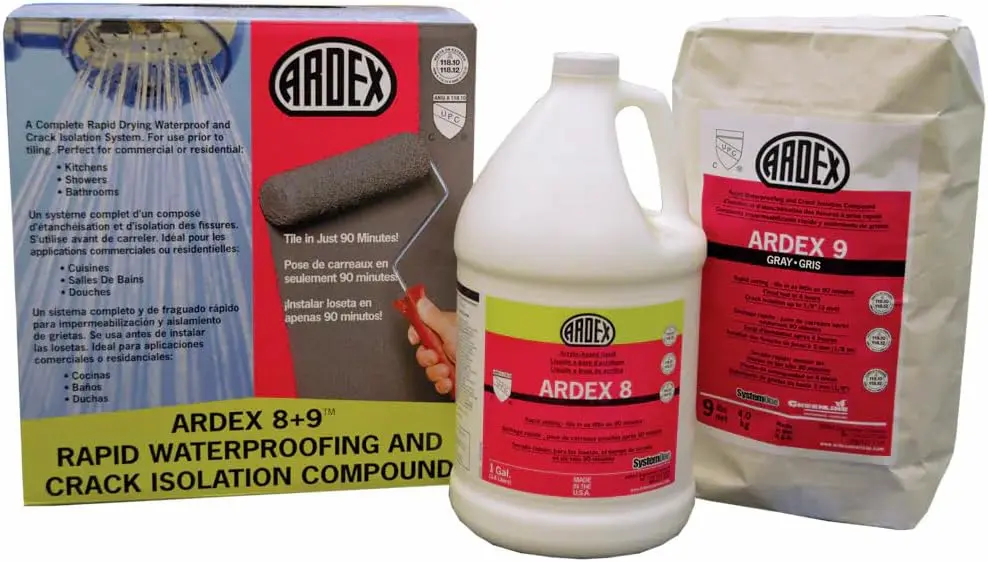
- Ardex 8+9 is your choice when you need a tough, professional-level membrane that cures fast and bridges substantial cracks.
- Particularly useful in renovation scenarios where time is limited or the substrate might shift.
- Quick-Dry & Low-VOC Concern
- Mapei AquaDefense is excellent when you want a fast return-to-traffic (or tiling) time, and when low VOC is a priority (safety, indoor air quality).
Limitations & Risks to Watch
- Skill & Detailing: Even great waterproofing products fail when detailing is wrong (flashing, corners, seams).
- Substrate Preparation: If the substrate isn’t clean, level, and stable, any membrane will underperform.
- Cure Time & Conditions: Temperature, humidity, and application thickness affect cure. Not respecting manufacturer guidance is a common cause of failure.
- Warranty & System Integrity: Mixing products (e.g., using one brand’s rolls with another’s liquid) can void manufacturer warranties or reduce system reliability.
- Local Cost & Availability: In some markets, not all waterproofing systems are easily available; import cost and freight can make big differences.
Expert Tip
- Flood Testing: Always perform a flood test (filling the shower floor) after waterproofing and before tiling. This reveals leaks early.
- Backup Options: If you’re unsure, combining systems (e.g., a sheet membrane plus a reinforcing liquid layer at corners) can offer redundancy, but only if done properly.
Maintenance: Even after waterproofing, inspect your shower window area regularly. Look for signs of cracking sealant, degraded grout, or any discoloration.
Key Products and Tools for Your Project
Choosing the right products has a big impact on how well your waterproofing work holds up. Each item plays a specific role, so it helps to understand when and why you should use it.
Waterproofing Membranes
Membranes are the backbone of the system, but not all of them behave the same way. Sheet membranes like Schluter Kerdi are a strong fit when you want predictable thickness and a clean bond to the substrate. They work well in high-moisture spaces, especially when you need a vapor barrier. Liquid membranes such as Laticrete Hydro Ban, RedGard, or AquaDefense are easier to apply in tight corners or odd-shaped areas. They’re good when you need full coverage without cutting and overlapping sheets. Your choice depends on the layout, the skill level of the installer, and whether the project needs a vapor-proof layer or just moisture protection.
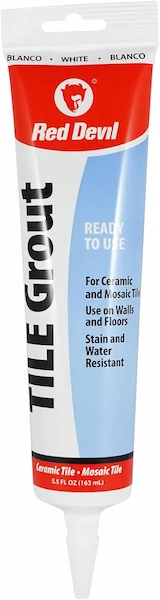
100 Percent Silicone Sealant (Mildew Resistant)
A reliable silicone sealant is essential for all interior joints, window perimeters, and transitions where movement is expected. This material stays flexible, bonds well to most surfaces, and reinforces areas that are most prone to leaks. It’s one of the simplest steps in the project, but also one of the most important.
Closed-Cell Foam Insulation
Closed-cell foam helps fill gaps around the window frame and maintains a tight thermal seal. It supports energy efficiency while reducing the chance of condensation. Because it doesn’t absorb water, it’s the safer choice compared to open-cell foam in any wet area.
Liquid Flashing and Sealing Tapes
Products like Schluter Kerdi-Fix or Laticrete Hydro Ban XP help lock down seams, corners, and transitions. They’re especially useful when the window sits close to tile lines or where movement can stress the membrane. These materials create a smooth, continuous barrier that strengthens areas most likely to fail over time.
Cement Board or Waterproof Backer Board
A stable backing material is critical before any waterproofing begins. Cement board and waterproof backer board have the rigidity needed for tile and resist moisture better than standard drywall. They provide a reliable surface for bonding either liquid or sheet membranes and help keep the assembly strong and long-lasting.
Application Tools
Use trowels, rollers, and brushes designed for the membrane you’ve selected. The right tool helps you achieve the correct thickness and a clean bond. A utility knife is useful for cutting sheet membranes and trimming excess material. A measuring tape and level help ensure accuracy around the window frame, which affects both performance and the quality of the final finish.
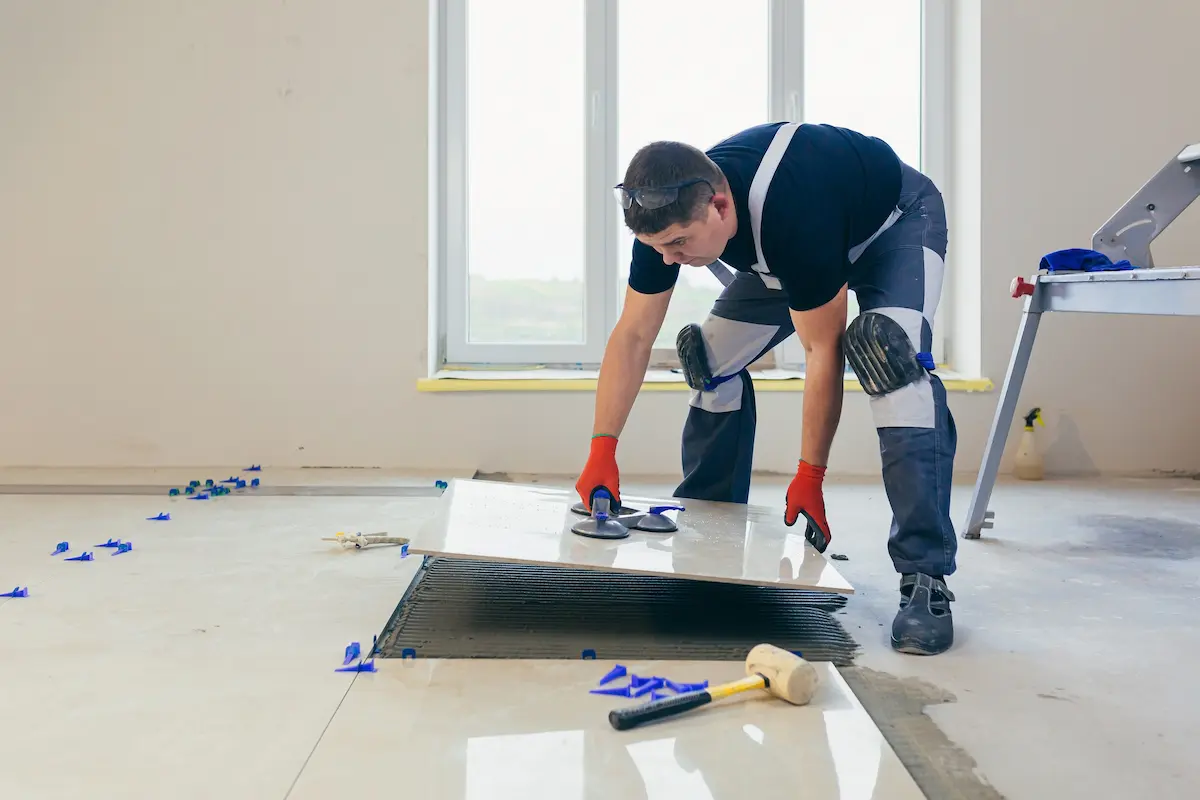
Step-by-Step Guide: Professional Waterproofing and Installation Methods
A successful waterproofing job comes down to planning, accuracy, and the right materials. The steps below walk the reader through each phase of the process while reinforcing expert methods and industry-accepted standards.
Phase 1: Preparation of the Rough Opening
Start by checking that the rough opening is plumb, level, and square. Small framing errors can lead to leaks or window binding later. Local building codes specify minimum rough opening tolerances and framing requirements, so it's important to follow those guidelines before moving ahead.
Run a continuous bead of high-quality silicone around the inside perimeter of the rough opening. This creates the first line of defense against moisture and helps seal any minor gaps between the framing and the window.
Phase 2: Window Installation and Initial Sealing
Expert Tip: Choose the Right Window Material
Vinyl or fiberglass frames with integrated nailing flanges handle moisture well and offer a secure attachment point for flashing.
Set the window in place, confirm that it sits level and plumb, and make minor adjustments before fastening. Use exterior-rated screws or roofing nails and follow the spacing recommended by the manufacturer. Once the window is secured, apply flashing tape around the nailing flange. Start with the bottom, then the sides, and finish with the top. This layering helps shed water properly.
Suggested Screenshot
A close-up shot of flashing tape being pressed and smoothed over the window flange.
Phase 3: Integrating the Flashing and Drainage Plane
Expert Tip: Ensure Proper Drainage
A sloped sill directs water away from the frame. Many pros build this with beveled wood or a foam sill support, then cover it with sub-sill flashing that extends over the weather-resistant barrier.
After the sill is prepared, apply a liquid flashing or sheet membrane to tie the edges of the window opening into the wall’s drainage plane. This step prevents water from finding a path behind the window and helps the assembly move moisture outward.

sloped sill with flashing lapped correctly over the wall’s weather-resistant barrier.
Phase 4: Interior Waterproofing Membrane Application
Expert Tip: Embrace a Layered Defense
This is where you establish the main waterproof barrier inside the shower. The more accurately each layer overlaps, the stronger the system becomes.
Choose a membrane that matches the project’s needs. Sheet systems like Schluter Kerdi give consistent thickness, while liquid systems such as Hydro Ban or RedGard work well in tight corners. Apply the membrane to the cement board or other approved backer board and bring it cleanly onto the window frame.
This area benefits from visual guidance. Step-by-step diagrams or a short video can help show how to coat, embed, or overlap the membrane around corners, seams, and penetrations. Pre-formed corners, banding strips, and manufacturer-specific tapes make these transitions more reliable.
Expert Tip: Master Sealant Application
Finish all transitions at the window frame with 100 percent silicone. This accommodates movement and completes the watertight seal.
3D Bathroom Construction Explorer
Click on each layer to understand how proper bathroom construction prevents leaks and ensures durability
Wall Framing
The structural skeleton of your bathroom walls, typically made from 2x4 or 2x6 wood studs spaced 16" apart.
- Provides structural support
- Creates space for insulation
- Allows for plumbing/electrical runs
- Must be properly spaced and leveled
Phase 5: Tile Installation and Grouting
Select a mortar suited for wet environments and follow the required coverage rates. Full, even contact is important to avoid weak spots behind the tile.
For grout, epoxy offers excellent durability and moisture resistance. Cementitious grout with additives is another reliable option. Industry standards such as the TCNA guidelines outline minimum performance requirements for tile in wet zones, so this is a good place to reference those expectations.
Phase 6: Final Sealing and Caulking
Expert Tip: Master Sealant Application
Apply a clean, unbroken bead of silicone along every change of plane, including the joint where the tile meets the window frame. Smooth the bead with a finishing tool or a moistened finger for a consistent, watertight finish.
Common Pitfalls to Avoid: Learning from Water Damage Disasters
Homeowners often worry about mold, hidden leaks, and long-term damage around a shower window. Those fears are valid. Most water-related failures come from small mistakes that grow into expensive repairs. This section breaks down the most common issues, why they happen, and how to avoid them.
The “Water Damage Hall of Shame”
Shower window failures tend to follow familiar patterns. Cracked caulk, missing flashing, or a flat sill may not look serious at first, but they let water travel into the wall cavity where mold and rot develop quickly.
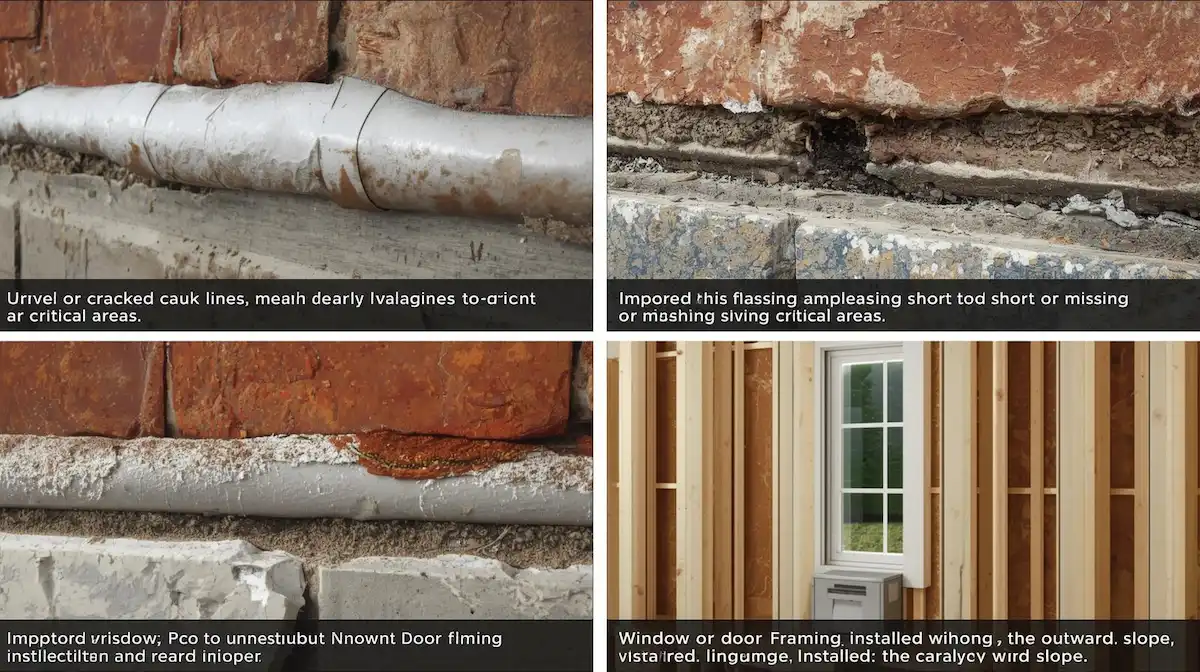
failed caulk lines, flashing that’s cut short, or framing without the proper slope.
Note :
Certified installers often say that most leaks come from small details people overlook. A quick check of flashing laps, sealant quality, and membrane transitions can prevent major repairs later.
Mistake 1: Inadequate or Incorrect Flashing
Some installers treat house wrap as a replacement for flashing, but it isn’t designed to waterproof a window on its own. Another common issue is incorrect shingling, where layers overlap in a way that forces water behind the flashing instead of away from it.
Correct flashing is essential because it directs water off the structure instead of into it. Missing or reversed layers are one of the top causes of hidden wall damage.
Mistake 2: Insufficient Slope on the Sill
A flat sill allows water to sit under the window. A negative slope is even worse because it channels water toward the framing instead of away from it.
Expert Tip: Ensure Proper Drainage
A minimum slope of a quarter inch per foot helps water move off the sill before it can soak into framing or drywall.
Mistake 3: Broken or Compromised Vapor Barrier Integration
Gaps or holes in the vapor barrier around a shower window allow moisture to travel inside the wall. Another issue is choosing materials that aren’t vapor-retardant or combining products that don’t work well together.
Expert Tip: Integrate the Vapor Barrier Seamlessly
Create a continuous layer that connects to the waterproof membrane, without open seams or unsealed overlaps.
Mistake 4: Wrong Sealants or Improper Application
Latex caulk breaks down quickly in wet spaces and should never be used around a shower window. Another issue is applying silicone to surfaces that are dusty, oily, or still damp, which prevents adhesion and causes early failure.
Expert Tip: Master Sealant Application
Surfaces should be clean and dry. Apply an even bead of 100 percent silicone and tool it so it bonds fully to both sides of the joint.
Mistake 5: Relying on Grout or Caulk as the Only Waterproofing
Grout is not waterproof. Caulk isn’t either. A shower window needs to be tied into the larger shower waterproofing system. If the membrane stops short of the frame or the flashing isn’t connected, moisture will find its way behind the tile.
A complete waterproofing system creates layers that work together rather than leaving weak points around the window.
Mistake 6: Neglecting Ventilation
Poor airflow leads to condensation around the window. Over time, this constant moisture breaks down sealants, encourages mildew, and stresses framing materials.
Expert Tip: Prioritize Ventilation
A properly sized exhaust fan, regular airflow, and basic humidity control help preserve seals and prevent mold.
When to Call a Professional
Some homeowners can manage straightforward waterproofing tasks, but complex window installations in a shower demand precise work. If anything feels beyond your comfort level, it’s smart to bring in a certified tile installer or licensed waterproofing specialist. Their training helps prevent the kinds of mistakes that lead to long-term damage.
Long-Term Protection: Maintenance, Longevity & Climate Considerations
A well-installed shower window should perform for many years, but it still needs routine care. Small issues can develop quietly, and catching them early protects your bathroom from preventable damage. This section walks homeowners through simple habits that keep a waterproofed window performing at its best.
Routine Inspection Checklist
Many homeowners worry about long-term maintenance, and for good reason. Sealants age, humidity fluctuates, and daily use puts constant pressure on waterproof layers. A quick check a few times a year can make all the difference.
Expert Tip: Regular Inspection and Maintenance
Use this simple checklist to stay ahead of problems:
- Look over all caulk and grout lines to make sure there are no cracks, gaps, or dark areas that could signal mold.
- Inspect the glass for condensation between panes or moisture collecting around the edges.
- Check the wall below the window for any signs of staining, bubbling paint, or soft drywall.
- Make sure the window’s weep holes, if present, are open and draining properly.
These small steps take only a few minutes and help you spot early warning signs before they turn into costly repairs.
Cleaning and Upkeep
Gentle care goes a long way. Use mild cleaners on the glass and frame to avoid breaking down the sealants. If you notice mildew, clean it promptly with a cleaner meant for wet areas. Avoid abrasive pads or harsh chemicals, which can scratch surfaces or damage the waterproofing around the window.
Prolonging Sealant Life
Even high-quality silicone needs refreshing over time. If the caulk looks worn, loose, or discolored, it’s time to remove it and apply a fresh bead. Proper prep makes a big difference. Clean and dry the area before applying new silicone so it bonds tightly and lasts longer.
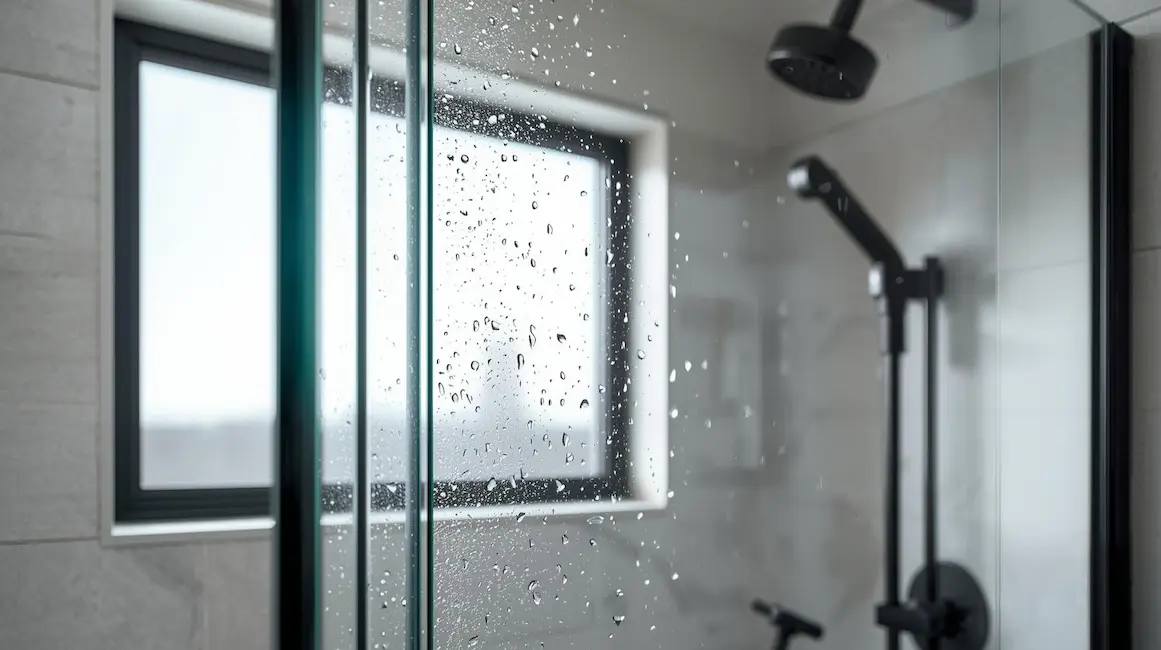
Expert Tip: Avoid Direct Water Spray
Angle the showerhead away from the window whenever possible. Constant, direct spray can shorten the life of sealants and increase the chance of leaks.
Climate-Specific Considerations
Every home faces different environmental pressures. The more extreme the climate, the more attention a shower window may need.
Cold Climates
Homes in colder regions deal with temperature swings that encourage condensation around the frame. Strong insulation helps prevent freezing and thawing cycles that can damage materials. An air gap behind the frame can also help keep moisture from settling inside the wall.
High-Humidity Climates
Moisture hangs in the air for long periods in these areas. Ventilation becomes critical. A dependable vapor barrier and consistent airflow help keep condensation from forming around the window.
Tropical Climates
These climates bring intense, year-round moisture. It’s important to seal every gap thoroughly to keep water and pests from creeping in. Pay close attention to the perimeter sealant and replace it as soon as it starts to break down.
Product Recommendation: High-CFM Bathroom Exhaust Fan
An exhaust fan that moves a high volume of air helps manage humidity throughout the room. It reduces condensation on the window, protects sealants, and keeps mold from forming in hidden spots. Turning it on during and after every shower can greatly improve long-term performance.
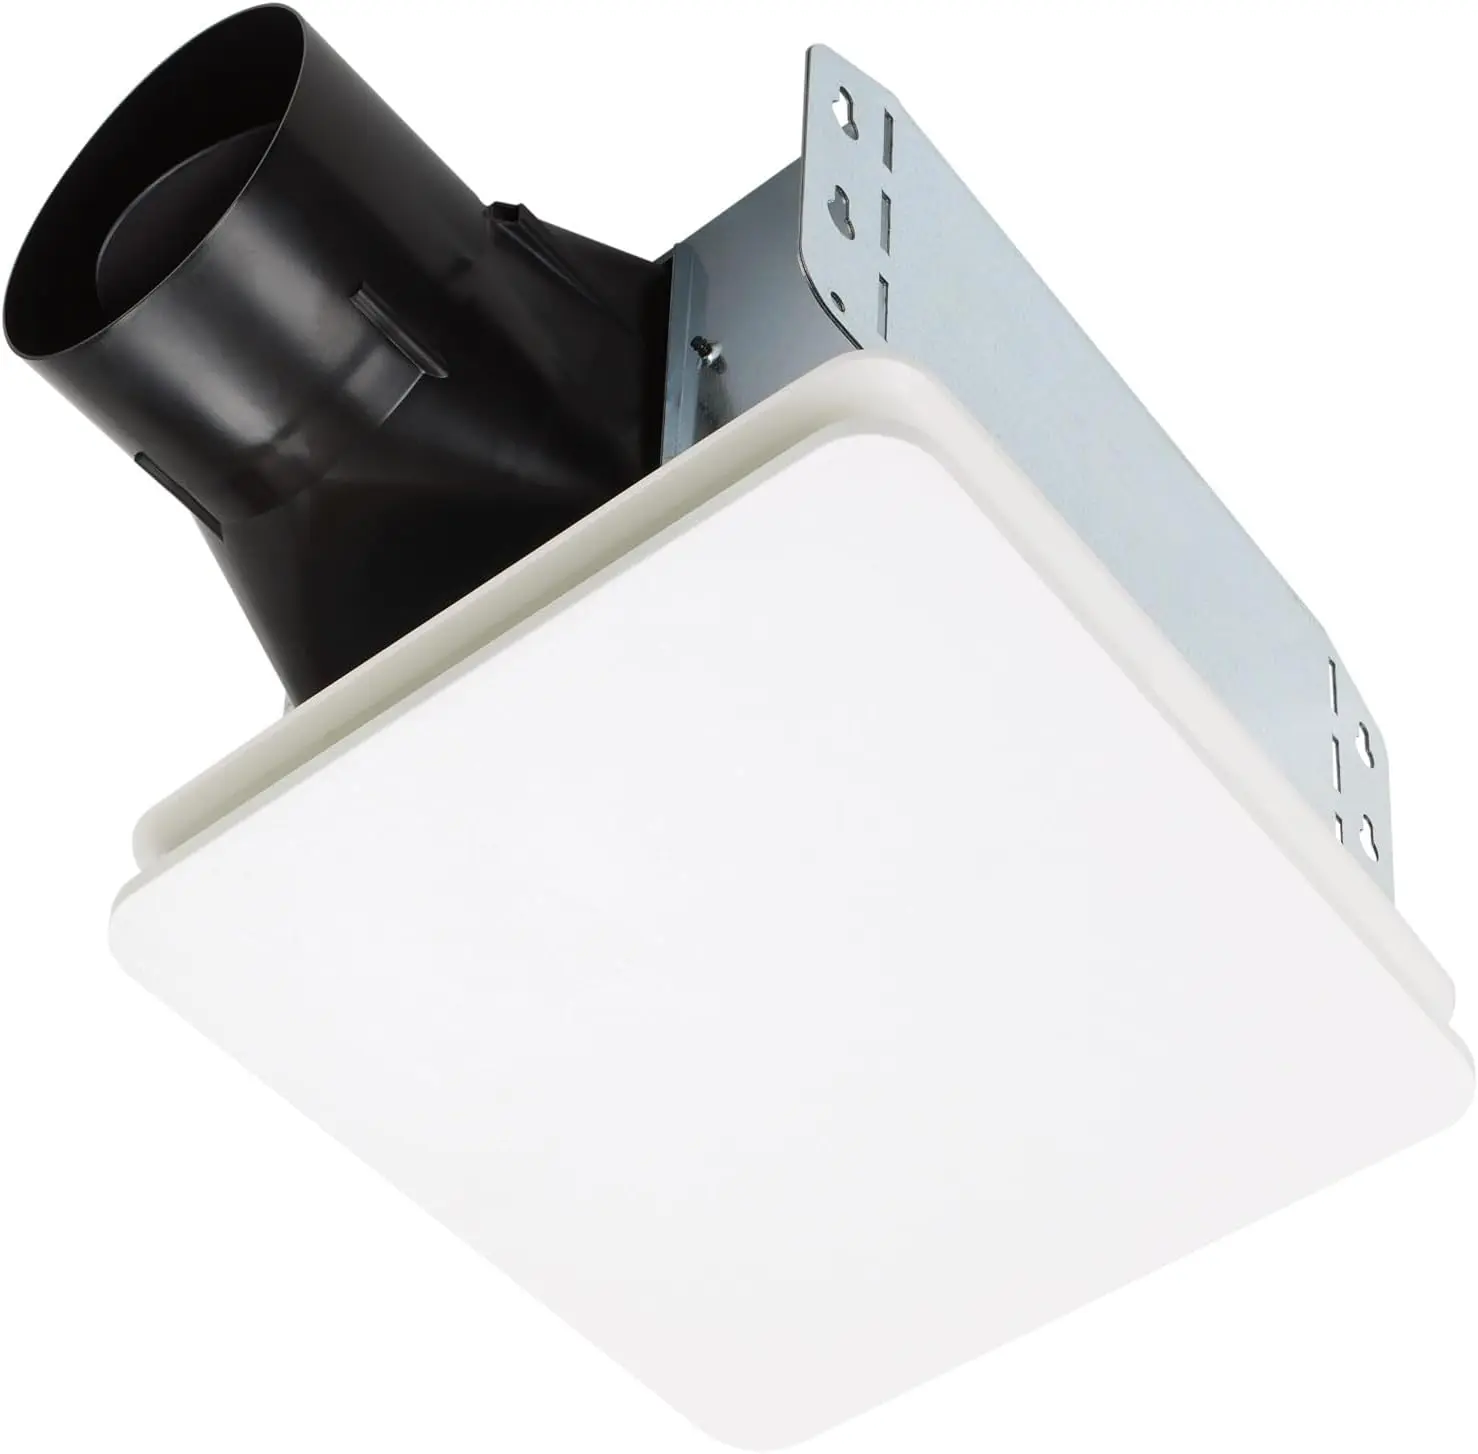
Broan-NuTone Bathroom Exhaust Fan Easy Retrofit without Attic Access, Quiet 1.5 Sones, Effective Ventilation at 80 CFM ENERGY STAR Certified Moisture
Experience powerful ventilation with 80 CFM airflow while using up to 50% less energy than standard bathroom fans. Effectively removes moisture, humidity, and odors to keep your bathroom fresher and cleaner—without increasing energy costs.
ULTRA-QUIET OPERATION (1.5 Sones)
Designed for peaceful bathrooms, this exhaust fan runs as quietly as a whisper. Ideal for rooms up to 75 sq. ft., it prevents foggy mirrors and lingering steam while maintaining a relaxing environment.
FAST, HASSLE-FREE INSTALLATION
The No-Cut, Roomside Installation system makes retrofitting simple even in spaces with no attic access. Install quickly without cutting drywall, reducing time, mess, and complexity.
SLIDECLIP™ TECHNOLOGY
Featuring an innovative, spring-free SlideClip™ mechanism, this fan allows for fast grille attachment and easy removal for cleaning—making long-term maintenance quick and convenient.
(FAQs) About Shower Window Waterproofing
Conclusion :Enjoying Your Beautiful, Leak-Proof Shower Oasis
Installing a waterproof shower window combines aesthetics, natural light, and functionality, but only when done correctly. A layered waterproofing system, high-quality materials, careful installation, and ongoing maintenance are the keys to success.
The benefits are clear: a bright, visually appealing bathroom, improved indoor air quality, and peace of mind that comes with a truly durable, leak-proof assembly.
Take the next step: plan your project, source trusted materials, or consult a certified professional. With the right approach, your shower can be both beautiful and built to last, providing a safe, comfortable space for years to come.