


The Complete Guide to Close Coupled Toilets Choosing the Best for Your Home & Bathroom
December 11, 2025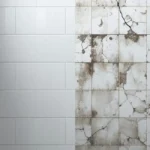
The Ultimate Guide to Choosing the Best Grout for Your Shower Durability, Mold Resistance & More
December 16, 2025
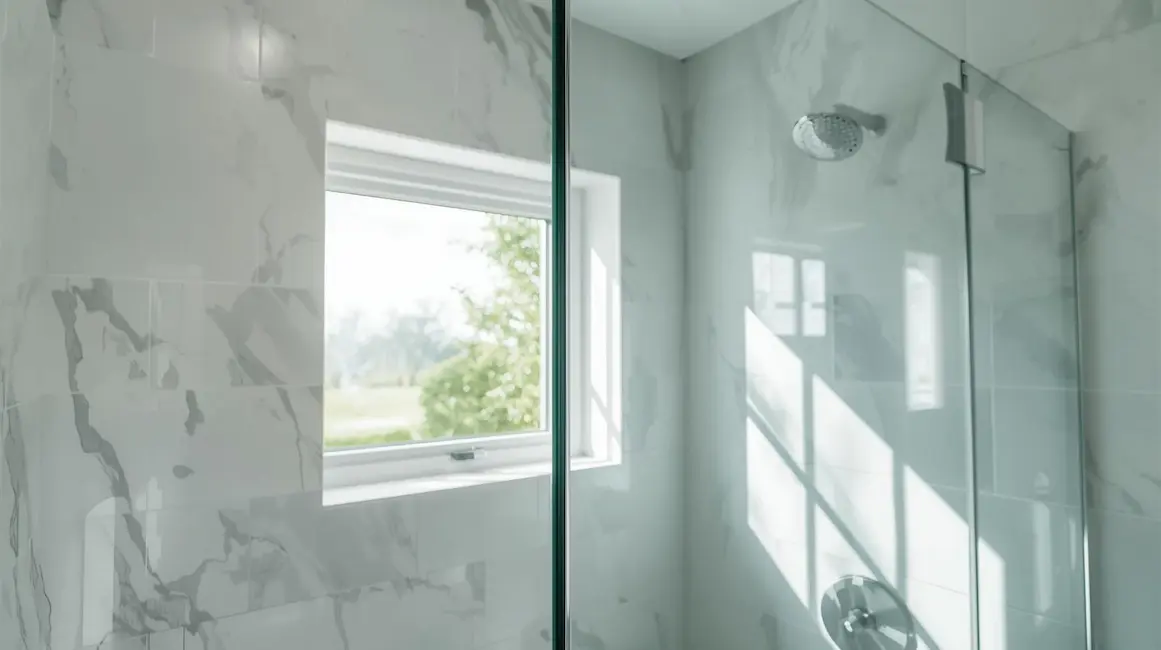
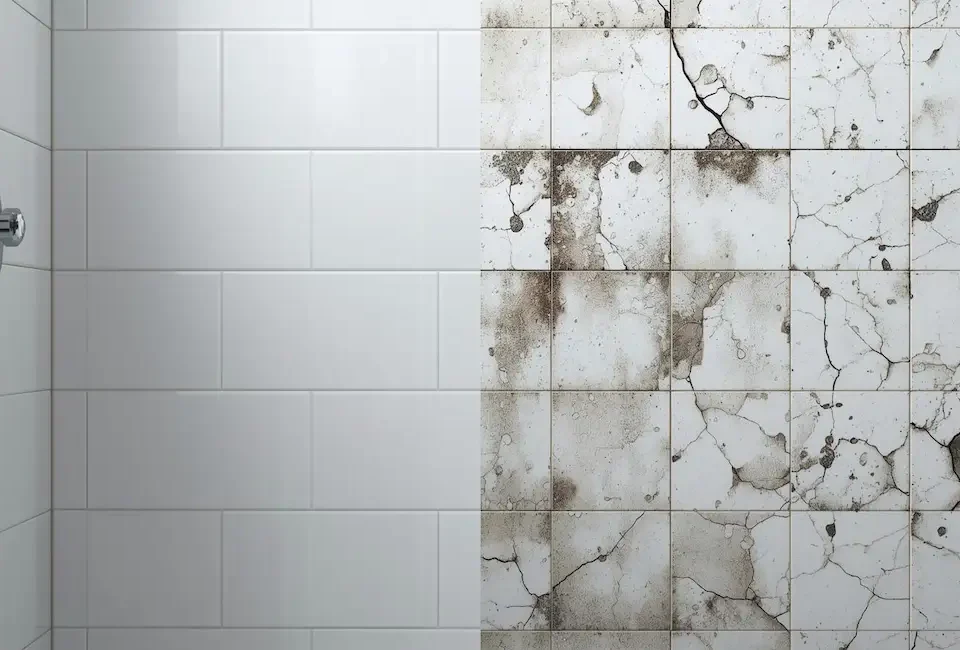
A leaking shower window can turn a simple bathroom upgrade into a frustrating and expensive problem. Water finds its way into the smallest gaps, leading to mold, damaged walls, and repairs that cost far more than the original project. Many DIY attempts fail because people underestimate how tricky it is to waterproof the area around a shower window. What looks simple on the surface actually requires careful planning and the right products.
This guide breaks everything down so you can get it right the first time. You’ll learn the exact steps, the best materials to use, and the common mistakes to avoid. By the end, you’ll know how to build a shower window that stays dry, strong, and dependable for years. If you're ready to tackle this project with confidence, let’s get started.
Why a Watertight Shower Window Is Essential
The Silent Threat: What Happens When Waterproofing Is Ignored
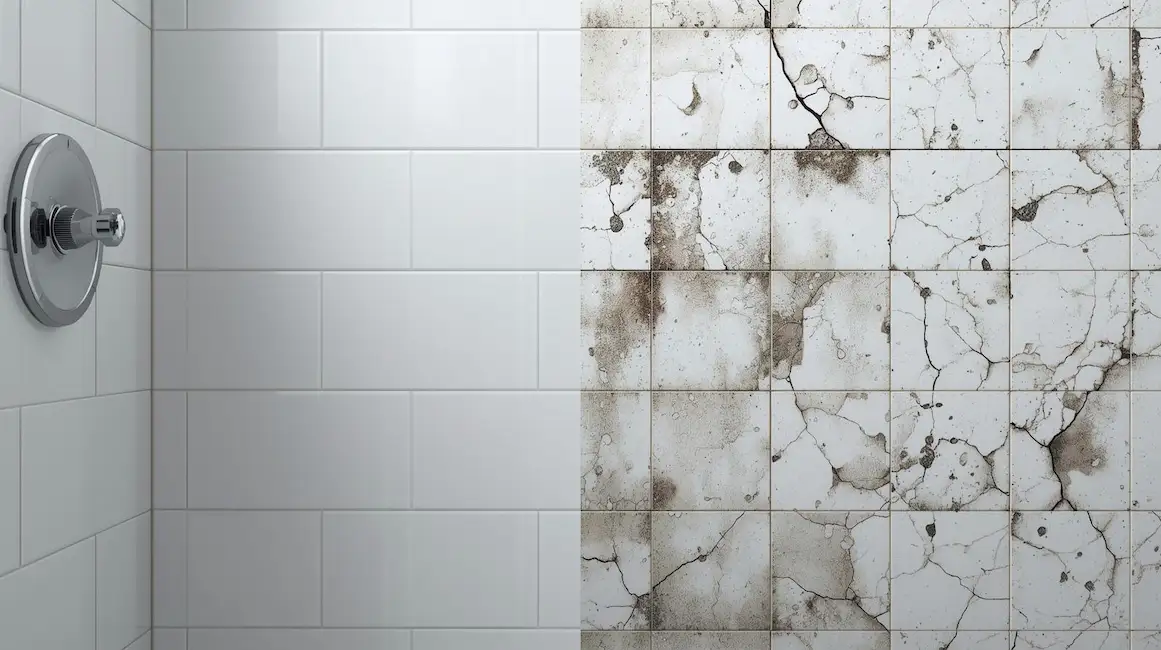
Moisture is sneaky, and a shower window is one of the easiest places for it to slip through. When waterproofing is overlooked or done poorly, the problems don’t show up right away. They build quietly behind the walls until the damage is too big to ignore.
Mold and Mildew Growth
When water gets trapped behind the tile or wallboard, it creates the perfect environment for mold. Once mold takes hold, it spreads fast. Beyond the musty smell, it can trigger allergies, breathing issues, and general discomfort in your home. What starts as a small leak can quickly turn into a health concern.
Structural Degradation
Water doesn’t just stain surfaces. It soaks into wood framing, causes drywall to crumble, and weakens the structure that supports your window and walls. Over time, the rot spreads, and what should be a solid bathroom becomes unstable beneath the surface.
Costly Repairs
A quick patch rarely solves the problem. Once water damage begins, it often requires opening walls, removing mold, replacing framing, and rebuilding the area from scratch. Repairs can get expensive fast, especially if the damage has been spreading for years without detection.
Industry Best Practice
Professionals stress prevention for a reason. Creating a watertight shower window isn’t optional. It’s a long-term safeguard that protects your home, your health, and your investment. Proper waterproofing reflects the right approach and aligns with the recommendations of top experts.
The Benefits of a Properly Sealed Shower Window
A watertight window isn’t just about avoiding damage. It also brings real, everyday advantages that make your bathroom safer and your home more valuable.
Enhanced Durability and Longevity
Good waterproofing keeps the structure strong and the finishes looking new. Your bathroom lasts longer, and you avoid frequent repairs or touch-ups.
Protection of Property Value
Hidden water damage is one of the quickest ways to lower your home’s value. Keeping the window area sealed protects you from issues that might show up during inspections or future renovations.
Peace of Mind
When you know the window is sealed correctly, you don’t have to worry about slow leaks or surprise repairs. It’s one less thing to stress about in a moisture-heavy area like a bathroom.
Improved Health and Hygiene
A dry environment discourages mold growth, keeping your bathroom fresher and healthier overall. Clean walls and clean air go hand in hand.
Demystifying Shower Window Types and Their Unique Challenges
Not all shower windows behave the same way when it comes to moisture. The material and construction of the window play a major role in how you waterproof it. Understanding these differences helps you pick the right products, plan the right steps, and avoid common mistakes.
Common Window Materials Found in Showers
Vinyl Windows
Vinyl is popular in modern bathrooms because it handles moisture well and doesn’t require much upkeep. The challenge is that the smooth surface can make it harder for waterproofing membranes and sealants to bond. To get reliable adhesion, you often need a compatible primer or a sealant designed for vinyl. Proper flashing and sealing around the frame are essential. The window should tie cleanly into the shower’s membrane system, so water can’t slip behind it.
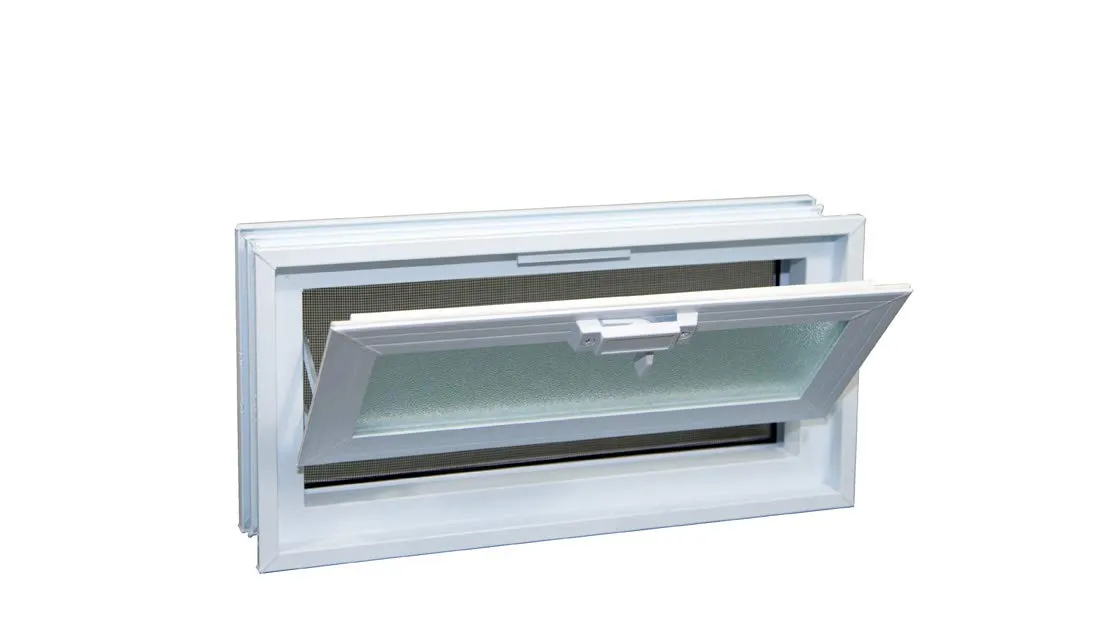
Vinyl Basement Window
Wood or Wood-Clad Windows
Wood gives a warm, classic look, but it’s also the most vulnerable material you can choose for a shower. If even a small amount of moisture reaches the wood, it can swell, rot, and eventually fail. This is why wood windows demand extreme care. Both the inside and the outside need protection, usually with high-quality primers, sealers, and a strong membrane system. Skipping steps with wood almost always leads to damage later.
Fiberglass Windows
Fiberglass holds up well to humidity and offers strong durability. It isn’t used as often as vinyl, but when installed correctly, it performs well in wet areas. Like vinyl, it requires sealants that bond properly to the frame. The goal is to create a solid seal around the perimeter and integrate the window into the surrounding waterproofing so it becomes part of a continuous barrier.
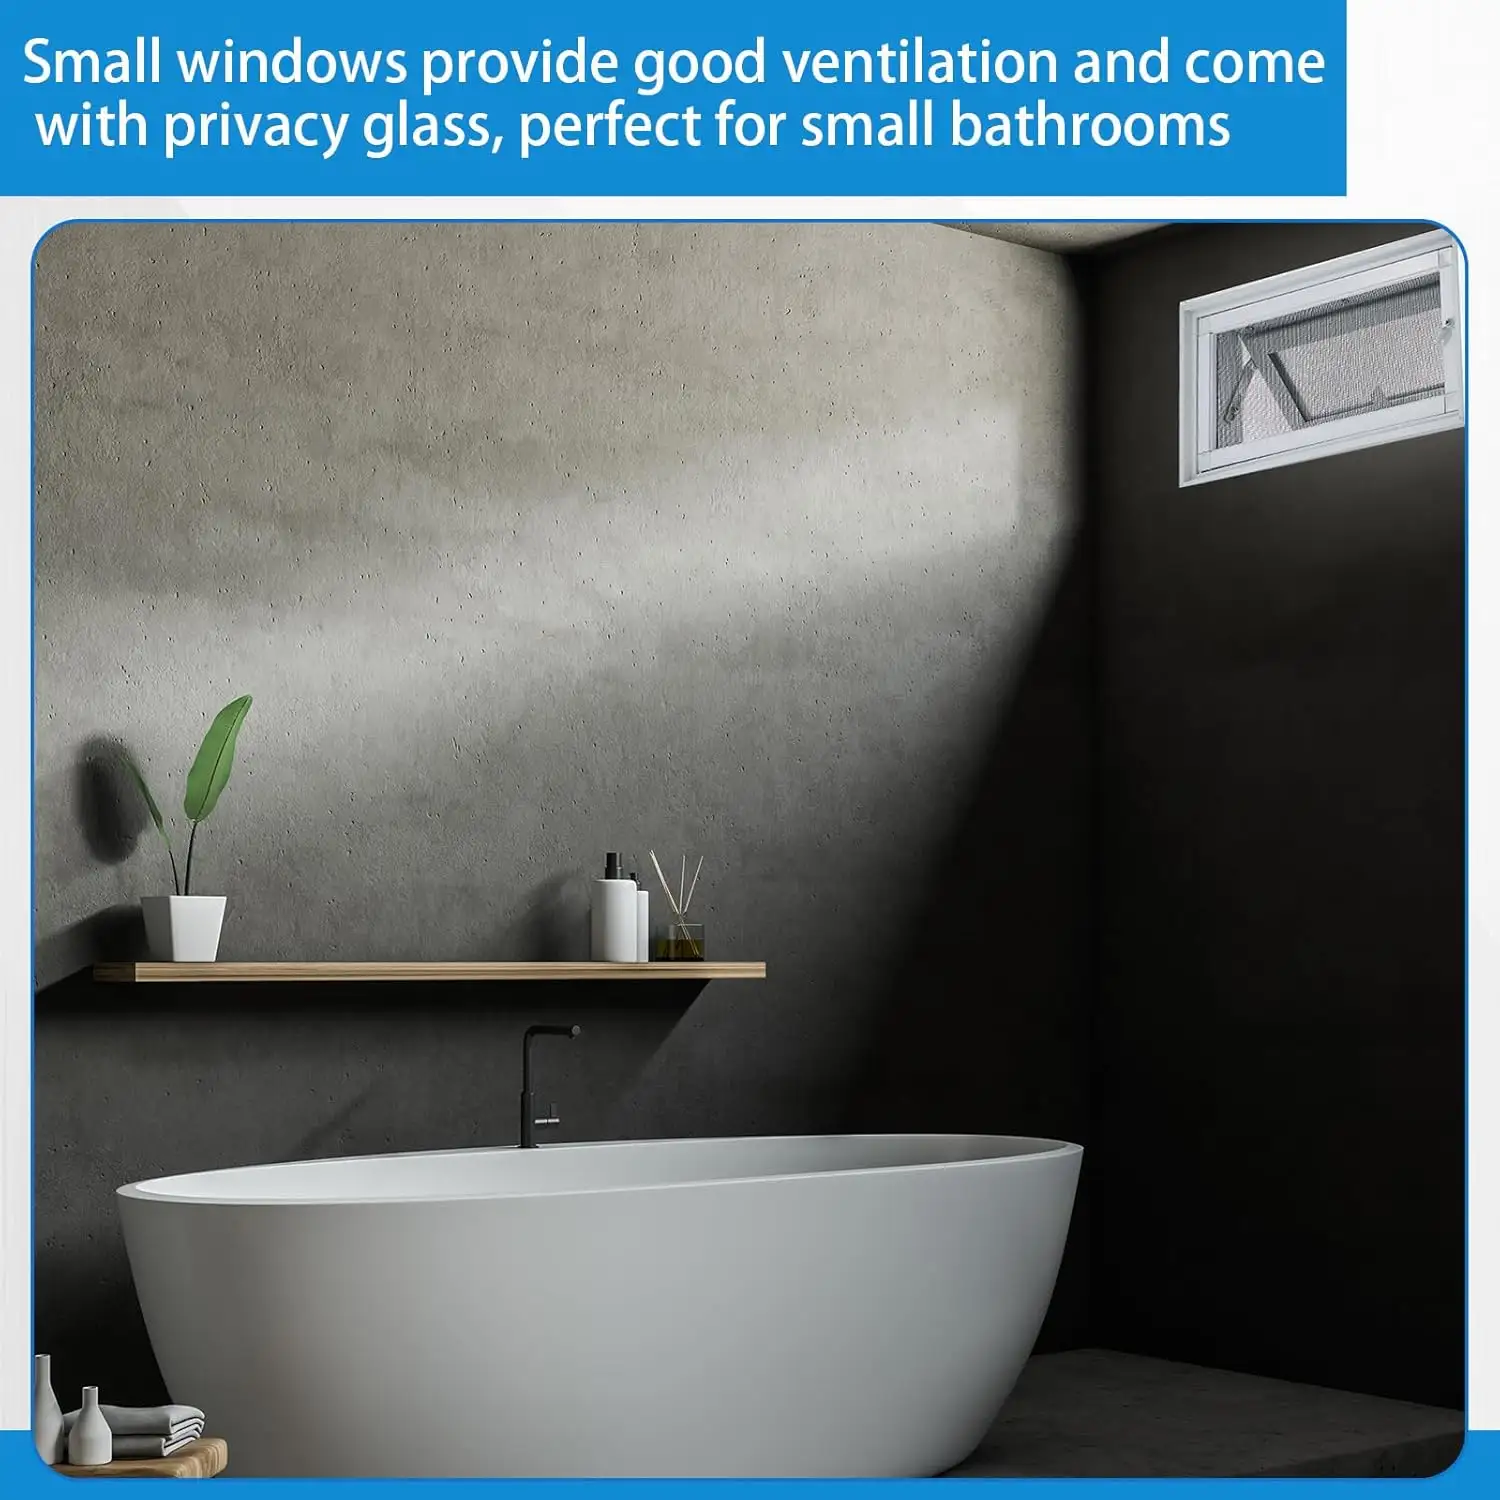
Glass Block Windows
Glass block is naturally resistant to water and offers privacy and great light. Even though the blocks themselves don’t absorb moisture, the perimeter still needs sealing. Installation requires the right mortar techniques, and the edges where the block wall meets your shower’s wall system must be tightly sealed. That’s the area most likely to let moisture through.
How Window Construction Shapes Your Waterproofing Plan
Flange vs. Flangeless Designs
A window with a built-in flange is typically easier to flash because the flange gives you a clear surface to integrate with exterior waterproofing. Still, the inside of the window opening needs just as much attention. Flangeless styles, including glass block, rely almost completely on interior waterproofing and precise sealing at the rough opening.
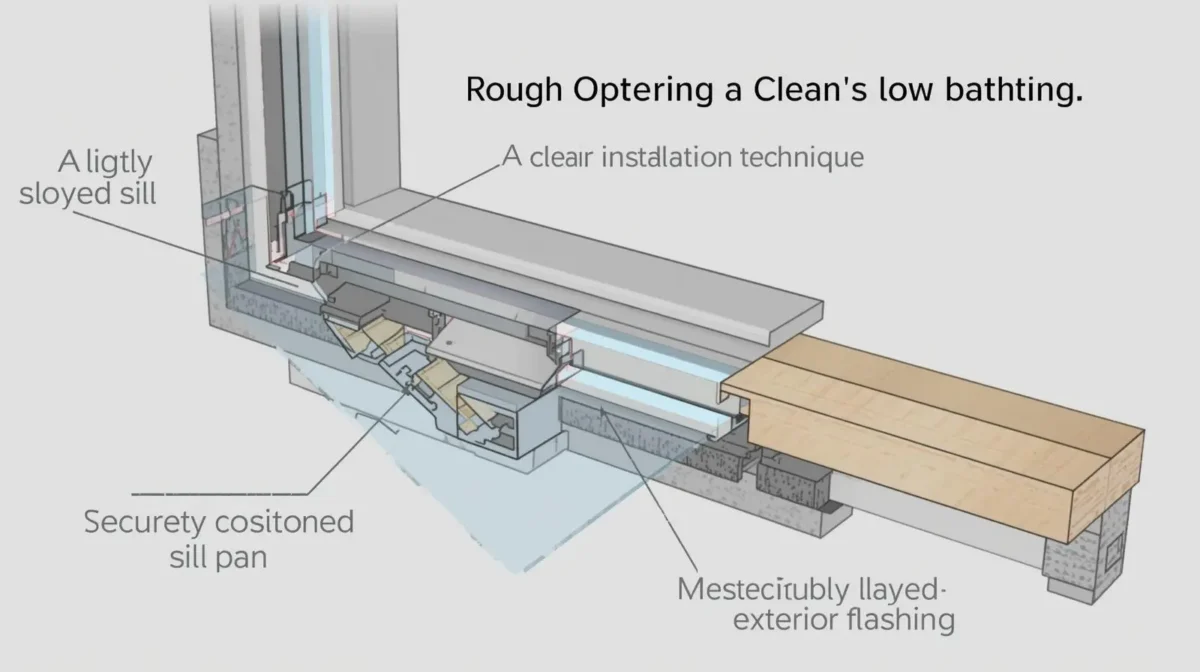
Preparing the Rough Opening
This step sets the foundation for everything that follows. The opening must be clean, dry, square, level, and structurally sound. One expert technique is to pre-slope the window sill toward the shower at about a quarter inch per foot. This prevents standing water from collecting on the sill and mimics the approach used in shower pan construction.
Exterior Flashing and Sill Pans
For windows that face outside, the exterior layer of protection matters just as much as the interior. A sloped sill pan and proper exterior flashing help shed water before it has a chance to reach the interior wall. It’s also wise to slope the exterior sill away from the house. This reduces the amount of water the interior waterproofing needs to manage.
Industry Best Practice
Certified tile installers and building science professionals follow these principles because they’ve seen firsthand what happens when shortcuts are taken. Matching the waterproofing method to the window type and construction is a core part of doing the job correctly and ensuring the installation lasts.
Essential Gear: Tools and Materials for a Leak-Proof Shower Window
A successful waterproofing job starts with having the right tools and materials on hand. Using proper equipment not only makes the process smoother but also ensures that every layer of protection performs the way it should. Below is a complete breakdown of the gear you’ll need, along with realistic cost ranges and notes on how each item supports a fully watertight installation.
Your Complete Waterproofing Toolkit
|
Item |
Purpose/Use |
Approx. Cost Range |
|
Trowel |
Spreads thin-set mortar for sheet membranes; smooths liquid membranes |
$15–$40 |
|
Measuring Tape |
Helps you take accurate measurements for cutting and fitting materials |
$10–$30 |
|
Utility Knife |
Cuts waterproofing fabric, backer board, and general materials |
$5–$20 |
|
Caulk Gun |
Applies silicone and specialized sealants |
$10–$50 |
|
Brushes/Rollers |
Used to apply liquid waterproofing membranes evenly |
$5–$25 |
|
Mixing Paddle |
Attaches to a drill to mix thin-set or liquid products properly |
$15–$30 |
|
Safety Glasses |
Protects eyes during cutting and mixing |
$5–$15 |
|
Gloves |
Shield your hands from chemical products and rough materials |
$5–$20 |
|
Respirator/Mask |
Protects lungs from dust and fumes, which is especially important when working with liquid membranes |
$20–$50 |
|
Level |
Ensures surfaces are plumb and properly aligned |
$15–$75 |
|
Notched Trowel |
Applies thin-set under sheet membranes; 1/8" x 1/8" is a common size |
$15–$30 |
|
Screws/Fasteners |
Used to secure backer board |
$10–$25 |
|
Drill |
Drives screws and mixes thin-set with the paddle attachment |
$40–$150 |
Safety Reminder:
Whenever you’re working with chemicals like liquid membranes, primers, and silicone, ventilation matters. Use your respirator or mask, keep windows open when possible, and take breaks to avoid inhaling fumes.
Key Waterproofing Materials Explained
|
Item |
Purpose/Use |
Approx. Cost Range |
|
Liquid Waterproofing Membrane |
Creates a seamless protective layer when brushed or rolled on |
$50–$150 per gallon |
|
Sheet Waterproofing Membrane |
A fabric material installed with thin-set for consistent, reliable waterproofing |
$75–$200 per roll |
|
Waterproofing Tape/Band |
Seals corners, seams, and transitions such as wall-to-sill connections |
$20–$60 per roll |
|
100% Silicone Sealant |
Flexible, mold-resistant sealant for final caulking and critical penetrations |
$8–$20 per tube |
|
Backer Board |
A solid, water-resistant base for tiles; available in cement or foam variations |
$15–$50 per sheet |
|
Butyl Tape/Flashing |
Self-adhesive flashing for sealing rough openings and window flanges |
$20–$50 per roll |
|
Primer |
Improves adhesion for liquid membranes on certain substrates |
$20–$50 per quart |
|
Thin-set Mortar |
Used beneath sheet membranes and for installing backer board |
$20–$40 per bag |
Product Recommendations
To help you choose reliable and proven options, here are popular picks trusted by both professionals and DIYers:
Liquid Waterproofing Membranes
- Laticrete Hydro Ban
- Schluter Kerdi-DS
- RedGard (Custom Building Products)
These create strong, seamless protection and are beginner-friendly.
Sheet Membranes / Waterproofing Fabric
- Schluter Kerdi
- Wedi Building Panels
Sheet systems offer dependable waterproofing and are excellent for wrapping window openings and large areas.
Waterproofing Sealants / Caulks
- 100% Silicone Sealant (GE Silicone II, similar high-quality brands)
- Schluter KERDI-FIX
These maintain flexibility, resist mold, and seal joints and penetrations.
Waterproofing Tapes / Bands
- Schluter Kerdi-Band
- Laticrete Hydro Ban Band
These reinforce vulnerable areas such as corners and window transitions.
Backer Board
- HardieBacker
- Durock
- Wedi
- Schluter Kerdi-Board
All provide a stable, moisture-resistant base for tile and waterproofing.
Butyl Tape / Flashing
Ideal for sealing the rough opening and protecting behind the window flange, especially with exterior-facing installations.
Step-by-Step: The Professional’s Guide to Waterproofing Your Shower Window
A watertight shower window depends on careful preparation, the right materials, and precise execution. The steps below walk you through the process the same way a seasoned installer would handle it. Take your time with each phase, especially around corners, seams, and transitions. These areas decide whether your window stays watertight for years or becomes a future repair job.
Phase 1: Preparation Is Paramount
Step 1: Inspect and Prepare the Rough Opening
Start by checking the rough opening thoroughly. It needs to be clean, dry, free of debris, and structurally sound. Any softness in the framing, lingering moisture, or uneven surfaces will compromise the waterproofing later.
Expert Tip:
Pre-slope the window sill toward the shower interior at about a quarter inch per foot. You can use shims, setting material, or a combination, depending on the framing. This slope keeps water from pooling on the sill surface, which is one of the most common sources of long-term leaks.
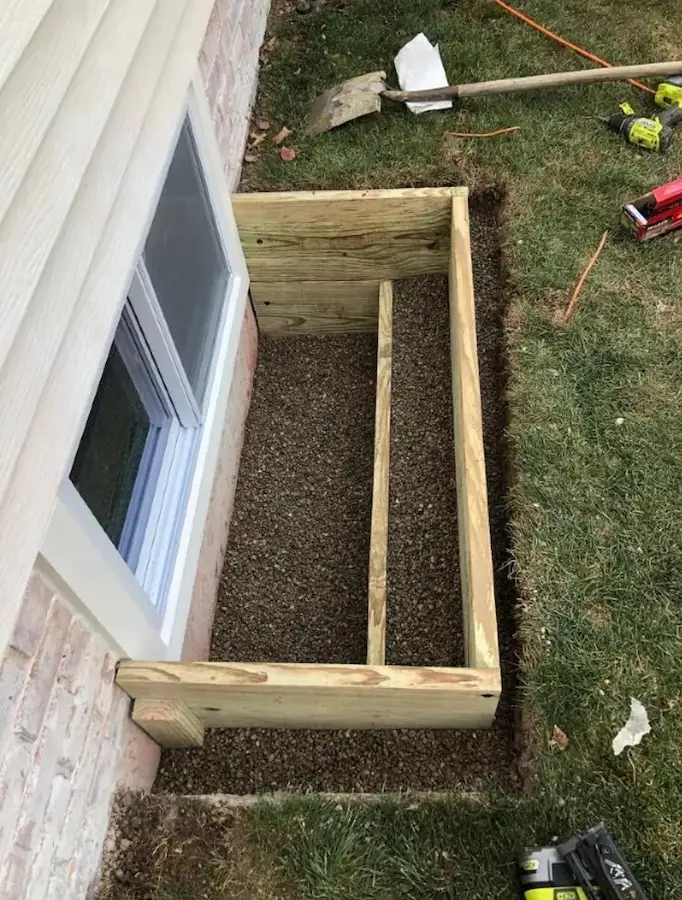
If your window faces the exterior, install the exterior flashing and a sloped sill pan exactly as the manufacturer recommends. This is your first line of defense against water penetrating from outside the home.
Clean rough opening with a slightly sloped
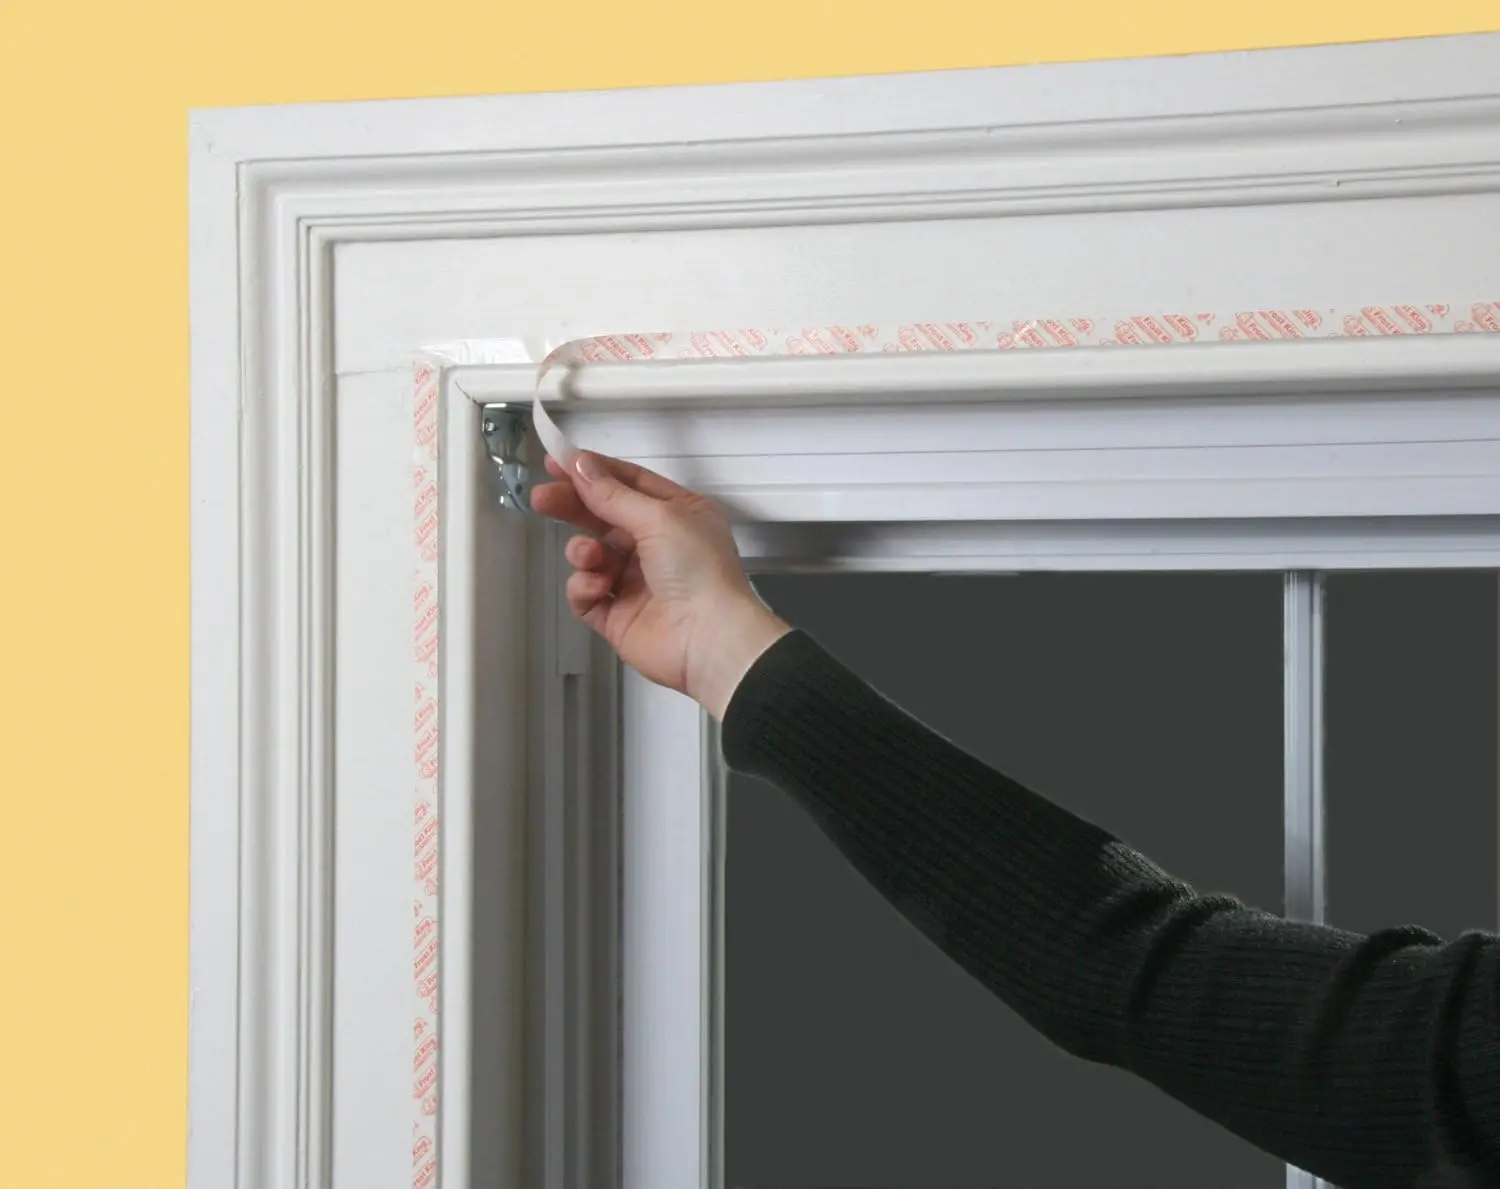
Step 2: Install the Window Unit and Seal the Exterior
Set the window in the opening so it sits plumb, level, and square. Use shims where needed to maintain proper alignment. Fasten the window securely to the framing, following the manufacturer’s fastening pattern.
Once the unit is installed, seal the exterior perimeter. Apply high-quality exterior caulking and integrate the window into the existing exterior flashing system. This gives you a stable, sealed opening before you begin the interior waterproofing.
Phase 2: Interior Waterproofing Layers
Step 3: Install Backer Board Around the Window
Cut your cement or foam backer board so it fits tightly around the window frame without forcing it into place. Leave the expansion gaps recommended by the manufacturer. These gaps help manage movement and prevent cracking.
Secure the board with corrosion-resistant screws. Fasteners should sit flush or slightly recessed so they don’t interfere with the membrane later.
Product Recommendations:
HardieBacker, Durock, Wedi, or Schluter Kerdi-Board.
Professional Standards:
Follow TCNA and ANSI guidelines for installing backer board in wet environments. These standards outline proper spacing, fastening, and treatment of joints.
Step 4: Prime Surfaces (If Required)
Some liquid membrane systems require a primer on specific surfaces such as foam boards, sealed substrates, or non-porous areas. If the manufacturer recommends it, don’t skip it. Primer improves adhesion, creates a uniform bond, and ensures the membrane cures properly.
Expert Tip:
Primers are essential when working on smooth or dense surfaces. They eliminate the risk of membrane peeling or blistering after installation.
Step 5: Detail Corners and Transitions with Waterproofing Tape
Corners and changes in plane are the most common failure points in any shower. This includes every joint where the wall meets another wall, and especially where the backer board meets the window frame.
Apply a high-quality waterproofing band such as Kerdi-Band or Hydro Ban Band. Make sure you press the tape firmly into place and overlap the pieces according to the manufacturer’s directions. The layers should “shingle” in a way that encourages water to drain outward.
Product Recommendations:
Schluter Kerdi-Band, Laticrete Hydro Ban Band.
Step 6: Apply the Main Waterproofing Membrane
You can choose between a liquid membrane or a sheet membrane system. Both work well when installed correctly. The choice often comes down to preference and the complexity of the installation.
Option A: Liquid Applied Membrane
Use a brush or roller to apply an even first coat over the entire surface. Cover the backer board, all taped seams, and the perimeter of the window frame. Aim for consistent thickness across the area.
Expert Tip:
Two or more thin coats are better than one heavy coat. Thick applications can cure unevenly and create weak spots. Allow the proper drying time between coats as specified by the manufacturer.
Product Recommendations:
Laticrete Hydro Ban, Schluter Kerdi-DS, RedGard.
Visual Suggestion:
A photo showing a roller applying a smooth first coat, with full coverage in corners.
Option B: Sheet Membrane System
Cut your sheet membrane to size, allowing for the required overlaps. Spread thin-set mortar onto the backer board with a notched trowel. Press the membrane firmly into the mortar, removing air pockets.
Overlap all seams by at least two inches or more if instructed. Make sure every layer overlaps in the correct direction to maintain proper shingling.
Expert Tip:
Take extra care when wrapping the window opening. The membrane should fold smoothly and bond completely to the sill, jambs, and head.
Product Recommendations:
Schluter Kerdi, Wedi Building Panels.
Visual Suggestion:
A diagram showing the membrane folding into the window recess and overlapping seams clearly.
Step 7: Seal Penetrations and Final Transitions
Inspect the entire area for any screw heads, fasteners, or tiny penetrations. Seal each one with a small amount of liquid membrane or silicone compatible with your system. The final waterproofing surface must be continuous and unbroken.
Step-by-Step Waterproofing Actions (Quick Reference)
|
Step # |
Action |
Key Considerations / Tips |
|
1 |
Prepare Rough Opening |
Clean, dry, structurally sound. Pre-slope sill. Install exterior flashing and sill pan if needed. |
|
2 |
Install Backer Board |
Cut accurately, leave expansion gaps, and secure with corrosion-resistant screws. Follow TCNA/ANSI standards. |
|
3 |
Apply Primer (If Needed) |
Follow the membrane instructions. Primer improves adhesion on non-porous surfaces. |
|
4 |
Detail Corners & Seams |
Tape all corners, seams, and window frame transitions. Overlap like shingles. |
|
5 |
First Coat of Membrane |
Apply a liquid membrane or embed a sheet membrane. Aim for even coverage. |
|
6 |
Additional Coats / Overlaps |
Add thin coats for liquids; ensure full seam coverage for sheets. |
|
7 |
Seal Penetrations |
Seal every screw, gap, and transition. |
|
8 |
Final Inspection |
Look for gaps, thin areas, or missed spots. The waterproofing layer must be continuous. |
Professional Note:
A meticulous final inspection reflects the level of care expected from certified installers. This step is essential before any tile work begins.
Product Deep Dive: Choosing the Best Waterproofing Membranes and Sealants
Picking the right waterproofing products for a shower window area can make the difference between a long-lasting installation and one that fails far too soon. The goal is to match the membrane or sealant to the project’s layout, the installer’s skill level, and the performance demands of a wet environment. This section walks through the major options and offers an objective look at how they perform in the field.
Understanding Your Options: Liquid and Sheet Membranes
Liquid-applied membranes
These are popular with both pros and experienced DIY homeowners because they’re flexible and easy to apply around irregular shapes. They curve into a continuous layer with no seams to manage.
- Pros: High flexibility, conform easily to tight corners, create a seamless barrier, simple to brush or roll on.
- Cons: You need to hit the manufacturer’s required thickness, often with two or more coats. They can take longer to cure, and some give off strong fumes during application.
- Best for: Windows with complex geometry, remodels where surfaces aren’t perfectly straight, and situations where a seamless coating is helpful.
Sheet membranes
These are factory-made sheets that offer uniform thickness and strong durability. They’re usually installed with thin-set mortar, and once they’re up, they’re ready for tile fairly quickly.
- Pros: Consistent thickness, strong tear resistance, excellent crack isolation, quick turnaround time for tiling.
- Cons: Tougher to shape around tight curves or angles, require careful cutting, and need the correct mortar.
- Best for: Large flat walls, full shower systems, and installations where speed and consistency matter most.
Comparison of Recommended Waterproofing Products
Below is a clear look at the strengths, limitations, and ideal uses for each product. The evaluations focus on ease of use, durability, drying time, field performance, and availability. Insights from contractors and tile installers are included where relevant.
Laticrete Hydro Ban (Liquid)
Pros: Dries fast, flexible, good anti-fracture qualities, simple to apply with a roller or brush.
Cons: Needs consistent thickness; cost can be slightly higher.
Ideal for: Remodels, irregular surfaces, and anyone who wants pro-level performance without a complicated install.
Schluter Kerdi-DS (Liquid)
Pros: Highly elastic, vapor-tight, built to work within the Schluter system.
Cons: Higher cost; you may need specific tools for larger areas.
Ideal for: Projects using Kerdi-Board or other Schluter components where a unified system gives the best results.
RedGard (Custom Building Products) – Liquid
Pros: Easy to find, strong adhesion, good crack isolation, friendly for DIY users.
Cons: Can be messy, has a noticeable odor, and needs proper drying time between coats.
Ideal for: Budget-conscious builds that still need reliable waterproofing with proven field performance.
Schluter Kerdi (Sheet)
Pros: Strong, reliable, uniform thickness, perfect for quick tiling once installed.
Cons: Challenging around curves or windows with irregular shapes; needs the right thin-set.
Ideal for: Flat surfaces and showers that benefit from a fully integrated Schluter setup.
Wedi Building Panels (Sheet)
Pros: Lightweight, already waterproof, easy to cut, available in pre-sloped designs.
Cons: Higher initial cost; best used as part of the full Wedi system.
Ideal for: Full shower builds where speed, precision, and integrated components matter.
GE Silicone II – 100% Silicone
Pros: High mold resistance, flexible, bonds well to smooth surfaces like vinyl, glass, and metal.
Cons: Not paintable and tough to remove once cured.
Ideal for: Final window perimeter sealing, glass-to-tile joints, and anywhere movement or constant moisture is expected.
Schluter KERDI-FIX – 100% Silicone
Pros: Strong bond, excellent for Schluter overlaps, penetrations, and transitions.
Cons: Higher price; system-specific.
Ideal for: Sealing Kerdi seams, pipe penetrations, and connecting Kerdi to window frames.
Essential Sealants and Reinforcement Tapes
100% Silicone Sealants
In wet zones, silicone is the only material that consistently holds up. Acrylic latex looks smooth at first, but breaks down quickly when exposed to daily moisture, eventually leading to mold and recurring leaks.
Why use silicone only:
- It doesn’t deteriorate in wet settings
- It stays flexible as surfaces expand and contract.
- It bonds strongly to glass, tile, metal, and vinyl.
Expert tip: Always use 100% silicone for the final bead around the window frame, tile edges, and any area that sees direct water contact.
Waterproofing Tapes and Bands
These products reinforce corners, seams, and transitions where membranes experience the most stress. They help prevent failure at weak points such as edges of a window sill, inside corners, and changes in plane. When combined with a liquid or sheet membrane, they add a second layer of protection in the places most vulnerable to leaks.
Navigating the Pitfalls: Common Mistakes to Avoid
Waterproofing a shower window is one of those jobs where small mistakes can create big problems later. Knowing what typically goes wrong helps you avoid failures that lead to leaks, damaged framing, and expensive repairs. Below is a practical look at the most common errors and how to stay ahead of them.
Overlooking Substrate Preparation
A waterproofing system is only as strong as the surface it bonds to. Rushing the prep stage is one of the fastest ways to set the project up for failure.
- Not cleaning or drying surfaces: Any trace of dust, soap residue, grease, or leftover construction debris weakens adhesion. Membranes need a clean, dry surface to bond properly.
- Skipping primer: Some manufacturers require primer for specific materials. If you skip it, the membrane can peel or blister later.
Inconsistent Membrane Application
Uneven application is another major reason waterproofing fails, especially with liquid products.
- Applying liquid membranes too thin or unevenly: This leaves weak spots that can’t handle constant moisture.
- Incorrectly overlapping sheet membranes or reinforcement tapes: Poor overlap creates paths where water can slip behind the system.
Neglecting Critical Areas
Corners, penetrations, and transitions take the most stress, which is why they’re responsible for most leaks.
- Ignoring high-risk zones: Any edge, corner, screw penetration, or change in plane needs extra attention.
- Improper shingling: If layers are installed in the wrong order, water gets pushed behind the waterproofing instead of flowing out and away.
Expert tip: Always install layers so they overlap in the direction water travels. Each layer should guide moisture outward, never inward.
Using the Wrong Sealants or Caulks
Choosing the right sealant is just as important as picking the right membrane.
- Using acrylic latex instead of silicone: Acrylic breaks down in wet areas, cracks over time, and traps mold.
- Expert tip: Stick with 100% silicone for any joint that sees regular moisture. It stays flexible, bonds better, and lasts far longer in a shower.
Ignoring the Flood Test (When Applicable)
Not all designs allow for a flood test, but when you can perform one, it’s one of the best safeguards.
- Skipping verification: If you tile over a failed waterproofing job, you won’t know until water starts showing up where it shouldn’t. By then, the damage is already underway.
- Expert tip: If the window sill design allows, fill the area with water and let it sit for a short period. Any leaks will show up before the tile goes on.
Waterproofing Horror Stories and How to Avoid Them
Real-world failures are often the best teachers. Here are a few anonymized examples that highlight common issues.
The Peeling Membrane Disaster
A liquid membrane began peeling away within months of installation.
What went wrong: The surface wasn’t cleaned well, and primer was skipped where it was needed. Dust and grease prevented proper bonding.
How to avoid it: Clean thoroughly, follow primer recommendations, and apply the membrane according to the manufacturer’s instructions.
The Corner Leak Catastrophe
Water started creeping behind the tile around a shower window, eventually staining the wall below.
What went wrong: The corners weren’t reinforced with tape, or the overlap was too short. Corners are high-stress points, and without reinforcement, they fail early.
How to avoid it: Always reinforce every change in the plane. Use membrane tape correctly, double-check overlaps, and maintain proper shingling.
The Rotten Sill Surprise
A wood window frame developed rot that wasn’t visible until the tile was removed.
What went wrong: The sill wasn’t pre-sloped, which caused water to collect and work its way into the wood. Interior waterproofing was minimal or missing entirely.
How to avoid it: Pre-slope the window sill and cover it with a continuous membrane. Any flat surface in a shower is a risk, and wood fails quickly when exposed to moisture.
The Ultimate Assurance: Testing Your Waterproofing
A strong waterproofing job should never rely on guesswork. Before the tile goes up and everything becomes sealed and hidden, it’s important to confirm that the system can actually handle water. That’s where testing comes in, and when possible, a flood test is the most dependable method.
The Importance of a Flood Test
A flood test, sometimes called a standing water test, is the best way to confirm the integrity of your waterproofing. By holding water in place for an extended period, you recreate the kind of stress a shower endures over time and expose any weaknesses you might have missed.
Not every window setup allows for a full flood test. Some windows are flush with the wall and don’t have a sill that can hold standing water. In those cases, a detailed visual inspection combined with a controlled water spray test is the next best approach. You’re still checking for leaks, but without relying on a contained basin.
Expert tip: If your window design allows, always perform a flood test before tiling. It’s far easier to fix an issue now than after grout and trim are installed.
How to Conduct a Flood Test
If your layout allows for it, the process is simple and effective.
Step 1: Create a temporary dam
Build a small barrier around the window sill area. A strip of wood secured with silicone, duct tape, or another removable seal works well. The goal is to create a watertight pocket that can hold a few inches of water. If it makes sense for your layout, you can extend the dam slightly into the shower pan.
Step 2: Fill with water
Slowly add water until you reach a depth of one to two inches, or up to the lowest point of your waterproofing. Leave it undisturbed for at least 24 hours unless your membrane manufacturer or local code requires a longer duration.
Step 3: Inspect for leaks
Check the surrounding areas several times during the test. Look at the exterior of the window, the wall below it, and any nearby framing or drywall for moisture, drips, or discoloration. Inside the test area, watch for falling water levels or individual drops forming along seams or transitions. Minor evaporation is normal, but noticeable loss usually signals a leak.
Step 4: Troubleshooting
If you find a leak, drain the test area and let everything dry completely. Identify the source, reinforce the membrane or tape as needed, and repeat the test. Don’t move forward with tiling until you’re confident the waterproofing is fully sealed.
Seamless Integration: Connecting Your Window to the Entire Shower System
A properly waterproofed shower window doesn’t exist in isolation. For long-term protection, it must become a fully integrated part of the shower’s overall waterproofing envelope. Any gaps or breaks where the window meets walls, pan, or curb can quickly become the source of leaks.
Ensuring Continuous Protection
Connecting Window Waterproofing to Shower Walls
The membrane or liquid coating applied around the window must seamlessly overlap with the waterproofing on the adjacent shower walls. There should be no interruptions, gaps, or loose edges. The goal is a continuous, unbroken barrier that directs water safely toward the drain.
Many DIYers get confused about how window waterproofing ties into the larger shower system. Think of it as a single protective sheet: the window area, walls, and corners must all act together to keep moisture out. Proper overlaps and consistent adhesion are critical.
Integrating with the Shower Pan and Curb
If your window sits low or close to the shower pan or curb, its waterproofing must connect directly with these elements. The window membrane should extend or tie into the pan and curb membranes, creating a fully contiguous system. This integration ensures that water flowing down the walls or pooling near the window sill is safely channeled away.
Industry Standards:
Certified tile installers often follow TCNA (Tile Council of North America) and ANSI (American National Standards Institute) guidelines to ensure continuity. These standards emphasize overlapping membranes, proper sealing of corners, and connecting wall and pan waterproofing into a single, cohesive envelope.
The "Shingle" Principle in Practice
The fundamental rule of waterproofing is simple: water always flows down and out. Every layer—flashing, tape, membrane—should be installed to reinforce this path. Misaligned layers that trap water can cause hidden leaks, even if everything looks perfect on the surface.
Expert Tip:
Always “shingle” your layers. Start at the highest point and work downward, overlapping each successive layer so that water is guided away from the structure. For example:
- Tape corners before applying the membrane
- Lay the membrane over the backer board overlaps.
- Integrate window flashing over all underlying layers.
Following this principle ensures that any water reaching these junctions flows outward and downward, rather than behind the waterproofing system.
Long-Term Care: Maintaining Your Leak-Free Shower Window
Even the best waterproofing system requires a little ongoing care to remain effective for years. Regular maintenance and early detection of potential issues can prevent costly repairs and keep your bathroom in top condition.
Post-Installation Care
Proper Cleaning
Use pH-neutral cleaners for both tile and grout. Harsh chemical cleaners or abrasive tools can degrade silicone sealants and damage the surface of membranes over time. Gentle cleaning helps preserve both aesthetics and functionality.
Ventilation
Even with perfect waterproofing, controlling moisture in the bathroom is crucial. Install a high-quality exhaust fan and run it during and after showers to reduce humidity. This lowers the stress on membranes, caulking, and surrounding materials.
Expert Tip: Consistent ventilation not only prolongs the life of your waterproofing but also reduces mold and mildew growth throughout the bathroom.
Regular Drying
Wipe down the window, sill, and surrounding tiles after each shower. Removing standing water and soap residue prevents mineral buildup, reduces surface stress, and minimizes the chance of hidden water damage.
Regular Inspection for Early Detection
Routine checks allow you to catch small problems before they escalate into major leaks.
What to Look For:
- Cracks in Caulk: Inspect all silicone lines around the window and where the window meets the tile. Look for shrinking, cracking, or separation from the substrate.
- Discoloration or Staining: Check grout lines, adjacent drywall, and paint for water stains or unusual discoloration, which can indicate leaks behind the surface.
- Loose Grout or Tile: Any loosened or crumbling grout or tile is a potential entry point for water and should be addressed immediately.
Frequency of Inspection:
- Conduct a visual inspection monthly.
- Perform a thorough review, including checking corners and hidden edges, at least once a year.
Minor Repairs and Preventative Measures
Even small interventions can extend the life of your waterproofing system.
- Re-Caulking as Needed: Remove old, compromised silicone completely before applying a fresh layer of 100% silicone. Proper adhesion is essential.
Addressing Grout Issues Promptly: Repair cracked or missing grout immediately to maintain a continuous, protective surface.
By routinely inspecting and maintaining your window area, you not only preserve your investment but also prevent minor issues from turning into expensive repairs. Teaching homeowners how to identify early warning signs adds significant value and sets apart a guide like this from standard “installation-only” instructions.
hower Window Waterproofing FAQs
Build Your Perfect Waterproofing Plan
Every shower window project is unique. Our interactive system selector guides you to the best combination of products and methods based on your specific needs.
Your Custom Waterproofing Plan
Answer the questions to the left to generate a personalized waterproofing system recommendation tailored to your specific shower window project.
Example Recommendations
Budget-Friendly Vinyl Window DIYer
Recommended System:
- RedGard liquid membrane
- Cement board backer
- Kerdi-Band for seams
- 100% silicone sealant
Key Focus: Proper surface preparation, careful application, and attention to detail maximize cost-effectiveness while ensuring durability.
Professional-Grade Wood Window Renovation
Recommended System:
- Schluter Kerdi sheet membrane system
- Kerdi-Board integration
- Specialized thin-set mortar
- Comprehensive exterior flashing
- Premium 100% silicone sealants
Key Focus: Robust, long-term protection for high-risk wood windows. Emphasizes professional-level integration and durability.
Quick Fix for Minor Leak (Non-Structural)
Recommended System:
- Remove old caulk
- Deep clean the area
- High-performance liquid sealant (e.g., Aquajoint)
- Fresh 100% silicone finish
Key Focus: Temporary repair that stops leaks until a full waterproofing system can be installed. Not a permanent solution.
Conclusion: Confidence in Your Waterproofing Project
Waterproofing a shower window is one of the most critical steps in any bathroom renovation. Done correctly, it protects your home from water damage, prevents mold, and ensures a long-lasting, healthy bathroom environment.
By following the guidance in this comprehensive DIY guide, you can:
- Select the right products for your window type and project scope
- Execute each step with professional precision.
- Avoid common mistakes and pitfalls.s
- Seamlessly integrate the window into your overall shower system.
With these insights and tools at your disposal, you can approach your shower window waterproofing project with confidence, achieving a truly leak-proof installation that will stand the test of time.