


Bare Ground to Beautiful: Essential Plants, Mulch & Easy Gardening
September 2, 2025

After the quiet slumber of winter, many gardeners feel a mix of excitement and uncertainty. You might be gazing out at your garden, where the soil looks bare, the beds a bit chaotic, and the to-do list unclear. Questions creep in “When do I start planting?”, “Did I clean up well enough last fall?”, or “How can I avoid last year’s mistakes?” If this sounds familiar, you're not alone and this guide is exactly what you need.
Now, picture this instead: a garden brimming with life. Fresh green shoots break through rich soil, flowers bloom in harmony, and your vegetables flourish. Weeds are minimal, pollinators are buzzing happily, and everything feels like it’s in perfect sync. Even better? You achieved it with confidence and care for the planet no guesswork, no waste, no overwhelm.
That’s the power of smart spring preparation.
In this guide, we’ll take you step-by-step from winter's end to spring’s full bloom. Whether you’re a seasoned green thumb or just getting started, you’ll find clear advice, a handy checklist, and sustainable strategies to make the transition easy and effective. Let’s demystify the process, eliminate the stress, and set you up for your most successful and sustainable growing season yet.
Assessing Your Garden After Winter: A Post-Frost Checkup
Before you dive into planting and prepping, it’s essential to take stock of how your garden weathered the cold season. A thoughtful checkup now can save you time, effort, and frustration later. Let’s walk through what to look for and how to assess your garden’s post-winter condition.
Identifying Winter Damage and Debris
Winter can be tough on your garden, especially with freezing temps, snow buildup, and harsh winds. Start your checkup with a walk-through:
- Scan for broken branches, fallen twigs, and wind-blown debris cluttering your garden beds or lawn.
- Inspect raised beds, containers, and trellises for cracks or shifts caused by freezing and thawing cycles.
- Check the soil have certain areas become compacted or washed out due to erosion? Take note, especially in sloped sections or near downspouts.
These small signs of damage can add up, so address them early before they affect planting and growth.
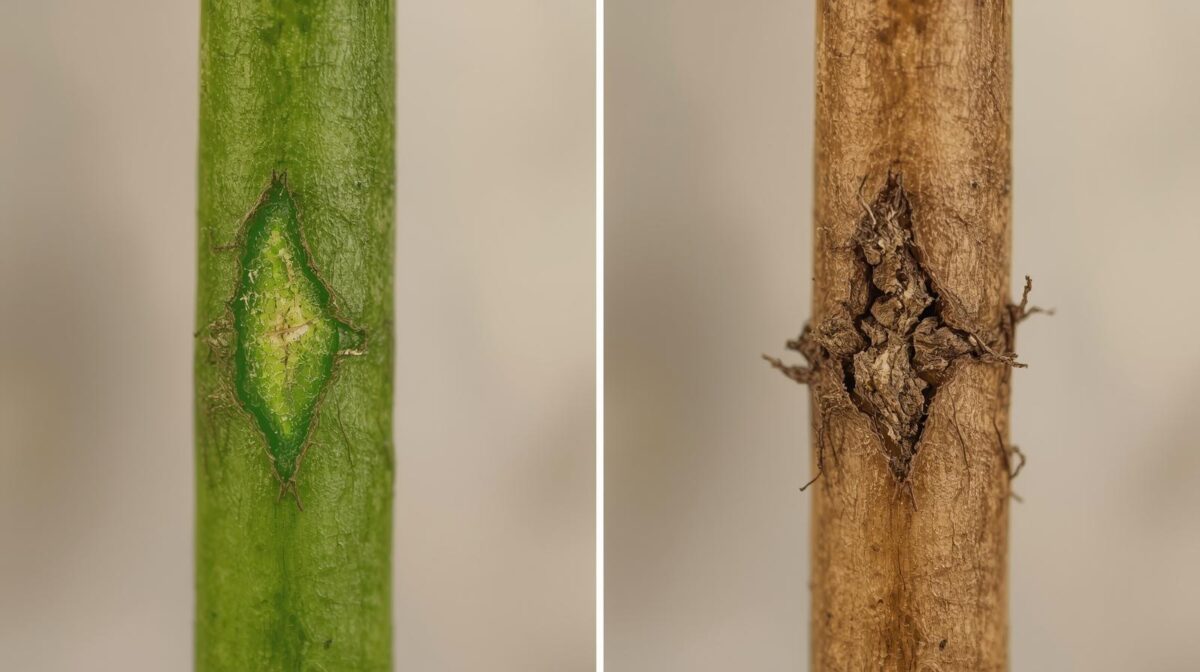
Dormant or Dead? How to Tell the Difference
One of the biggest springtime mysteries for gardeners is knowing what’s coming back and what’s not.
Here’s a practical and reliable method:
The Scratch Test:
Choose a woody stem and gently scratch the bark with your fingernail or a knife.
- Green beneath the surface? That’s living tissue your plant is just dormant.
- Brown and dry? That stem is likely dead.
Pro Tip: Don’t give up too soon. Some plants wake up later than others. Look near the base of perennials for small green shoots they're a good sign your plant is just taking its time.
Planning for Repairs and Replanting
With your damage report in hand, it’s time to plan:
- Top up beds where soil has settled this helps improve drainage and root health.
- Replace lost plants with varieties better suited to your climate or layout.
- Inspect your irrigation system (if you have one). Look for cracked hoses, clogged emitters, or leaking joints these often sneak by unnoticed after a freeze.
Spring Garden Cleanup Checklist: Clearing the Way for New Growth
Spring cleanup is more than just tidying up it’s about creating the right conditions for healthy, vigorous growth. Removing the clutter of winter gives your garden room to breathe and sets the stage for a thriving season ahead.
Removing Debris and Old Plant Material
Start by clearing out the remnants of last season:
- Rake away dead leaves, spent annuals, and leftover garden debris. These can harbor pests and diseases if left too long.
Take your time. While it’s tempting to jump right in, wait until the soil is dry and workable. Cleaning too early can lead to soil compaction and damage tender perennials just waking up.
Expert Tip: Separate and dispose of any diseased plant material do not compost it, as this can reintroduce pathogens into your garden later.
- Early Season Weed Control Strategies are essential; weeds are opportunists and spring is their time to shine if left unchecked, making a heavy-duty patio weeder useful.
- Catch them early: Young weeds are easier to pull and haven’t yet developed deep root systems.
- Manual weeding is effective and environmentally friendly, especially in small beds or around delicate plants.
- Organic pre-emergents like corn gluten meal can help prevent seeds from sprouting without harming established plants.
Pain Point Tip: If weeds have been a problem in previous seasons, now’s the time to act addressing them early prevents a much bigger job later.
Sanitation and Disease Prevention
Good hygiene in the garden can mean the difference between thriving plants and a season of battling disease.
- Remove any mummified fruits or berries from fruit trees, vines, and shrubs they can carry fungal spores into the new season.
- Clear leaf litter from the base of roses, peonies, and other disease-prone plants. Overwintered debris is a common hiding spot for fungal pathogens.
Expert Tip: Always sharpen and sanitize your garden tools before each use. This not only prevents the spread of disease but also gives cleaner cuts, which helps plants heal faster.
Soil Preparation: The Foundation of a Thriving Garden
If there’s one step that can make or break your spring garden, it’s soil preparation. Great soil doesn’t just support plants it nourishes them. Taking the time to prep it properly now lays the groundwork for lush, resilient growth all season long.
The Importance of Soil Health
Healthy soil is more than dirt it's a living, breathing ecosystem that feeds your plants from the ground up.
- It supports strong root development, helping plants anchor deeply and access nutrients.
- It improves water retention and drainage, creating an ideal moisture balance.
- Beneath the surface, billions of microbes, fungi, and beneficial bacteria are at work, breaking down organic matter and making nutrients available to your plants.
Expert Tip: If you do just one thing for your garden this spring, amend your soil with plenty of organic compost. It’s the most impactful, long-lasting boost you can give your garden.
Conducting a Soil Test and Interpreting Results
Not sure where to start? A soil test takes out the guesswork.
- Test for pH levels, macronutrients (Nitrogen, Phosphorus, Potassium), and micronutrients to know exactly what your soil needs.
- Conduct a test every 2–3 years to stay on top of changes and avoid over- or under-amending.
Common Pain Point: Soil test results can be confusing. You’ll see numbers and ranges, but what do they mean?
Product Recommendation: Try an at-home kit like Rapitest or Luster Leaf both reliable and user-friendly.
For the most accurate and region-specific advice, contact your local university extension office. They often offer lab tests and will help interpret the results, especially for pH correction or nutrient balance.
Amending with Organic Matter
Once you know what your soil lacks, it’s time to enrich it naturally:
- Use organic compost, worm castings, or aged manure to restore nutrients and encourage microbial activity.
- Espoma Organic Compost is a trusted brand, but local compost from nurseries or farms can be just as effective (and more affordable).
- Work compost into the top 6–8 inches of soil using a fork or spade especially important in heavy clay or sandy soils.
Why it matters: Organic matter improves soil structure, boosts moisture retention, and helps balance drainage creating the perfect environment for roots to thrive.
Tilling vs. No-Till Methods
There’s more than one way to prepare your soil and choosing the right method depends on your garden style and philosophy.
- Breaks up compacted soil
- Mixes in compost and nutrients evenly
- Great for first-time or neglected beds
- Disrupts soil structure and beneficial microbes
- Can lead to erosion if overused
No-Till Gardening
Many gardeners now favor no-till for its sustainability and soil-building benefits, but even occasional, gentle tilling can be useful for compacted areas or new beds.
- Preserves microbial life and soil layers
- Reduces erosion and weed growth
- Lower maintenance over time
- May take longer to see full benefits
- Requires careful layering of compost and mulch
Pruning and Trimming: Shaping for Success
Pruning isn’t just about tidying up it’s a powerful way to improve your garden’s overall health, appearance, and productivity. With the right techniques and timing, spring pruning sets the stage for stronger growth, more vibrant blooms, and bigger harvests.
Why Prune in Spring?
Spring is the ideal time to give your plants a clean slate:
- Remove winter damage: Cut away dead or damaged branches caused by frost, wind, or heavy snow.
- Encourage air circulation: This reduces the risk of fungal diseases and helps plants breathe.
- Stimulate new growth: Pruning activates dormant buds and encourages more vigorous branching.
- Shape for beauty and strength: Well-pruned plants look better and are less likely to suffer from breakage or overcrowding.
Spring Pruning Techniques for Different Plant Types
Not all plants require the same approach. Here's how to prune different types effectively:
Perennials
- Cut back old, brown foliage from last season to make way for fresh growth.
- Deadhead spent flowers to prolong blooming throughout the season.
Shrubs
- Remove crossing or rubbing branches to avoid wounds and disease.
- Shape lightly to maintain a natural form, especially for flowering varieties.
- Deadhead early-blooming shrubs after they flower to avoid cutting off next year’s buds.
Fruit Trees
- Prune while still dormant, before new buds swell.
- Focus on removing:
- Dead or diseased wood
- Inward-growing or crossing branches
- Water sprouts and suckers
- Dead or diseased wood
Aim to create an open, vase-like shape to let in light and air for better fruit production.
Embad A video
Making Proper Cuts
The way you cut matters just as much as where you cut.
- Always use clean, sharp tools to avoid crushing stems or spreading disease.
- For stems or branches:
- Cut at a 45-degree angle just above an outward-facing bud.
- When removing branches, cut at the branch collar the swollen area where a branch meets the trunk for faster healing.
- Cut at a 45-degree angle just above an outward-facing bud.
Product Recommendation: Invest in high-quality bypass pruning shears like Felco or Fiskars, and consider durable rose pruning gloves.
. These provide cleaner, more precise cuts and last for years with proper care.
Pro Tip: Sanitize your tools between plants especially when dealing with diseased material to prevent contamination.
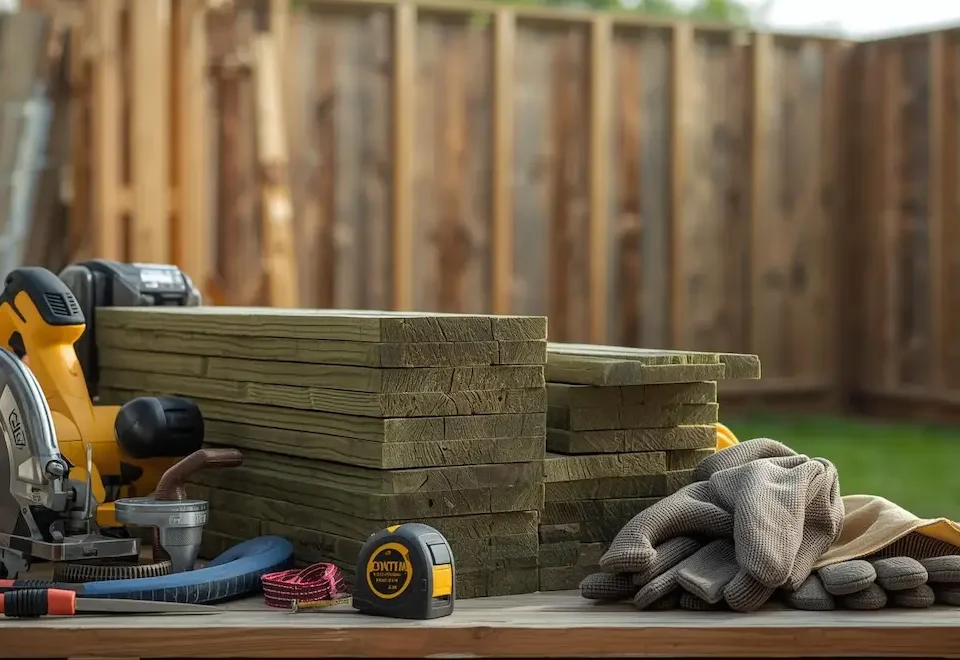
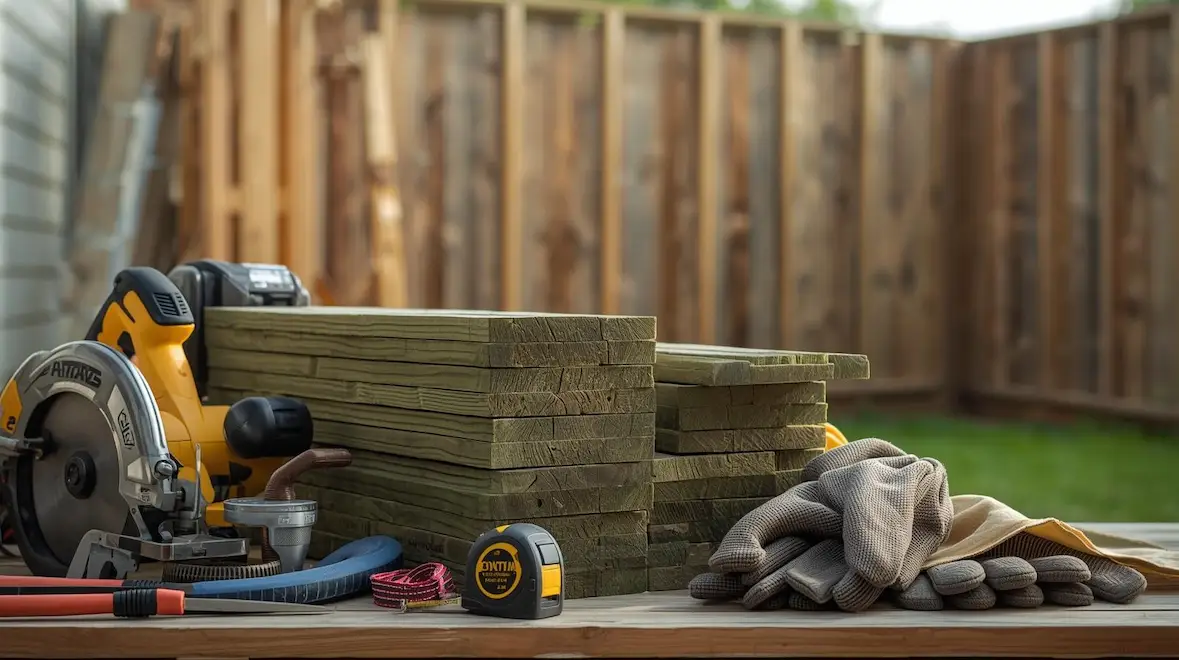
Essential Tools for Spring Garden Prep & Maintenance
Ensure spring gardening can be deeply satisfying, especially a quality garden tools set. With a few high-quality essentials and proper maintenance habits, your work becomes easier, faster, and far more enjoyable. Whether you’re digging, planting, pruning, or hauling compost, investing in the right gear pays off every season.
Must-Have Tools for Spring Gardeners
Here’s a curated list of tools that no spring gardener should be without:
Ergonomic Garden Trowel and Hand Fork
- These are your go-to tools for planting, weeding, and loosening soil.
- Look for stainless steel blades for rust resistance and easy cleaning.
- Product Recommendation: Try the CobraHead Weeder and Cultivator or a sturdy stainless steel trowel/fork set with rubberized grips for comfort and durability.
Heavy-Duty Gardening Gloves
-
Heavy-Duty Gardening Gloves protect your hands from thorns, splinters, and soil-borne pathogens, including specific gardening gloves for women.
- Choose gloves that offer both dexterity and durability.
- Product Recommendation:
- Atlas Nitrile Gloves for light, breathable protection
- Leather gloves for heavy-duty tasks like pruning or moving debris
- Atlas Nitrile Gloves for light, breathable protection
Other Spring Essentials
- Long-handled shovel – ideal for digging, edging, and turning compost
- Sturdy rake – perfect for clearing debris and leveling soil
Wheelbarrow or garden cart – saves your back and time when transporting soil, mulch, or plants

Garden Guru Heavy-Duty Stainless Steel Garden Trowel – Rust-Resistant Hand Shovel with Ergonomic Grip for Digging, Planting & Weeding


CobraHead Long Handle Weeder & Cultivator

COOLJOB 2 Pairs Gardening Gloves
Tool Care and Sanitation Tips
Taking care of your tools not only extends their lifespan it helps keep your plants healthy, too.
Cleaning
- After each use, rinse tools with water and wipe off soil and sap.
- For tougher grime, use a wire brush or steel wool.
Sanitizing
Expert Tip: Disinfect tools before moving between plants, especially if dealing with disease. A quick dip in a 10% bleach solution (1 part bleach to 9 parts water) or a spritz of rubbing alcohol works well.
Sharpening
- Keep blades on pruning shears, loppers, and shovels sharp for safer and cleaner cuts.
- Use a sharpening stone or file at the same angle as the blade's bevel.
- Wipe with oil after sharpening to prevent rust.
Proper Storage
- Store tools in a dry, sheltered space like a shed or garage.
- Hang tools or keep them in a bucket of sand mixed with oil to prevent rust and keep them clean between uses.
Planning Your Spring Planting: What, Where, and When
Helps create a thriving garden; it’s the result of smart, strategic planning for your dream backyard. By choosing the right plants for the right spots and understanding when to plant them, you set your garden up for a season full of healthy growth and abundant harvests.
Garden Layout and Design Considerations
Start by visualizing your space. The goal is to create a layout that maximizes sunlight, encourages healthy plant relationships, and allows you to move easily through your garden.
Map Sun Exposure
Observe your garden throughout the day to see where the sun hits and for how long. Most vegetables and flowers need at least 6–8 hours of full sun, so placing sun-loving plants in the right spot is key.
Plan Pathways and Access
Design clear paths between rows or beds so you can water, weed, and harvest without compacting soil or stepping on plants.
Use Companion Planting
Pair plants that benefit each other like basil with tomatoes or marigolds with cucumbers. This natural method helps with pest control, pollination, and nutrient uptake.
Crop Rotation for Soil Health and Pest Prevention
Rotating what you grow in each garden bed is a simple, powerful way to protect your soil and plants:
- Prevents nutrient depletion by alternating heavy feeders (like tomatoes) with soil-builders (like beans).
- Reduces the risk of disease and pests that target specific plant families.
Simple Rotation Tip:
Group crops into categories like leafy greens, root vegetables, fruiting plants, and legumes then rotate each group to a different bed or area each year.
Selecting Seeds vs. Starts: Pros and Cons
Not sure whether to plant from seed or buy seedlings (starts)? Both have benefits here’s how to decide:
🌱 Starting from Seeds
- Cost-effective
- Offers a wider variety of heirloom or specialty plants
- Great for planning early indoors
- Requires space, time, and the right conditions for germination
- Some crops need a head start indoors (e.g., tomatoes, peppers)
Product Recommendation:
Use seed starting trays, grow lights, and peat pellets to boost success for indoor starts.

500 Count- Jiffy 36 MM Peat Soil Pellets Seeds Starting Plugs
Using Starts from a Nursery
- Saves time and simplifies the process
- Ideal for beginners or late starters
- Limited variety compared to seed catalogs
- Higher cost
Understanding Sun Requirements
Different plants thrive in different light conditions. Matching plants to their sunlight needs is essential:
- Full Sun: 6+ hours of direct light (e.g., tomatoes, peppers, sunflowers)
- Partial Sun/Shade: 3–6 hours (e.g., lettuce, spinach, beets)
- Full Shade: Less than 3 hours of direct light (e.g., hostas, some herbs like mint)
Tip: Use a sunlight tracking app or sketch out your space with morning/afternoon sun observations to help with plant placement.
Cool-Season vs. Warm-Season Crops
Knowing when to plant is just as important as what to plant.
Cool-Season Crops
Plant as soon as the soil can be worked and temps are consistently above freezing.
Examples:
- Lettuce
- Peas
- Radishes
- Spinach
Warm-Season Crops
Wait until after the last frost date and when soil has warmed.
Examples:
- Tomatoes
- Peppers
- Beans
- Zucchini
Expert Tip: Check your region’s frost date and count backward to time your seed starts or forward to schedule your transplants.
Think Local: What to Plant Now
Planting times vary by region, so it’s crucial to tune into local advice.
Use Online Tools: Websites like The Old Farmer’s Almanac or PlantMaps allow you to plug in your zip code and get customized planting calendars.
University Extension Offices & Local Nurseries
These are goldmines of regional info including what to plant now, which pests to watch for, and what varieties thrive in your area.
Unique Tip: Create your own planting calendar using regional data organize it by month, crop type, and sun requirement to make seasonal planning easier year after year.
Spring Planting Calendar by Region/Zone
To build a successful spring garden, timing is everything. This regional and seasonal planting calendar is designed to guide you through essential tasks, with seasonal accuracy and zone-specific timing. Whether you're in a mild southern climate or a cold northern zone, this adaptable checklist ensures you stay on track from soil prep to planting.
E-E-A-T Tip: Align your planting with your USDA Hardiness Zone and local last frost dates. Visit plant hardiness.ars.usda.gov or consult a local extension office to determine your zone and frost timelines.
Spring Gardening Checklist by Region/Zone
|
Task Category |
When to Do It |
Details / Pro Tips |
|
Soil Assessment & Cleanup |
As soon as soil is workable (post-hard frost) |
Remove debris, test moisture, and prep beds for amendments. |
|
Soil Testing & Amending |
Early Spring (before major planting) |
Collect soil samples; use a lab or DIY kit. Amend with compost, aged manure, or lime. |
|
Dormant/Early Spring Pruning |
Late Winter – Early Spring (before bud break) |
Prune fruit trees, roses, and deciduous shrubs. Remove dead/diseased limbs. |
|
Start Seeds Indoors |
8–12 weeks before your last frost date (zone dependent) |
Ideal for tomatoes, peppers, herbs. Use trays, grow lights, and peat pellets. |
|
Transplant Cool-Season Crops |
Zones 7–10: Early Spring Zones 4–6: Mid-Spring |
Lettuce, broccoli, kale transplant once soil warms but before heat spikes. |
|
Direct Sow Cool-Season Crops |
Zones 7–10: Early Spring Zones 4–6: Mid-Spring |
Carrots, spinach, peas plant as soon as soil is workable. |
|
Hardening Off Transplants |
1–2 weeks before transplanting outdoors |
Gradually expose seedlings to sun, wind, and fluctuating temps. |
|
Plant Warm-Season Crops |
After all danger of frost (based on local date) |
Tomatoes, squash, peppers wait until nights are consistently above 50°F (10°C). |
|
Apply Mulch |
Late Spring (post-planting, pre-heat) |
Use organic mulch (2–4 inches) to retain moisture and suppress weeds. |
|
Fertilizing (if needed) |
Mid-Spring (once plants show active growth) |
Choose slow-release, organic options; avoid overfeeding. |
Bonus Tip: Turn this checklist into a personal calendar or garden journal. Align each task with your zone-specific frost date and growing conditions.
Common Spring Garden Prep Problems & Practical Solutions
Even the most seasoned gardeners run into a few bumps in the soil. Here are some common spring setbacks and how to solve them strategically.
Problem: Compacted Soil
Common Pain Point: Poor drainage, stunted root growth
✅ Solution:
- Add compost or aged manure
- Use broad forks or aeration tools
- Consider no-till methods to maintain soil structure
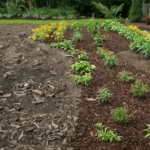
![Side-by-side of compacted vs. amended soil]](data:image/svg+xml;base64,PHN2ZyB3aWR0aD0iMSIgaGVpZ2h0PSIxIiB4bWxucz0iaHR0cDovL3d3dy53My5vcmcvMjAwMC9zdmciPjwvc3ZnPg==)
![Side-by-side of compacted vs. amended soil]](https://homesandlooms.com/wp-content/uploads/2025/09/Side-by-side-of-compacted-vs.-amended-soil-1200x672.webp)
Problem: Stubborn Weeds
Common Pain Point: Overrun with weeds early in the season
Solution:
- Weed consistently in early spring (before seed set)
- Use organic mulch or landscape fabric
- Try cardboard sheet mulching in new beds
Problem: Late Spring Frosts
Common Pain Point: Frost damage to tender plants
Solution:
- Watch local forecasts closely
- Use row covers, frost cloths, or cloches on cold nights
- Always harden off seedlings before transplanting
Tip: Check your area's average last frost date annually it can shift!
Problem: Confusing Soil Test Results
Common Pain Point: Not sure what to do with test readings
Solution:
- Contact your local university extension office
- Start with basics balanced compost, bone meal, or lime depending on pH
Use trustworthy online tools for interpretation (ex: nrcs.usda.gov)
Problem: Feeling Overwhelmed
Common Pain Point: Too many tasks, not sure where to begin
Solution:
- Prioritize: 1) Cleanup → 2) Soil prep → 3) Cool-season planting
- Break tasks into smaller chunks over multiple weekends
- Use checklists and calendars to stay focused and reduce burnout
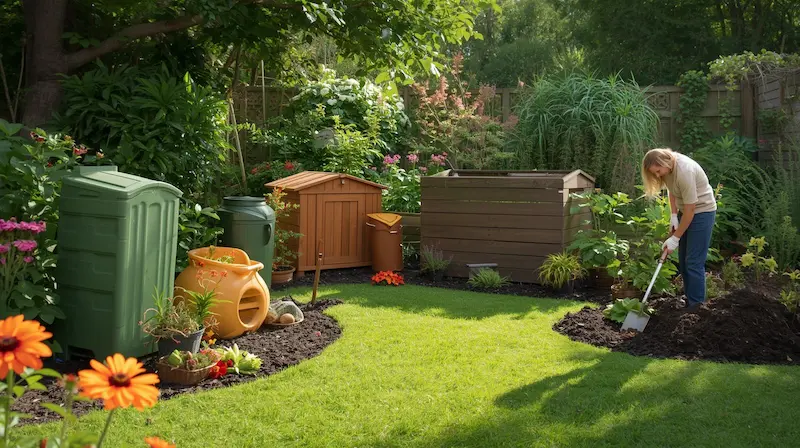
Sustainable & Eco-Friendly Spring Gardening Practices
Spring is the perfect time to build not just a beautiful garden but a resilient, sustainable one. By making thoughtful, eco-friendly choices early in the season, you’ll support the environment while cultivating healthier plants and soil for years to come.
Let’s go beyond the basics and explore practical, planet-friendly techniques to green your garden from the ground up.
Water Conservation Strategies from the Start
Water is precious especially in spring when rainfall patterns can be unpredictable. Smart watering methods not only save resources but also improve plant health.
Expert Tip: Install water-saving systems at the beginning of the season to develop deep root systems and reduce waste.
Best Practices:
- Drip Irrigation & Soaker Hoses
Deliver water directly to plant roots, reducing evaporation and runoff. Perfect for vegetable beds and flower borders. - Rain Barrels
Collect roof runoff to water your garden naturally. Place them under gutters for easy access and free irrigation.
Pro Tip: Pair drip systems with a timer to create a set-it-and-forget-it watering schedule.
Composting & Nutrient Cycling
Composting turns your kitchen and garden waste into rich, living soil a win for both your plants and the planet.
How to Start:
- Use a compost bin or open pile in a sunny, well-drained corner of your yard.
- Balance “greens” (fruit/vegetable scraps, grass clippings) with “browns” (dry leaves, shredded paper).
- Turn weekly for airflow and decomposition.
Why It Matters:
- Adds essential nutrients to your soil naturally.
- Improves soil structure and water retention.
- Keeps organic waste out of landfills.
Compost = Nature’s recycling system.
The Power of Mulch
Mulching is one of the simplest, most effective ways to create a low-maintenance, water-wise garden.
Expert Tip: Apply 2–4 inches of mulch around your plants after planting to protect your soil and retain moisture.
Types of Organic Mulch:
- Shredded Leaves – Free and fast-decomposing
- Wood Chips – Long-lasting, ideal for pathways and perennials
- Straw or Hay – Great for vegetable gardens
Benefits:
- Reduces watering needs
- Suppresses weeds naturally
- Regulates soil temperature
Feeds beneficial microbes as it breaks down
Natural Fertilizers & Soil Amendments
Skip the synthetic stuff your garden thrives best with organic, earth-friendly nutrition.
Safe, Effective Boosts:
- Worm Castings – Rich in nutrients and microbial life
- Compost Tea – A brewed liquid fertilizer made from finished compost
- Kelp Meal – Packed with micronutrients and plant growth hormones
Avoid chemical fertilizers that degrade soil structure over time. Focus on long-term health, not quick fixes.
Creating Pollinator-Friendly Spaces
A sustainable garden is a living ecosystem, not just a collection of plants. By attracting pollinators and beneficial insects, you support food production, biodiversity, and beauty.
How to Attract Wildlife:
- Plant native wildflowers like coneflowers, milkweed, or bee balm
- Include herbs like lavender, thyme, and oregano
- Add shallow water dishes with pebbles for bees and butterflies
- Avoid pesticide use especially neonicotinoids
Biodiversity = Balance. A garden buzzing with life is a healthier, more productive space.
Conclusion: Enjoying Your Prepared Garden
Spring gardening is more than a seasonal task it’s the beginning of a rewarding journey. With a little planning, the right tools, and a commitment to eco-friendly care, you’re setting the stage for a thriving, vibrant space that nourishes both you and the planet.
Key Takeaways
- Strategic preparation ensures stronger, healthier plants from day one.
- Healthy soil is the foundation of a productive garden invest in compost, proper pH, and consistent care.
- Proactive steps like crop rotation, companion planting, and tool maintenance save time and boost yields all season long.
Why It’s Worth It
- Enjoy bountiful harvests and beautiful blooms.
- Spend quality time outdoors, connecting with nature and family.
- Experience the pride of growing your own food sustainably and responsibly.
Keep Growing: Start a Garden Journal
Expert Tip: Use a notebook or app to track your garden’s progress. Include:
- Planting dates & varieties
- Germination and bloom times
- Pest issues and remedies
- Harvest quantities and notes for next year
This habit turns every season into a learning experience and makes your future gardens even more successful.