


DeWalt vs. Milwaukee Guide to Choosing Your Power Tool Brand
October 22, 2025
Transform Your Garden: The Ultimate Guide to Attracting Birds with Native Plants & Landscaping
October 25, 2025
The Power of Perfect Compost
Have you ever started a compost pile with the best intentions, only to find yourself facing a smelly, soggy mess or a dry, stubborn heap that refuses to break down? You’re not alone. Many gardeners start composting with enthusiasm, only to lose interest when the process doesn’t go as planned. What should feel like a natural cycle of renewal often turns into a confusing experiment that ends in frustration.
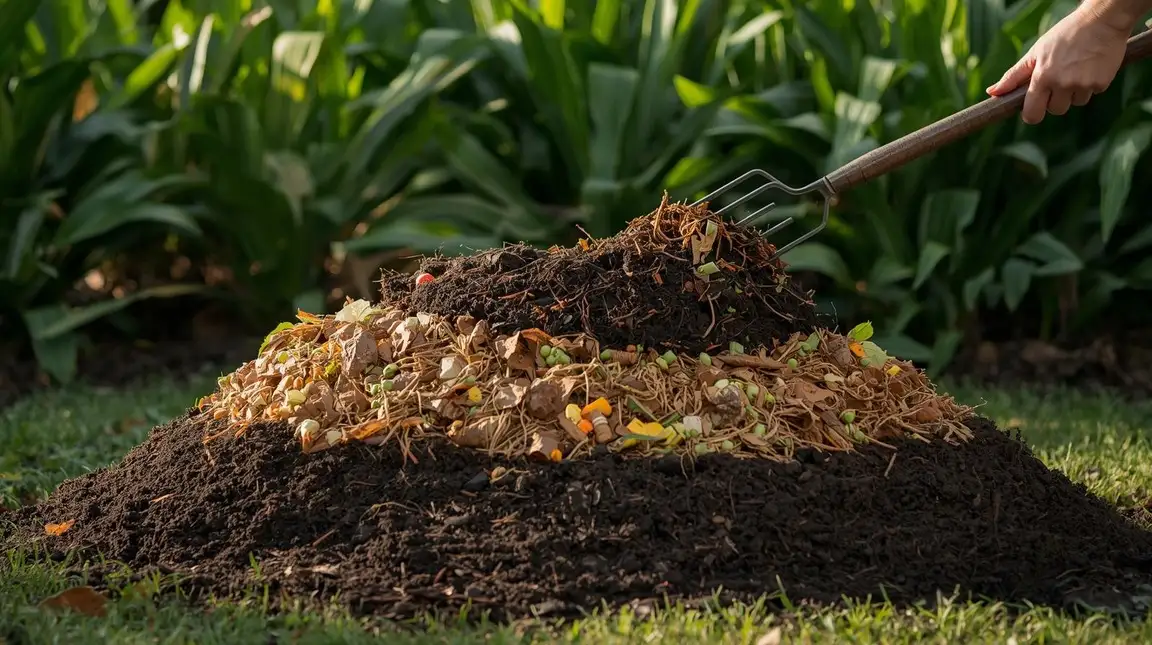
But imagine this instead: your food scraps and yard waste transforming into rich, earthy compost, the kind that crumbles easily in your hands and breathes life into every plant it touches. This “black gold” not only boosts your garden’s health but also helps you live more sustainably by reducing waste and supporting the natural ecosystem around you.
This guide will help you with garden preparation, ensuring success. We’ll uncover the most common composting mistakes and show you simple, proven fixes to keep your pile healthy and active. By the end, you’ll understand how to create nutrient-packed compost that fuels vibrant growth and keeps your garden thriving year-round. Get ready to turn your scraps into success, nd finally master the art of perfect compost.
Understanding the Basics: Why Compost Fails
Every successful compost pile depends on a small but mighty workforce you can’t see: microorganisms. These bacteria, fungi, and other decomposers are the true heroes of composting. They break down organic material into humus, the dark, crumbly substance that enriches your soil. But just like any living organism, they need the right balance of food, water, air, and warmth to thrive. When any of these conditions fall out of balance, decomposition slows down or stalls entirely.
The Unseen Workforce
According to experts from the University of California Agriculture and Natural Resources, composting works because microorganisms feed on organic matter. Bacteria handle the early stages of decomposition, rapidly breaking down soft plant tissues. Fungi, on the other hand, take on tougher materials like wood and leaves, which relates to tree bark care. These organisms need both carbon and nitrogen, along with air, moisture, and warmth, to stay active and efficient.
When these microbes are well-fed and comfortable, they multiply quickly and generate heat as a byproduct of their activity. That heat is a good sign; it means your compost is alive and working. But when conditions aren’t right, the process slows, odors develop, or the pile simply stops breaking down.
The Four Pillars of Decomposition
- Carbon-to-Nitrogen (C: N) Ratio
The balance between “browns” (carbon-rich materials like dry leaves, straw, and cardboard) and “greens” (nitrogen-rich materials like food scraps and grass clippings) is crucial. The ideal C: N ratio, as recommended by the Cornell Waste Management Institute, is roughly 25–30:1. Too much nitrogen makes your pile slimy and smelly, while too much carbon slows decomposition and leaves materials largely unchanged. - Moisture
Microbes need water to function, but not too much. Think of your compost pile as a “wrung-out sponge.” According to Washington State University Extension, optimal moisture keeps microorganisms active without drowning them. A pile that’s too dry won’t decompose efficiently; one that’s too wet turns anaerobic and starts to smell. - Aeration
Oxygen is another key ingredient. Aerobic bacteria , the ones you want , need airflow to survive. Turning your pile regularly ensures oxygen reaches the inner layers and prevents the formation of anaerobic pockets that produce foul odors. Lack of aeration leads to slow, uneven decomposition and that unmistakable rotten smell. - Temperature
Temperature is both a sign and a driver of composting success. Active compost piles can reach between 130°F and 160°F (55°C–70°C), which helps destroy weed seeds and harmful pathogens, ideal for green living.. If your pile stays cool, it’s often a sign that the microbes need more nitrogen, moisture, or oxygen to get back to work.
Connecting the Principles to Common Problems
Every compost issue can be traced back to one or more of these pillars. Too much nitrogen and not enough carbon? You’ll get a slimy, smelly mess. Too little moisture or oxygen? The pile dries out or goes dormant. Insufficient temperature? Your compost might take months longer to mature. Understanding how these factors interact gives you the power to fix problems before they start.
Composting isn’t just about tossing scraps into a pile; it’s about creating the right habitat for your unseen workforce. When you balance carbon and nitrogen, manage moisture carefully, keep air flowing, and monitor temperature, you’re not just making compost. You’re cultivating a living ecosystem that transforms waste into something truly valuable.
The Top 10 Composting Mistakes and How to Master Them
Creating perfect compost is part science, part patience, and part practice. Even the most enthusiastic gardeners make mistakes, but each one is an opportunity to learn. Below are the ten most common composting missteps, along with simple, expert-backed solutions that will help you turn waste into rich, healthy compost with confidence.
Mistake 1: Imbalanced Green-to-Brown Ratio
The Mistake:
Composting relies on the right balance between greens (nitrogen-rich materials like fruit scraps, grass clippings, and coffee grounds) and browns (carbon-rich materials like dry leaves, cardboard, and sawdust). Too many greens create a slimy, smelly mess. Too many browns leave you with a dry pile that barely breaks down.
Compost Clinic Scenario:
“My neighbor’s pile smells like rotten eggs and is a slimy mess! He just keeps adding kitchen scraps.”
Diagnosis:
That odor is a classic sign of too many greens and not enough browns. The pile has gone anaerobic due to a lack of oxygen.
Remedy:
Add a generous amount of dry leaves, shredded paper, or cardboard, and turn the pile thoroughly to reintroduce oxygen.
How to Avoid It:
- Expert Tip: Aim for roughly 2 parts browns to 1 part greens by volume.
- Layering Technique: Alternate thin green layers with thicker brown ones.
Product Recommendation:
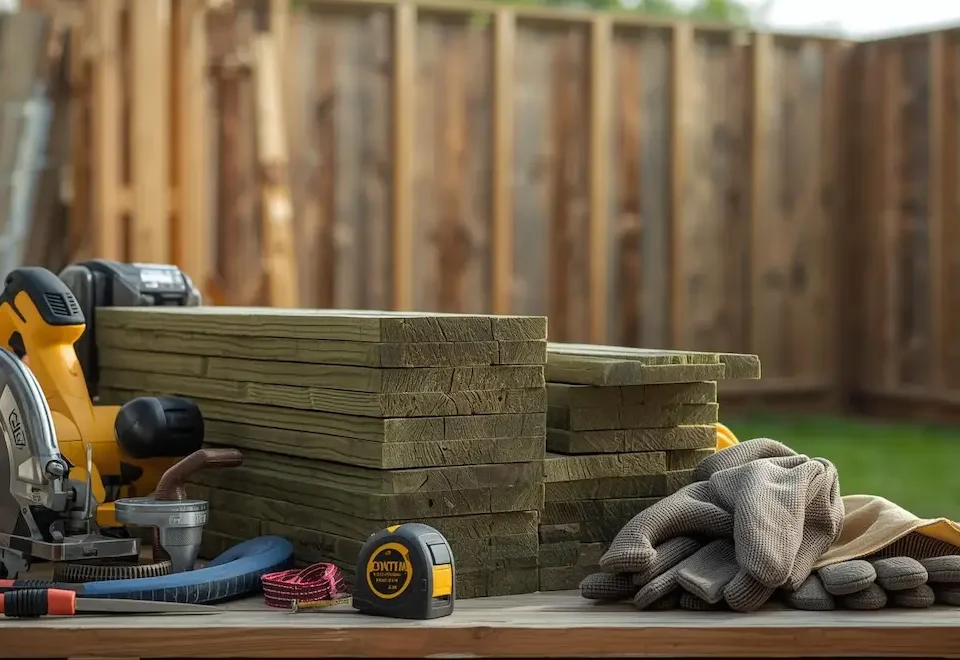
Use a garden shredder/chipper to break woody browns into manageable pieces for faster decay.
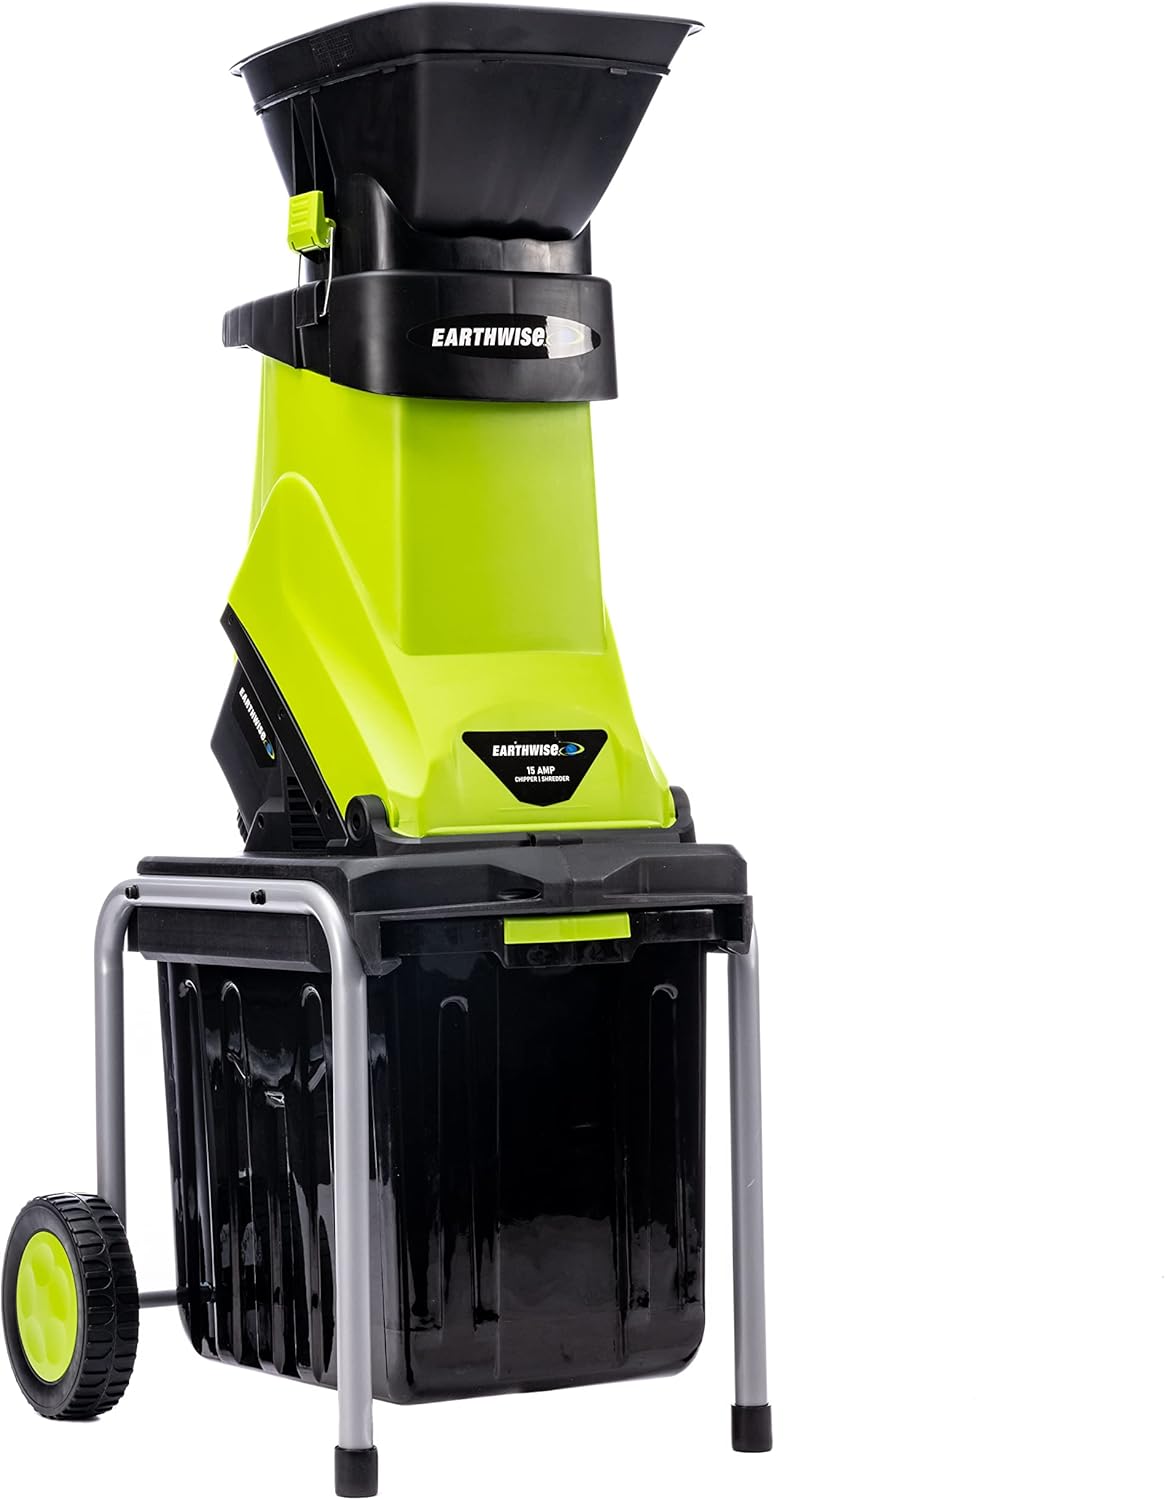
Earthwise GS70015 15-Amp Garden Corded Electric Chipper, Collection Bin
Turn yard waste into valuable compost with the Earthwise 15-Amp Electric Chipper/Shredder. Designed for eco-conscious homeowners, it offers powerful, quiet, and emission-free chipping for branches and sticks—making garden cleanup fast, safe, and sustainable.
The Earthwise Power Tools by ALM Electric Chipper/Shredder is your go-to solution for turning yard debris into compost-ready material. Powered by a robust 15-amp motor, it efficiently chips branches and sticks up to 1.75 inches thick, giving performance comparable to gas-powered models without the noise, fumes, or maintenance.
Its slim, portable design with rear wheels makes it easy to move around your yard, while a 1.2-bushel collection bin keeps cleanup simple. For added safety, the chipper includes a tamper tool to protect your hands and a safety shut-off system with a quick-reset button to prevent motor damage from overloads.
Perfect for homeowners looking to reduce waste, create organic mulch, and build nutrient-rich compost for a healthier garden.
Key Features:
-
Powerful 15-Amp Motor
-
Compost-Ready Output
-
Built-In Safety System
-
Hands-Free Operatio Easy Collection & Cleanup
-
Portable & Compact
-
Eco-Friendly Choice
Mistake 2: Incorrect Moisture Levels (Too Wet or Too Dry)
The Mistake:
A compost pile that’s too wet can become waterlogged, cutting off airflow and inviting pests. A pile that’s too dry halts microbial activity, leaving your compost dormant.
Compost Clinic Scenario:
“My compost looks like dry dust and nothing is happening, even after months.”
Diagnosis:
The pile lacks moisture, so the microbes responsible for decomposition are dormant.
Remedy:
Slowly add water while turning the pile, ensuring even moisture. The goal is a damp, sponge-like consistency.
How to Avoid It:
- Expert Tip: Use the “Squeeze Test.” Grab a handful; it should feel like a wrung-out sponge.
- For wet piles: Add dry browns (leaves, cardboard) and turn often.
- For dry piles: Add water gradually and cover with a tarp to retain moisture.
Product Recommendation:
A moisture meter or garden hose with a spray nozzle makes this easy to manage.

General Tools MMD4E Digital Moisture Meter, Moisture Tester, Pin Type, Backlit LCD Display With Audible and Visual High-Medium-Low Moisture Content Alerts, Grays
The General Tools Moisture Meter is an essential tool for homeowners, DIYers, and professionals looking to detect and prevent water damage and mold growth. Its built-in humidity sensor quickly determines whether your home has unsafe moisture levels, helping you take early action before black mold can develop.
Ideal for checking wood, drywall, and concrete, this handheld device provides instant readings on a backlit LCD display with easy-to-understand icons and audible moisture alerts (low, medium, high). Use it to test water stains, monitor leaks, or verify if surfaces have fully dried after remediation.
It comes equipped with stainless steel measuring pins, a protective cap that doubles as a calibration checker, and a 9V battery, so it’s ready to use right out of the box.
Key Features:
-
Accurate Moisture Detection: Measures moisture from 5–50% in wood and 1.5–33% in drywall or masonry.
-
Built-In Humidity Sensor: Identifies high dampness levels to help prevent black mold.
-
Early Leak Detection: Quickly checks suspicious water stains or areas affected by leaks.
-
Visual & Audible Alerts: Low, medium, and high tone indicators with on-screen icons for fast interpretation.
-
User-Friendly Design: Backlit LCD with large 0.3" digits for easy reading in any lighting.
-
Complete Kit: Includes spare stainless steel pins, calibration cap, and 9V battery.
-
Trusted Brand: General Tools is known for precision instruments built for pros and homeowners alike.
Mistake 3: Lack of Aeration and Turning
The Mistake:
Oxygen is essential for aerobic microbes to do their work. Without enough airflow, your compost becomes compacted, smells bad, and decomposes slowly.
Compost Clinic Scenario:
“My compost pile smells like ammonia, and I’ve never turned it. It’s just a big, dense lump.”
Diagnosis:
Poor aeration has led to anaerobic decomposition and nitrogen loss.
Remedy:
Turn the pile thoroughly, breaking up clumps and mixing in dry browns to improve structure and airflow.
How to Avoid It:
- Expert Tip: Turn your compost every few days to once a week during active decomposition.
- Use an aerator tool or garden fork to mix from the outside in.
- Regular turning speeds decompose, distribute moisture, and stabilize temperature.
-
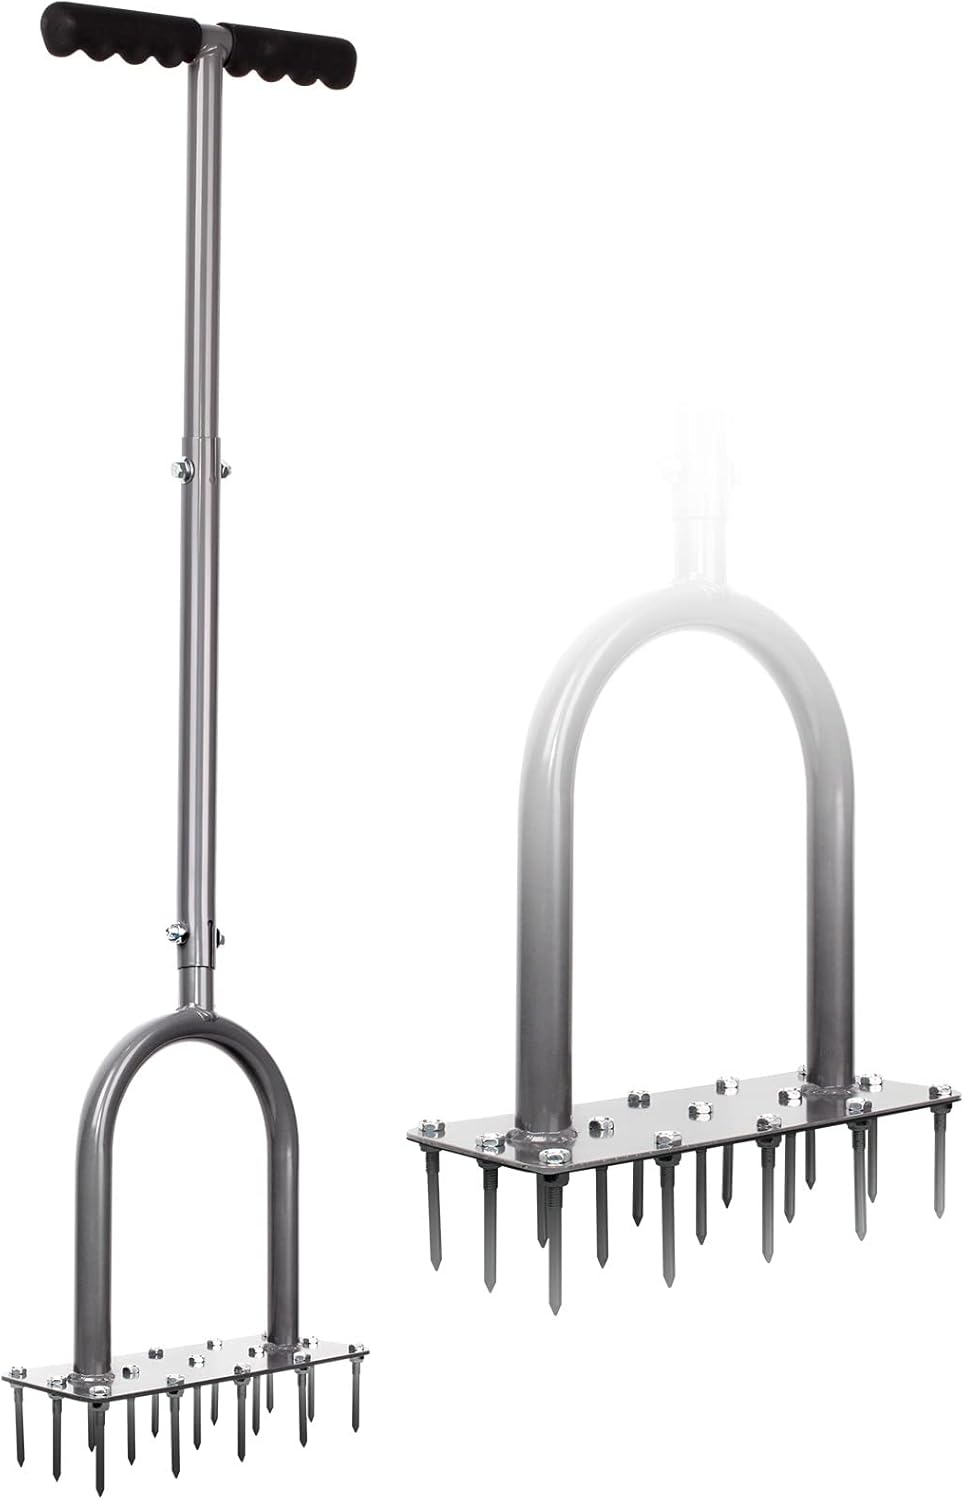
Product Recommendation:
A compost aerator/fork designed for easy turning.
Mistake 4: Adding the Wrong Materials
The Mistake:
Not everything biodegradable belongs in the compost bin. Certain items attract pests, release odors, or introduce harmful pathogens.
Avoid these:
Meat, dairy, oily foods, diseased plants, pet waste, synthetic materials, and chemically treated wood or grass clippings.
Compost Clinic Scenario:
“I put all my leftover chicken bones and grease into the compost, and now I have raccoons visiting every night!”
Diagnosis:
Animal products and fats are attracting pests and causing odor issues.
Remedy:
Remove the animal-based materials and secure the bin. Stick to plant-based kitchen scraps only.
How to Avoid It:
- Keep a clear list of what’s compostable.
- Understand that fats, proteins, and chemicals disrupt microbial balance.
- Regional Tip: In wildlife-prone areas, consider a sealed compost tumbler to deter pests.
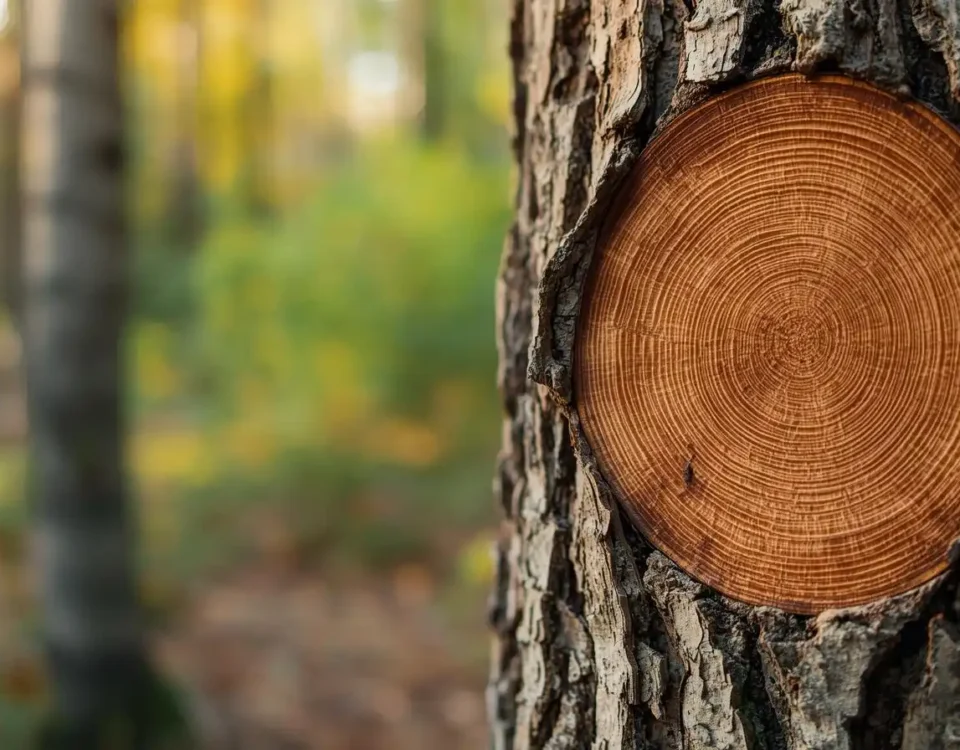
Mistake 5: Insufficient Material Breakdown (Too Large)
The Mistake:
Large pieces of waste take much longer to decompose because microbes can only work on the surface area available.
Compost Clinic Scenario:
“My friend throws whole branches and giant vegetable stalks into his pile, and it’s taking forever to break down!”
Diagnosis:
The pieces are too big for microbes to break down efficiently.
Remedy:
Chop or shred larger items before adding them. Smaller pieces decompose faster and more evenly.
How to Avoid It:
- Expert Tip: Keep material pieces 1–2 inches in size.
- Pre-process waste with pruners or a shredder before composting.
Product Recommendation
A shredder/chipper for branches or sturdy stalks.
Mistake 6: Impatience and Premature Harvesting
The Mistake:
Using compost before it’s fully matured can harm plants and undo your hard work.
Compost Clinic Scenario:
“My neighbor used compost that still had visible leaves, and now his plants look yellow.”
Diagnosis:
He used immature compost, which tied up nitrogen in the soil, starving the plants.
Remedy:
Wait until compost is dark brown, crumbly, and smells earthy. No recognizable material should remain.
How to Avoid It:
- Mature compost has a uniform texture and pleasant smell.
- Expert Tip: Perform a germination test. If seeds sprout well in your compost, it’s ready.
- Be patient; rushing this step can hurt your soil health.
Mistake 7: Ignoring Compost Temperature
The Mistake:
Temperature indicates microbial activity. A cold pile decomposes slowly and may not kill weed seeds or pathogens.
Compost Clinic Scenario:
“My pile never gets warm, even though I add greens and browns. It’s just sitting there.”
Diagnosis:
The mix lacks nitrogen or aeration, preventing the pile from entering its “hot” phase.
Remedy:
Add more fresh greens, moisten evenly, and turn the pile to stimulate oxygen flow.
How to Avoid It:
- Ideal compost temperature: 130–160°F (55–70°C).
- Use a compost thermometer to track progress.
- A cold pile usually needs better C: N balance, moisture, or airflow.

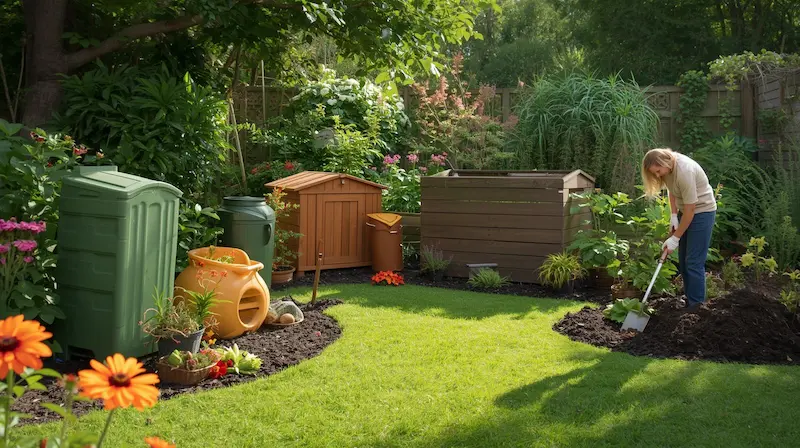
Mistake 8: Poor Compost Bin Location or Design
The Mistake:
Where you place your compost bin matters more than most think. Too much sun dries it out; too much shade makes it soggy and cold.
Compost Clinic Scenario:
“I put my compost bin against my house in full sun, and it’s always bone dry.”
Diagnosis:
Excessive heat and sun exposure are evaporating moisture too quickly.
Remedy:
Move the bin to a partially shaded, well-drained area that stays moderately moist.
How to Avoid It:
- Choose a shaded spot that’s easy to reach.
- Consider your climate: adjust for heat, cold, or rainfall.
-
Product Recommendation:
A compost bin or tumbler that promotes airflow and is pest-resistant, ideal for small gardens or urban areas.
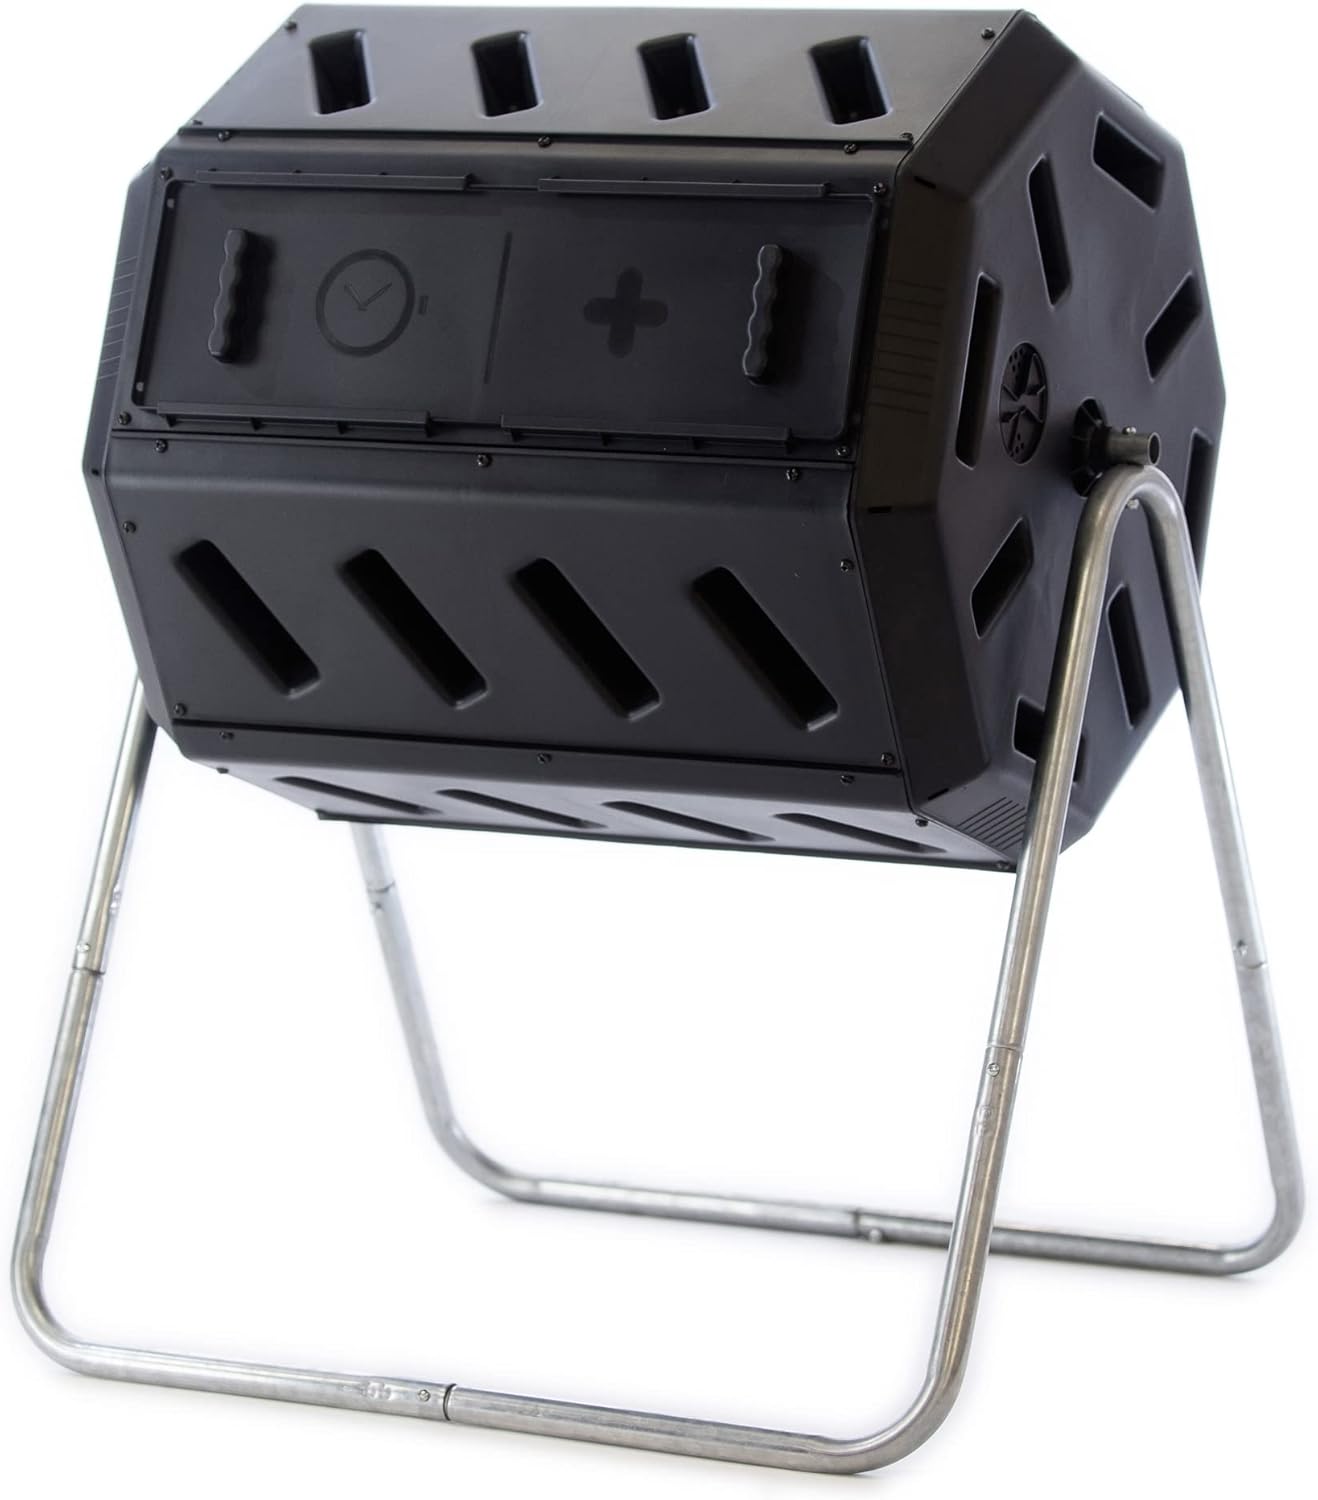
FCMP Outdoor IM4000 Dual Chamber Tumbling Composter Canadian-Made, 100% Recycled Resin - Outdoor Rotating Compost Tumbler Bin for Garden, Kitchen, and Yard.
This 8-sided dual-chamber tumbling composter simplifies the composting process, eliminating the need for hand-turning or manual mixing. Just fill one side, close the door, and rotate the barrel 5–6 times every few days—it’s that easy. Under warm, sunny conditions with a proper ingredient balance, you can get finished compost in as little as two weeks.
With two separate chambers, you can keep one side curing while adding fresh scraps to the other ensuring a continuous supply of rich, organic compost for your garden. The deep fins and aeration holes improve airflow, prevent clumping, and speed up decomposition.
Built from UV-inhibited, BPA-free, 100% recycled polypropylene and supported by a galvanized steel frame, this composter resists corrosion, sun damage, and wear for long-lasting performance.
Mistake 9: Overloading with a Single Material Type
The Mistake:
Using mostly one material, like grass or leaves, creates an imbalance and limits nutrient diversity.
Compost Clinic Scenario:
“I only add grass clippings, and now my compost is a smelly, solid block.”
Diagnosis:
Excess nitrogen from grass has compacted the pile and caused anaerobic decay.
Remedy:
Mix in dry browns like shredded leaves or cardboard, and turn frequently.
How to Avoid It:
- Maintain variety; every addition should bring something new to the mix.
- Layer greens and browns evenly over time.
- Alternative Tip: If food scraps are piling up, try vermicomposting. Worms handle nitrogen-rich materials effectively indoors or in tight spaces.
Mistake 10: Neglecting the Compost Ecosystem
The Mistake:
Compost isn’t “set it and forget it.” It’s a living ecosystem that needs ongoing attention.
Compost Clinic Scenario:
“My compost pile was great for a few weeks, but I stopped checking it, and now it’s cold and lifeless.”
Diagnosis:
Neglect has caused moisture loss and microbial slowdown.
Remedy:
Re-engage: check moisture, add fresh material, and give it a full turn to reactivate decomposition.
How to Avoid It:
- Check your pile weekly for moisture, temperature, and balance.
- Adjust seasonally, insulate during winter, and water more in summer.
- Expert Tip: Treat composting like gardening; regular care brings consistent results.
Compost Health Check Quiz
Not sure what's going wrong with your compost? This quick check will point you in the right direction.
1. What does your compost pile smell like?
2. What's the texture or moisture level of your pile?
3. Is your pile heating up?
4. What materials have you added most recently?
Your Compost Diagnosis
✅ Great News - Your Compost is Healthy!
Your compost is active and balanced. Keep doing what you're doing!
- Continue maintaining your current green-to-brown ratio
- Keep monitoring moisture levels
- Turn the pile regularly to maintain aeration
🌿 Too Much Nitrogen
Your compost has too many greens (nitrogen sources).
- Add more browns: dry leaves, straw, cardboard, paper
- Turn the pile to improve aeration
- Review your green-to-brown ratio (aim for 1:2 or 1:3)
💨 Anaerobic Conditions
Your pile lacks oxygen and has gone anaerobic.
- Turn the pile immediately to introduce air
- Add coarse browns like small twigs or straw
- Ensure proper drainage to prevent waterlogging
🏜️ Too Dry
Your compost needs more moisture to support microbial activity.
- Add water gradually while mixing the pile
- Use a hose with spray attachment for even distribution
- Add fresh greens which contain moisture
💦 Too Wet
Your compost is waterlogged and needs drying out.
- Turn the pile to evaporate excess moisture
- Add dry browns like shredded paper or dry leaves
- Ensure proper drainage and cover during heavy rain
❄️ Inactive Pile
Your compost isn't heating up and microbial activity is low.
- Add more greens to boost nitrogen
- Check moisture levels - add water if too dry
- Turn the pile to incorporate oxygen
🥀 Too Much Carbon
Your compost has too many browns, slowing decomposition.
- Add more greens: kitchen scraps, grass clippings
- Chop or shred brown materials to speed breakdown
- Ensure proper moisture for microbial activity
🔄 Lack of Diversity
Using only one type of material limits decomposition.
- Mix different materials for balanced nutrition
- Include various greens and browns in each layer
- Add finished compost or soil to introduce microbes
Compost Troubleshooting Guide
Here’s a practical, easy-to-scan reference table you can use when your compost isn’t behaving as expected. Each row lists a common symptom, what it means, how to recognize it, and what to do next.
|
Symptom |
Observable Indicators |
Likely Cause |
Quick Fix / Solution |
|
Pile smells like ammonia |
Sharp, chemical odor similar to fertilizer; steam may be absent |
Too much nitrogen (too many “greens”) |
Add dry browns like shredded cardboard, dry leaves, or straw. Turn the pile thoroughly to introduce air. |
|
Pile smells like rotten eggs or sewage |
Sour, sulfur-like odor; dense, soggy texture |
The pile has gone anaerobic, too wet, or compacted |
Add coarse, dry browns (wood chips, straw). Turn several times to aerate. Reduce watering. |
|
The pile is cold and dry |
Feels dusty or crumbly; no warmth or odor |
Not enough moisture for microbial activity |
Lightly moisten the pile while turning until it feels like a wrung-out sponge. Cover with a tarp to retain humidity. |
|
The pile is cold and wet |
Heavy, soggy, and cold to the touch; clumps together |
Too compacted or too many greens |
Mix in dry browns (shredded paper, dried leaves). Turn often to reintroduce oxygen. |
|
Pile attracts flies or pests |
Fruit flies hovering; rodents digging; scraps visible |
Exposed food waste or inclusion of meat/dairy |
Bury food scraps deep inside the pile. Avoid meat, dairy, or oily foods. Cover with browns after every layer of greens. |
|
The pile is not heating up |
Feels the same temperature as the air; decomposition is slow |
Insufficient nitrogen, pile too small, or too dry |
Add more greens (fresh grass, vegetable scraps). Check moisture. The pile should be at least 3x3 feet for insulation. |
|
Pile has large, recognizable chunks |
Visible pieces of leaves, twigs, or food |
The materials are too large or not well mixed |
Chop or shred large materials before adding. Turn regularly to ensure even decomposition. |
|
Compost looks slimy, not crumbly |
Feels sticky or clumped together; smells slightly sour |
Too much moisture and poor airflow |
Add bulky browns (corn stalks, wood chips). Turn often. Leave the lid off for a few days to dry it out. |
|
Compost is taking too long to finish |
Pile looks inactive for months; texture remains coarse |
Insufficient aeration, moisture, or poor balance |
Turn more frequently. Adjust moisture. Check your C: N ratio (around 25–30:1). Shred new inputs to speed breakdown. |
|
Weeds sprouting in compost |
Small plants or grass emerging from the pile |
Compost is not hot enough to kill seeds |
Make sure the pile reaches 130–160°F for several days. Turn to redistribute heat. Let the compost cure before use. |
Practical Tip:
A compost thermometer (available from most garden centers or online) is one of the best tools to track your pile’s health. A reading between 130–160°F (55–70°C) means your microbes are active and pathogens are being destroyed.
The Rewards of Flawless Composting
When your composting process runs smoothly, the payoff goes far beyond a cleaner bin or a pile that smells fresh and earthy. Perfect composting transforms your garden’s health, cuts costs, and supports a more sustainable way of living. It’s where environmental responsibility meets personal reward.
Supercharging Your Soil
Healthy soil is the foundation of every thriving garden, and compost is nature’s best soil conditioner. When mixed into garden beds, it improves soil structure, helping loose, sandy soils retain moisture and making heavy clay soils drain more effectively. The result is soil that breathes and holds just the right amount of water, a perfect environment for plant roots to grow strong and deep.
Compost also delivers a steady supply of nutrients. It’s rich in essential macro nutrients like nitrogen, phosphorus, and potassium, along with trace minerals such as calcium, magnesium, and iron that plants need in smaller but critical amounts. Unlike synthetic fertilizers, compost releases these nutrients slowly, ensuring consistent feeding without the risk of burning roots or causing nutrient runoff.
Boosting Plant Vigor and Health
Plants grown in compost-enriched soil are noticeably more robust and resilient. The organic matter encourages beneficial microbes that suppress harmful pathogens and improve nutrient uptake. Over time, your plants develop stronger immune systems, reducing their susceptibility to diseases and common garden pests.
Compost-fed plants often require fewer chemical fertilizers and pesticides, which not only saves money but also keeps your soil ecosystem in balance. Gardeners who switch to organic composting practices often notice better yields, brighter blooms, and overall improved plant vitality.
Environmental Sustainability and Cost Savings
Flawless composting is a win-win for both you and the planet. Every banana peel, coffee ground, or fallen leaf you compost is one less item sent to the landfill. Organic waste that decomposes in landfills produces methane, a greenhouse gas over 25 times more potent than carbon dioxide. By composting, you significantly reduce your household’s carbon footprint and help mitigate climate change.
And from a financial perspective, the benefits add up. Instead of purchasing commercial fertilizers, soil conditioners, or mulch, your compost becomes a free, renewable source of fertility for your garden. Over time, you’ll notice lower costs and richer harvests, proof that sustainability can be both environmentally and economically rewarding.
Expert Tip: Harness Compost Leachate
If your compost pile is healthy and well-balanced, you might notice a dark, tea-colored liquid draining from the bottom. This is compost leachate, often called “compost tea.” When properly diluted (about one part leachate to ten parts water), it becomes a nutrient-rich liquid fertilizer that plants love.
Apply it directly to the soil around your plants or use it as a foliar spray for a quick nutrient boost. Just make sure your compost system is aerobic (odor-free and well-aerated), as leachate from anaerobic compost can harbor harmful bacteria. Used correctly, compost tea is an excellent, sustainable way to give your plants an extra dose of natural nourishment.
The Zero-Waste Composter’s Playbook
Composting is more than a gardening technique; it’s a cornerstone of a zero-waste lifestyle. By recycling your kitchen and garden scraps into valuable soil amendments, you close the loop on your household’s waste cycle. Every peel, leaf, and coffee filter becomes part of a self-sustaining system that supports both your garden and the planet.
Mastering composting teaches you to see waste differently, not as something to discard, but as raw material for growth. Whether you’re growing vegetables, maintaining a flower garden, or caring for houseplants, effective backyard planning turns everyday habits into an act of renewal.
In essence, flawless composting isn’t just about creating perfect soil; it’s about cultivating a mindset of sustainability. Each small pile of compost represents a larger commitment to living responsibly, resourcefully, and in harmony with nature.
Conclusion: Your Journey to Composting Success
You now have the knowledge and tools to take control of your composting process, to diagnose, adjust, and transform what might once have felt like a messy experiment into a reliable, rewarding routine. Every challenge you’ve faced, from sluggish piles to unpleasant odors, can now become a learning experience that moves you closer to producing rich, earthy compost your garden will thrive on.
Remember, composting isn’t about perfection; it’s about progress. The more you observe, tweak, and understand your pile, the better your results will become. Even experienced composters still experiment with ratios, materials, and techniques. What matters most is consistency, feeding your pile the right balance of greens and browns, maintaining moisture like a wrung-out sponge, and keeping it well-aerated. Over time, you’ll develop a natural sense for what your compost needs, and that’s when the process starts to feel effortless.
So don’t wait for the “perfect” moment to begin. Start applying these tips today. Watch how your kitchen scraps and yard waste turn into nutrient-rich compost, your very own “black gold.” The payoff will be visible in your soil’s texture, your plants’ vigor, and the satisfaction of knowing you’re reducing waste while nourishing the planet.
Your garden will thank you with stronger growth, brighter blooms, and healthier harvests. And the planet will thank you too, for every bit of organic matter you recycle, every ounce of methane you prevent, and every handful of life-giving compost you return to the earth.