


The Ultimate Guide to Barrier-Free Shower Pans & Bases Design, Installation, & Top Product Reviews for Seamless Accessibility
December 3, 2025
The Ultimate Guide to Choosing Shower Windows: Balancing Light, Privacy & Bulletproof Waterproofing
December 9, 2025
The tool you never thanked
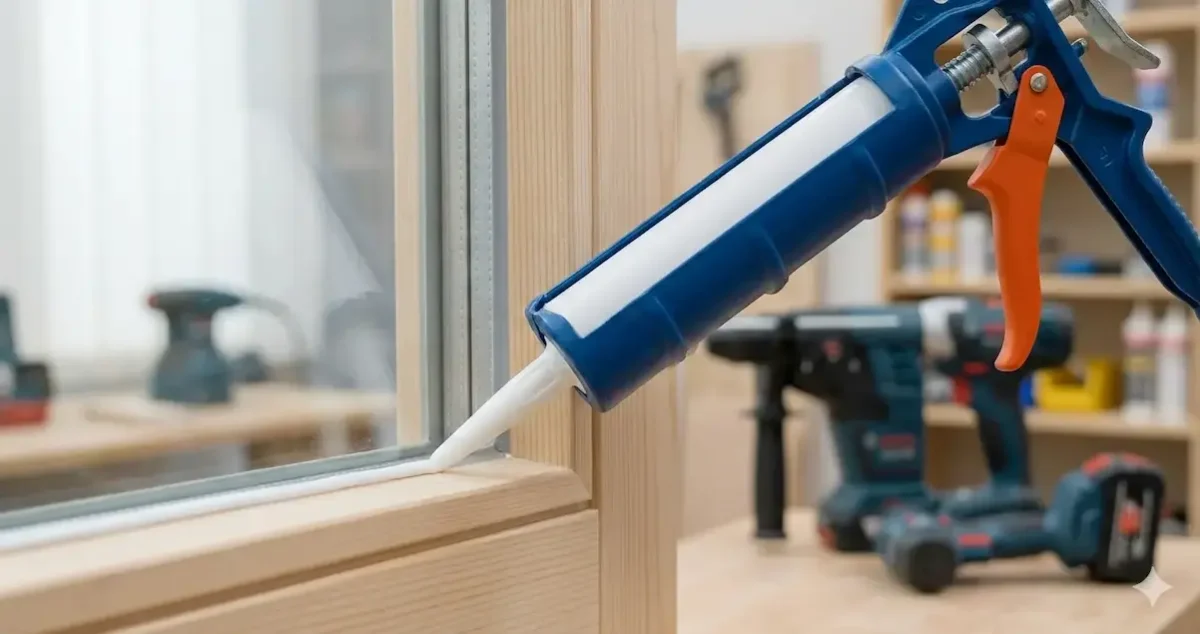
You know the moment: you tackle a simple seal along a bathtub or window, and it ends up ragged, gummy, or full of gaps. Suddenly, a twenty-minute fix turns into a frustrating hour of scraping and redoing. Most of us blame the caulk or our skill. The real culprit is usually overlooked: the caulk gun.
Think of the caulk gun as the difference between a messy patch and a finish that looks like it was done by a pro. The right gun gives you smooth, even beads, less wasted material, and far less hand strain. It changes a fiddly chore into a predictable, even satisfying task.
In this guide, we will take that overlooked tool seriously. I’ll show you why choosing the right caulk gun matters more than you might expect, and how that single choice affects precision, waste, speed, and ultimately how your project looks when it’s done.
What you’ll get from this guide
I’ll walk you through the types of caulk guns, the features that actually matter, and how to match a gun to the job at hand. Whether you’re sealing a bathroom, weatherproofing windows, or finishing trim, you’ll learn how to pick a tool that makes clean work the norm, not the exception. Expect practical tips, clear comparisons, and checklists you can use on the job.
Credibility and method
This is not an opinion without basis. The recommendations that follow come from hands-on tests, interviews with experienced tradespeople, and a strict evaluation process that measures ease of use, control, bead consistency, and durability. You’ll get honest pros and cons so you can choose confidently.
Why your choice of caulk gun matters more than you think
A clean bead isn’t just about steady hands. The tool you hold shapes everything from the flow of the material to the way your wrist feels after a long project. A good caulk gun gives you control, saves product, and helps you get a finish that looks intentional instead of rushed.
A better tool gives you better control.
A well-designed caulk gun lets you control the bead size and placement. It gives you a smooth squeeze instead of the jerky push that cheaper guns often create. If you’ve ever ended up with thick blobs in one spot and thin gaps in another, you’ve felt the effect of a gun that doesn’t regulate pressure well.
Less waste and fewer drips
Cheap guns often ooze as soon as you stop squeezing. That wasted material adds up and makes a mess of trim, corners, and tile edges. A quality gun is designed to limit drips, hold pressure evenly, and avoid sudden spurts. It helps you save caulk and keeps cleanup far easier.
Less strain on your hands
Hand fatigue is one of the most common complaints among DIYers. A poor grip angle or stiff trigger can tire your hand before you’ve finished a single room. Better tools focus on ergonomic grips, smooth triggers, and even pressure distribution. They let you work longer without your hands cramping or your wrist aching.
Finishes that look professional
A clean joint doesn’t just look good. It also holds up longer and resists moisture better. When your tool lays down a smooth, even bead, you get tighter seals, better adhesion, and a result that doesn’t break down prematurely. Readers often say this matters most. They want something that both looks sharp and lasts.
Durability that saves money
Many budget guns fail early or lose their tension, which leads to sloppy results. A reliable caulk gun keeps its grip strength, trigger control, and smooth action for years. It’s worth paying a little more to avoid buying replacements or redoing projects that didn’t seal correctly.
Understanding the different types of caulk guns
Manual guns: simple and dependable
Manual models are the most common. They’re easy to use and fit most standard tubes.
Ratchet rod caulk guns
These are built with a serrated rod that moves forward one click at a time.
- Affordable and available almost everywhere.
- Less control
- More hand fatigue
- Prone to dripping when you pause.
Best for: Light, occasional fixes using standard sealants.
Smooth rod caulk guns
These use a smooth pressure rod and usually include a quick-release lever.
- Smoother action
- Better control
- Fewer drips
- Less strain.
- A bit more expensive than ratchet styles.
Best for: Regular DIY use and general sealing needs.
Drip vs. dripless mechanisms
Drip-less models automatically pull back pressure when you release the trigger. This helps stop the caulk from oozing. Drip-style guns do not do this, so you’re more likely to get slow leakage.
Why it matters: Cleaner work and less wasted material.
Pro tip: Even with drip-less guns, release the trigger and gently pull back the rod to stop residual flow.
Gear ratios and thrust
Gear ratio refers to how much power you get with each squeeze. Common ratings include 10:1, 12:1, and 18:1.
Why it matters:
Higher ratios push out thicker caulk more easily and reduce how hard you need to squeeze.
If you’ve fought with cold tubes or dense sealants, a higher thrust gun makes a big difference.
Electric and battery-powered caulk guns
These models use a motor to push out the material for you.
- Very consistent flow
- Great for long runs
- Fewer drips
- Less fatigue
- Perfect for thick sealants.
- More expensive
- Heavier, and requires battery charging.
Best for: Professionals, large projects, and anyone with hand strength concerns.
Recommended model: DeWalt DCE560B 20V MAX Cordless Caulk Gun.
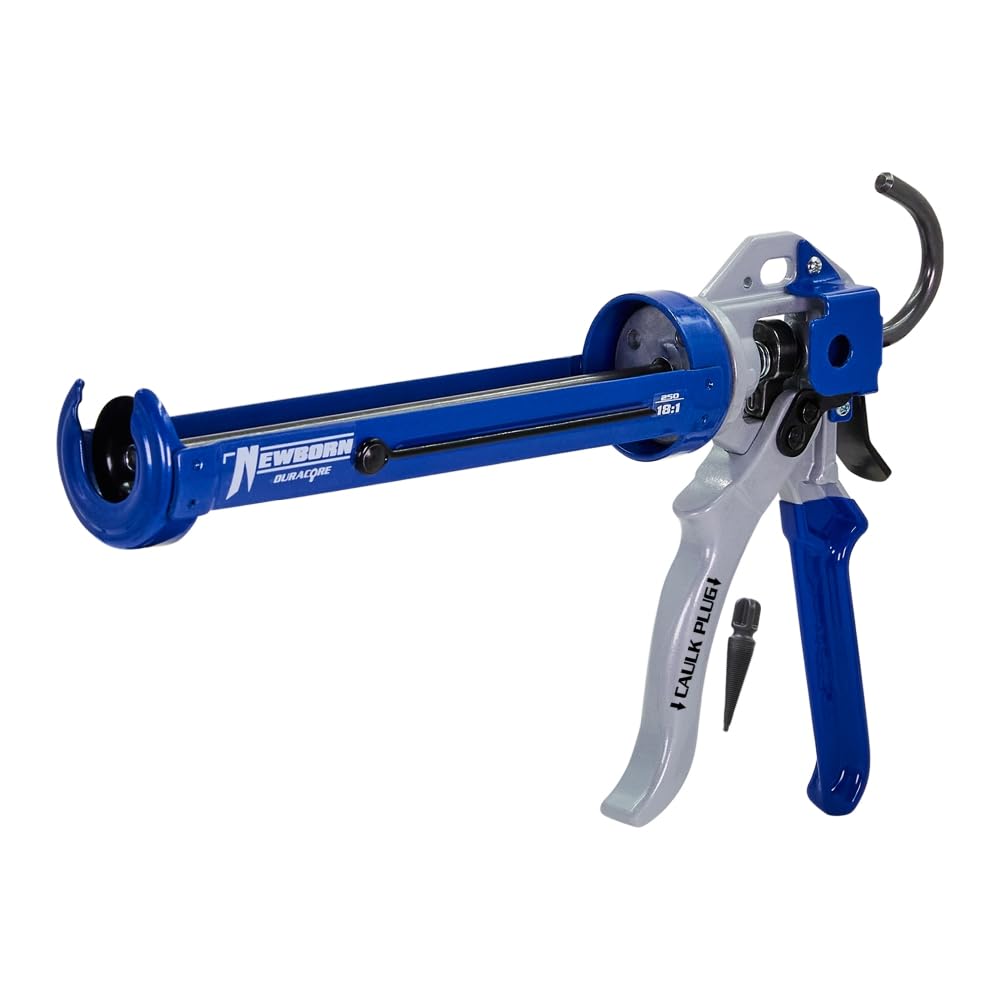
Newborn Pro Drip-Free Hex Rod Cradle Caulk Gun with Gator Trigger Comfort Grip
Newborn Cradle Caulk Gun
DEWALT 20V MAX Caulking Gun, Cordless, 10oz, Variable Speed Trigger, Interchangeable Canister Trays
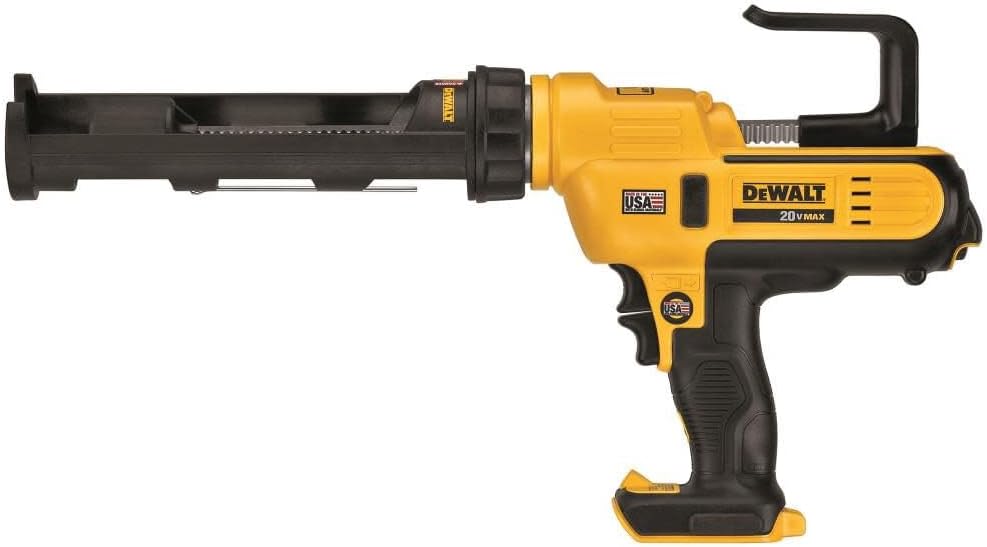
DEWALT 20V Caulking Gun interchangeable
Key features to consider when buying a caulk gun
Choosing a caulk gun is easier when you know what actually affects how it performs. The right features can make the difference between a smooth, controlled line and a frustrating cleanup job after ward.
Gear ratio and thrust
Gear ratio tells you how much pushing force you get with each squeeze. A lower ratio works fine for thin materials like latex caulk. Thicker sealants or construction adhesives need something stronger.
For DIY users, a moderate ratio gives a good balance of control and comfort. Professionals often prefer higher ratios because they speed up work and handle dense materials without straining their hands. If you work with heavy sealants often, the upgrade pays off in both time and effort.
Drip or drip-less mechanisms
A drip-less gun releases pressure when you stop squeezing, which helps prevent oozing. This saves product and keeps the trim and tile edges cleaner. If you’ve dealt with caulk leaking after you’ve paused, a dripless mechanism solves that headache. It’s a small feature that makes a big impact on neatness and material use.
Ergonomic design and handle comfort
This is one of the most underrated factors. The frame material, grip style, and trigger shape all affect how your hand feels after a long run. Metal frames offer stability and durability, while composite bodies can reduce overall weight.
Soft-grip handles and smooth triggers help reduce strain. People with smaller hands often prefer narrower grips. If you’re prone to wrist tightness or repetitive strain, look for models with a lighter pull and better leverage. Comfort isn’t a luxury here. It directly affects how well you control the bead.
Construction materials and durability
A good caulk gun is built to last. Metal frames, reinforced handles, and sturdy plungers stand up to regular use. Plastic parts tend to wear out faster, especially around pivot points and trigger joints.
Understanding where guns typically fail helps you spot better builds. Handles can bend, rods can warp, and cheap triggers can lose tension. Reputable brands often offer replacement parts, which saves money and keeps the tool in service longer.
Cartridge size compatibility
Most homeowners use standard 10-oz tubes, but larger 20 or 30-oz guns are available for heavy use. Bigger cartridges mean fewer reloads on large jobs like siding or flooring. Some guns offer adapter kits that let you switch between sizes, which adds flexibility if you take on a mix of projects.
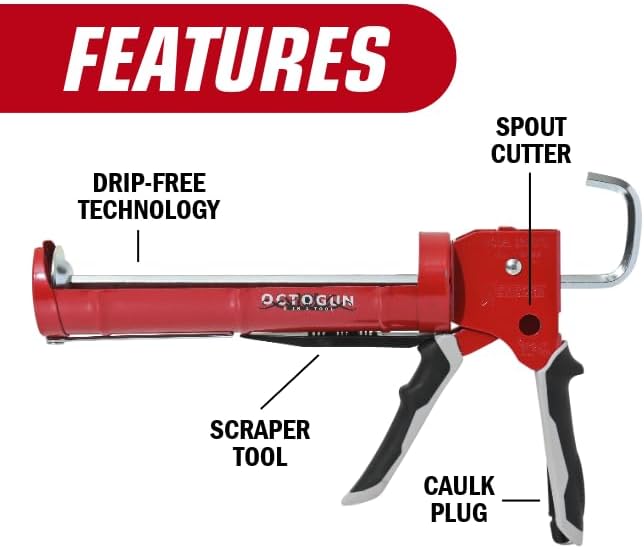
Useful built-in features
Some details seem small until you’re mid-project.
- Puncture tool: Built to break the inner foil seal of the tube.
Pro tip: Make sure the seal is fully punctured before loading the tube to avoid sudden bursts of pressure. - Spout cutter: Lets you trim the nozzle to the size you need.
Pro tip: Cut at a slight angle and start with a smaller opening. You can always widen it if needed. - Ladder hook: Letting the gun hang from a rung means you don’t have to set it down on crowded job sites.
These features speed up your workflow and cut down on interruptions. They’re simple upgrades that make the tool easier to use in real situations.
How to choose the right caulk gun for your project
Picking a caulk gun becomes much simpler when you match the tool to the job. Different tasks call for different levels of control, strength, and convenience. Here’s a clear breakdown to help you choose with confidence.
Light-duty home repairs
For quick fixes like sealing window frames or filling small gaps, a basic manual drip or smooth rod gun is all you need. These are simple to load, easy to handle, and affordable.
Recommended model: Newborn 101 Super Sturdy Caulk Gun. It’s a solid starter tool for light tasks and keeps things predictable without unnecessary features.
Medium-duty DIY projects
Bathroom remodels, trim work, and similar projects demand more precision. A high-quality manual, drips,s smooth rod gun give you cleaner lines and better control. The dripless mechanism prevents unwanted flow, which saves time on cleanup.
Recommended model: Newborn 250 Smooth Rod Caulk Gun. It offers comfort, smooth action, and consistent performance for most household jobs.
Heavy-duty adhesives and sealants
Thicker materials like sub floor
adhesive or concrete repair compounds require more force. A high gear ratio manual gun or a powered model will help you dispense these compounds without straining your hands.
Pain point solved: Fighting with dense sealants becomes much easier with more thrust.
Recommended models: Dripless Inc. ETS2000 Ergo Composite Caulk Gun or Cox Power flow Plus. Both deliver strong pushing power with less fatigue.
Large-scale professional applications
Commercial projects often involve high-volume work and thicker materials. Electric, battery-powered, pneumatic, or bulk-loading guns provide a consistent flow and reduce strain over long workdays. They also speed up production.
Best use case: Construction crews, large renovations, and anyone applying sealant for hours at a time.
Industry considerations and material viscosity
Sealant manufacturers often provide viscosity guidelines that help you choose the right gear ratio. Thinner materials don’t need much thrust, while thicker ones demand more power. Matching your gun to the material ensures smooth flow and protects your hands.
Material compatibility guide
Different caulks behave differently, so choosing the right tool also means understanding what’s inside the tube.
Acrylic latex caulk
Thin and easy to squeeze. A lower gear ratio manual gun works well.
Silicone sealants
Medium viscosity. A smooth rod dripless gun offers better control, especially around tile and glass.
Polyurethane sealants and construction adhesives
Very thick. High gear ratio tools or powered guns prevent strain.
Fire-stop materials
Among the densest sealants available. High-thrust manual or powered models are often required for proper application.
Expert tip: Make sure the caulk you choose fits the surface, the environment, and the flexibility you need. No tool can compensate for using the wrong material.
Budget considerations
You don’t always need the most expensive caulk gun. If you only tackle small repairs a few times a year, a basic model works fine. If you handle frequent or demanding projects, investing in a stronger or more ergonomic model saves you time and strain. Think about how often you’ll use the tool, the types of materials you’ll work with, and how long you want the tool to last.
Caulk Gun Selection Quiz
Answer a few questions to find the perfect caulk gun for your construction or DIY project
Manual Caulk Guns
Standard, economical option for occasional use. Requires hand pressure to dispense.
Drip-Free Caulk Guns
Prevents mess with a mechanism that stops caulk flow when pressure is released.
Power Caulk Guns
Battery-powered for continuous, even application with less hand fatigue.
Pneumatic Caulk Guns
Air-powered for heavy-duty, professional use on large-scale projects.
Our top picks: the best caulk guns for every need
Before choosing our favourites, we put each model through the same structured process. This keeps the evaluations fair and helps you understand why certain tools rise above the rest.
Our testing and evaluation approach
Each caulk gun was assessed on how easy it was to load, how smoothly the trigger moved, and how consistent the bead looked during long runs. We checked comfort by using each gun for extended periods, especially with thicker adhesives, where strain becomes noticeable. Durability was tested with both light and dense sealants, including latex, silicone, construction adhesive, and high-viscosity materials that push weaker frames to their limits.
These tests were done in realistic project conditions, such as bathroom seams, window trim, heavy bonding joints, and vertical applications where control matters most. All products were sourced through normal retail channels. If any future affiliate relationships apply, readers should assume links may be monetized.
Best overall caulk gun: Newborn 250 Smooth Rod Caulk Gun
This model stands out because it combines clean performance, dependable control, and a drip-less mechanism that keeps surfaces tidy. It’s the kind of tool that works for most projects without fuss.
- Produces steady, even beads
- Dripless design minimizes cleanup
- Smooth trigger action and comfortable grip
- Strong build for regular use
- Not ideal for very thick materials
- Slightly more expensive than basic models
Ideal use
General DIY projects, bathroom and trim work, and homeowners who want a dependable all-around tool.
Newborn 250 Super Smooth Rod Revolving Frame Caulking Gun, 1/10-Gallon Cartridge Capacity
Newborn 250 Smooth Rod Caulk Gun
Best budget-friendly option:
Newborn 101 Super Sturdy Caulk Gun
A reliable choice for quick household repairs. It’s simple, sturdy, and affordable.
- Very low cost
- Solid metal construction
- Smooth trigger action and comfortable grip
- Great for occasional use
- Ratchet mechanism offers less control
- Can drip if pressure isn’t released properly
Ideal use:
Light sealing tasks, small window gaps, and users who only need a caulk gun a few times a year.
Best for heavy-duty adhesives and thick sealants: Dripless Inc. ETS2000 Ergo Composite Caulk Gun
Thick adhesives can be stubborn, but this model helps reduce hand fatigue while deliveringa strong push force.
Pros
• Higher gear ratio for dense materials
• Lightweight composite body
• Comfortable and ergonomic trigger
Cons
• More expensive than standard manual guns
• Still requires effort with very high-viscosity sealants
Ideal use
Construction adhesives, polyurethane sealants, and tougher materials that need extra force.
Alternative option: Cox Power flow Plus for users who prefer a robust metal frame with even more thrust.
Best electric/battery-powered caulk gun: DeWalt DCE560B 20V MAX Cordless Caulk Gun
This is the top choice for pros. It provides a consistent flow without relying on hand strength.
Pros
• Smooth and adjustable flow
• Suitable for long workdays
• Excellent for thick materials and large projects
Cons
• Higher cost
• Battery sold separately
• Heavier than manual guns
Ideal use
Commercial jobs, multipoint sealing, and users who want consistent output with minimal fatigue.
Best for precision work: High-control smooth rod dripless model
Several brands offer precision-focused designs, but the best options share the same traits: a responsive trigger, dripless pressure release, and a narrow-profile frame. These models excel when accuracy matters most.
Pros
• Excellent bead control
• Minimal overspill
• Ideal for fine seams
Cons
• Not suited for heavy adhesives
• Usually mid-range in cost
Ideal use
Tile work, glass edges, detailed trim, and any project where clean lines are essential.
Best for bulk and sausage sealants: Albion B26 B-Line 20oz Manual Caulk Gun
Built for productivity, this gun accepts large sausage packs and cartridges, reducing downtime.
Pros
• Large capacity for fewer reloads
• Strong 12:1 thrust
• Compatible with tubes and sausages
Cons
• Larger and heavier than standard guns
• More than most DIY users need
Ideal use
High-volume sealing, commercial work, and specialty materials are supplied in bulk packaging.
Caulk gun comparison table
|
Model |
Type |
Gear Ratio |
Drip/Dripless |
Best For |
Key Benefit |
Approx. Price Range |
|
Newborn 101 Super Sturdy |
Manual (Ratchet Rod) |
N/A |
Drip |
Light tasks, budget users |
Simple, durable |
$5–$10 |
|
Newborn 250 Smooth Rod |
Manual (Smooth Rod) |
10:1 |
Dripless |
General DIY |
Smooth action, cleaner lines |
$15–$25 |
|
Dripless Inc. ETS2000 Ergo |
Manual (Smooth Rod) |
12:1 |
Dripless |
Medium-heavy materials |
Higher thrust, ergonomic frame |
$25–$40 |
|
Cox Powerflow Plus |
Manual (Smooth Rod) |
18:1 |
Dripless |
Thick adhesives |
Strong thrust, rugged build |
$40–$60 |
|
DeWalt DCE560B 20V MAX Cordless |
Battery-powered |
N/A |
Dripless |
Heavy-duty, large projects |
Variable speed, consistent flow |
$150–$250 |
|
Astro Pneumatic Tool 4050 |
Pneumatic |
N/A |
Dripless |
Industrial use |
High power, low fatigue |
$70–$100 |
|
Albion B26 B-Line 20oz |
Manual (Bulk/Sausage) |
12:1 |
Dripless |
Bulk sealants |
Handles large volumes |
$40–$70 |
Mastering the tool: a step-by-step guide to using a caulk gun effectively
Using a caulk gun isn’t complicated, but the details make all the difference. Follow these steps to get smooth, durable results with any type of sealant.
- Surface preparation is key.
Good caulking starts long before you squeeze the trigger. Surfaces should be clean, dry, and free of dust, soap residue, or oils. If there’s old caulk in the joint, remove it with a scraper or a caulk removal tool. New caulk won’t bond well to deteriorated material.
Expert tip: A clean joint improves adhesion and helps the bead last longer. - Loading the caulk tube
Pull back the plunger rod, set the tube into the cradle, and seat the nozzle in the front opening. Make sure the tube sits flat.
Before loading, puncture the inner foil seal fully. Incomplete punctures cause sudden bursts or uneven flow. - Cutting the nozzle
A clean cut at a slight angle gives you better control over bead size. Hold the nozzle cutter or utility knife steady and cut at about forty-five degrees. Start small. You can always widen the opening if needed.
Expert tip: Match the opening to the size of the gap. Smaller joints need finer cuts. - Applying a perfect bead
Technique 1: Push, don’t pull
Pushing forces the caulk into the joint instead of dragging it across the surface. This leads to better adhesion and a stronger seal.
Technique 2: Consistent pressure and speed
Squeeze the trigger steadily while moving the gun at an even pace. Avoid stopping mid-joint unless necessary. Uneven pressure causes bumps or thin spots.
For corners, slow down and keep the nozzle angled so the bead forms smoothly. On straight lines, keep your wrist steady and your forearm aligned with the joint. - Tooling the caulk
The bead needs shaping before it skins over. A damp finger, a caulk tool, or a sponge works well. The goal is to press the caulk into the joint while smoothing the surface. Tooling also removes ridges and creates a uniform finish.
Expert tip: Work right away. Most caulk begins to cure within minutes. - Cleaning up
Keep a few damp rags or wipes close by. Clean spills as soon as they happen because dried caulk is harder to remove. If excess builds up near the nozzle, wipe it off between passes to avoid smears.
This quick cleanup keeps the work neat and saves time later.
Common caulk disasters and how to fix them
Even with good tools and careful technique, things can go wrong. The good news is that most caulk problems have simple fixes once you understand what caused them. Here’s a clear guide to the issues DIYers face most often and how to correct them.
Uneven beads and gaps What causes it:
This usually comes from inconsistent trigger pressure, moving too fast, or cutting the nozzle too wide. A bead that skips or wobbles is easy to spot and even harder to ignore once it dries.
How to fix it: Re-cut the nozzle so the opening is smaller and more controlled. Practice a slow squeeze on a scrap surface to get a feel for steady pressure. Then remove the flawed bead and reapply with a smoother pace.
Excessive mess and oozing What causes it:
Oozing is often the result of a gun that doesn’t release pressure after you stop squeezing. It can also happen when the nozzle opening is oversized, causing the caulk to spill out faster than you can control it.
How to fix it: Switch to a dripless gun if possible. Always release the trigger pressure when you pause, and consider cutting a smaller nozzle. This alone can cut your cleanup time dramatically.
Visual suggestion: A short clip or graphic showing how to pull back the plunger rod to stop flow.
Poor adhesion and cracking What causes it:
Caulk needs a clean, dry surface to stick. If there’s dust, soap residue, moisture, or leftover old caulk, the bead won’t bond well and may crack or peel. Using the wrong caulk for the material can also cause early failure.
How to fix it: Remove any old caulk, clean the joint thoroughly, and let it dry before applying a new bead. Check that you’re using the right type of caulk for the surface, temperature range, and flexibility required.
Air bubbles in the bead What causes it:
Air trapped inside the tube or an incomplete puncture of the inner seal. When squeezed, the air pushes out in pockets and interrupts the bead.
How to fix it: Make sure the inner seal is fully punctured. Apply slow, steady pressure so trapped air moves through before the bead reaches the joint. If needed, test-flow a short line on cardboard to push air out before starting on the actual project.
Sticky plunger or hard-to-dispense material What causes it:
Thick sealants, cold temperatures, or a gun with too low a gear ratio. A clogged nozzle can also block flow.
How to fix it: Warm the tube slightly to improve flow. Use a higher gear ratio gun or a powered model for dense materials. Clear the nozzle if it’s been sitting unused between passes. These steps take the strain out of dispensing and help maintain control.
Insights from the field
Experienced pros spot these issues fast because they’ve seen them hundreds of times. Many say the first clue is how the bead behaves in the first inch. A smooth, even line means the material, temperature, and gun are in sync. Any jump, sputter, or ooze tells them to pause and adjust before committing to the full run. Small corrections early prevent larger fixes later.
Caulk gun maintenance and troubleshooting common issues
A well-maintained caulk gun lasts longer, works smoothly, and saves you money over time. With a few simple habits, you can keep the tool in good shape and avoid the problems that slow projects down.
Cleaning your caulk gun
Wipe the rod, frame, and nozzle area after each use. Fresh caulk comes off easily, and this quick step keeps moving parts from getting sticky. If you find dried caulk on the frame, use a stiff brush to scrape it away. Some materials respond to mild solvents, but check the caulk type first. Proper cleaning prevents buildup, which reduces friction and wear on the tool. Over the long run, this simple routine can extend the life of even a budget gun.
Proper storage of caulk tubes
If you don’t finish a tube, seal it right away. A nail, screw, or dedicated cap works well and slows down curing. Store tubes in a cool, dry place so the material stays usable for longer. Heat and humidity can cause early thickening, which makes dispensing harder the next time you reach for it.
Troubleshooting common issues
Clogs
A clogged nozzle is usually caused by dried caulk at the tip. Cut off the blocked section or clear it with a thin rod or nail. If the tube itself is clogged, it may be partially clogged inside. In that case, removing the dried material or switching to a fresh tube is often the only solution.
Uneven flow
Uneven flow can come from an improperly cut nozzle, a worn plunger, or inconsistent material. Make sure the nozzle opening matches the joint size. Check that the plunger rod moves smoothly and that the material hasn’t thickened due to age or cold temperatures.
Sticky plungers
If the rod feels sticky or skips, clean it thoroughly and apply a light lubricant. Dirt or dried caulk on the rod can cause jerky motion, which affects bead consistency.
Gun jams
Jams usually happen when the rod bends or debris gets caught inside the frame. Inspect the rod for warping and clear away any hardened caulk around the trigger mechanism. Replacing a bent rod is often more effective than trying to straighten it.
Frequently Asked Questions (FAQs) About Caulk Guns
Conclusion
Choosing the right caulk gun isn’t just a minor detail; it can make the difference between a sloppy, frustrating job and a clean, professional finish. The right tool helps you lay consistent beads, reduces waste, minimizes hand strain, and ultimately gives your projects a polished, long-lasting result.
With this guide, you now know how to evaluate caulk guns, match them to the type of material and project, and use them effectively. You understand the features that matter, from gear ratios and dripless mechanisms to ergonomics and durability, and you’re equipped to troubleshoot common issues and maintain your tools for long-term performance.
Take this knowledge and put it to work. Whether you’re sealing windows, remodeling a bathroom, or tackling industrial-scale adhesive projects, the right caulk gun paired with proper technique ensures a professional outcome every time. Upgrade where needed, practice the steps outlined, and approach your next sealing task with confidence.