


2025 Bedroom Trends Your Guide to a Modern, Stylish Sanctuary
October 17, 2025
Money Tree Care Guide Braiding, Trunk Growth & Expert Tips
October 20, 2025
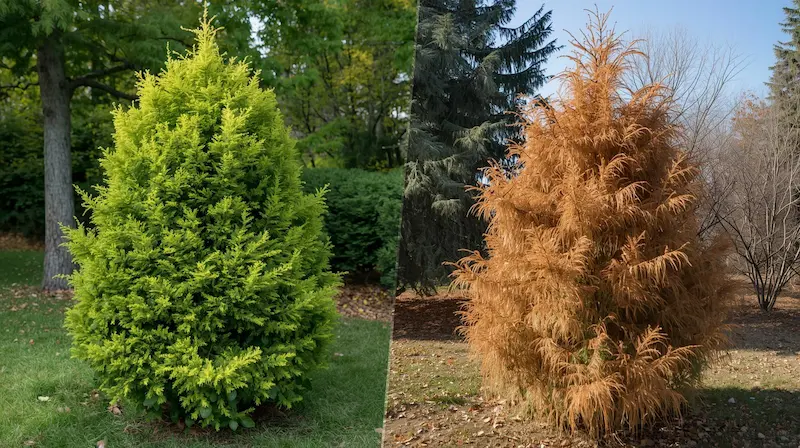
The Browning Arborvitae Dilemma
Few sights are as disheartening to a gardener as a once vibrant, green arborvitae slowly turning brown, a common issue discussed at Homes and Looms. This iconic evergreen, cherished for its dense foliage, privacy screening, and year-round color, can quickly become a source of frustration when its lush green turns dull and dry. Whether you’re a homeowner trying to maintain curb appeal, a property manager keeping landscapes healthy, or a gardener who takes pride in every plant, browning arborvitae immediately signals that something’s wrong.
The challenge, however, is that diagnosing the cause isn’t always simple. Arborvitae browning can result from several overlapping issues, environmental stress, improper watering, pest infestations, or fungal diseases. What often seems like a single problem might actually be a combination of factors working together to weaken the plant. Without understanding the underlying cause, even well-intention fixes can fail, leaving the tree vulnerable and declining further.
That’s where this guide comes in. It cuts through the confusion and helps you understand exactly what your arborvitae is trying to tell you. You’ll learn how to recognize key symptoms, pinpoint the true cause of browning, and apply effective treatments that work. More importantly, you’ll discover practical strategies to prevent these issues from returning, protecting your landscape investment and keeping your arborvitae healthy and green for years to come.
Understanding Your Arborvitae: Normal vs. Distress Signals
Before jumping to conclusions about browning foliage, it’s important to understand that not every change in color signals distress. Arborvitae, like all evergreens, go through natural seasonal and biological cycles that can make parts of the plant appear unhealthy, even when it’s perfectly fine. Learning to distinguish normal changes from real warning signs will help you take action only when it’s truly needed.
The Arborvitae Life Cycle: Natural Browning Explained
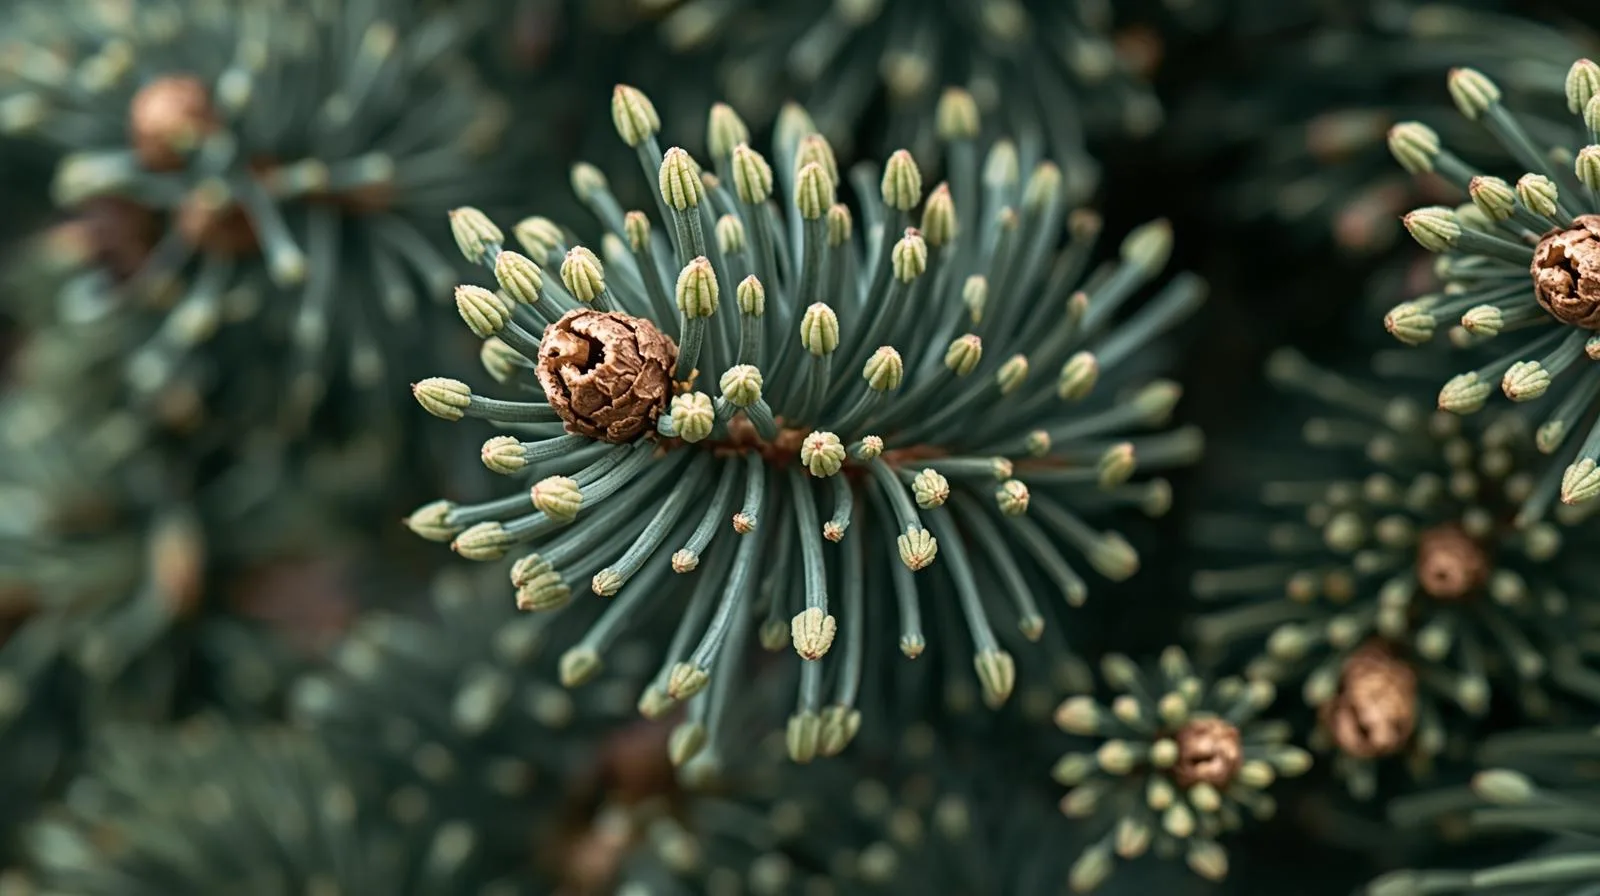
To understand this process, it helps to look at the science behind it, specifically, needle senescence, the natural aging and shedding of foliage. Arborvitae (genus Thuja) continuously produce new growth at the outer edges of their branches. As this happens, the older, inner needles, technically called cladodes, begin to lose chlorophyll, the green pigment responsible for photosynthesis. Once the plant no longer needs these inner leaves, it reabsorbs valuable nutrients from them and allows them to dry and fall off.
This process usually happens in late summer or early fall and may continue into winter. The inner browning often appears evenly distributed throughout the plant’s interior, while the outer layer remains lush and green. Far from being a symptom of disease, this is actually a sign that your arborvitae’s growth cycle is functioning properly.
Why It’s Normal:
- The browning occurs deep inside the shrub, not at the tips.
- It happens gradually, following seasonal changes.
- The outer foliage stays vibrant and green.
If you look closely, you might even notice that the fallen inner needles accumulate near the trunk, forming a light mulch that helps conserve soil moisture, a small, natural recycling system at work.
In regions with hot summers, choosing heat-tolerant varieties such as Thuja plicata (‘Green Giant’), a fast-growing tree for cooling, can make a significant difference. Mulching and adequate watering also help stabilize soil temperature and moisture
Key Differentiator:
Natural browning is uniform and located inside the plant, while problem browning usually appears on the outer edges or progresses unevenly. Timing also matters: if browning happens suddenly in spring or affects entire sections of the plant, it likely signals an underlying issue such as drought stress, pest damage, or disease.
Winter Bronzing: A Seasonal Adaptation
As temperatures drop, some arborvitae varieties naturally take on a bronze, copper, or even purplish tone, a change known as winter bronzing. While it can look alarming, this color shift is actually a protective adaptation that helps the plant survive cold, dry winter conditions.
From a physiological perspective, winter bronzing occurs when the plant reduces its chlorophyll production and increases the concentration of protective pigments like carotenoids and anthocyanins. These pigments shield the foliage from cold injury and excessive sunlight, especially during winter when the ground is frozen and moisture uptake is limited. The change is comparable to how some trees turn color in autumn; it’s a temporary, natural response rather than a sign of decline.
Common Varieties Prone to Winter Bronzing:
- Thuja occidentalis ‘Nigra’ (Dark American Arborvitae)
- Thuja occidentalis ‘Sunkist’
- Thuja occidentalis ‘Techny’
- Thuja plicata ‘Atrovirens’ (Western Red Cedar)
Reassurance:
Winter bronzing typically fades away as spring temperatures rise and new growth begins. The green color returns naturally without any intervention. Unless the foliage is brittle, losing needles, or showing signs of dieback at the tips, there’s no cause for concern.
Credit Homes & Looms
Decoding the Causes: Why Your Arborvitae Is Turning Brown
Once you’ve ruled out natural browning and seasonal color changes, it’s time to look deeper. Browning arborvitae often signals that the plant is under stress. The challenge is that many different problems can create similar symptoms, making it easy to misread what’s really happening. Understanding the underlying causes is the first step toward fixing the issue and preventing it from happening again.
Environmental Stressors
Drought Stress and Under watering
When arborvitae don’t receive enough water, their ability to move nutrients and maintain healthy cell function is compromised. The plant closes its pores to conserve moisture, slowing photosynthesis and weakening tissue.
Symptoms:
You’ll often notice a general dullness before browning begins. It typically starts at the tips of branches and works inward, with the side facing the sun showing the most damage.
Audience Pain Point:
Many gardeners mistake these symptoms for disease or pest issues, applying treatments that only worsen dehydration.
Expert Tip:
Don’t rely on a fixed watering schedule. Instead, use a soil moisture meter, such as the XLUX T10, to check moisture at the root zone. Arborvitae prefer consistently damp, but not soggy, soil, especially during prolonged dry periods.
Overwatering and Poor Drainage
Too much water can be just as harmful as too little. Constantly saturated soil reduces oxygen availability to the roots, essentially suffocating them and encouraging rot-causing pathogens such as Phytophthora.
When roots are deprived of oxygen, cellular respiration slows, preventing the plant from absorbing nutrients and water effectively. Over time, this leads to root decay and foliage decline.
Symptoms:
Lower branches may yellow, then brown, and stems near the base may feel soft or mushy to the touch.
Expert Tip:
Check planting depth. Arborvitae should always be planted with the root flare visible, at or slightly above ground level. Burying it too deeply traps moisture and invites root rot.
Winter Burn and Desiccation
Winter burn is a common cause of browning that appears on one side of the plant, usually the side exposed to sun or wind. It occurs when cold air and sunlight pull moisture from the foliage while frozen ground prevents roots from replenishing it.
This imbalance causes cells in the foliage to dehydrate and die, leading to brown or bronze patches that appear in late winter or early spring.
Symptoms:
Outer foliage turns brown or tan, often in streaks or patches corresponding to wind or sun exposure.
Expert Tip:
Before winter sets in, water your arborvitae deeply to ensure the root zone is moist. In exposed areas, use burlap screens or anti-desiccant sprays to protect the foliage from wind and sun.
Excessive Heat and Sun Scald
Young or newly transplanted arborvitae are particularly vulnerable to heat stress. Prolonged exposure to intense afternoon sun can scorch the foliage, especially if the plant isn’t yet established.
Symptoms:
Browning appears mainly on the side exposed to harsh sunlight, with foliage feeling dry or crisp.
Climate-Smart Planting Tip
In regions with hot summers, choosing heat-tolerant varieties such as Thuja plicata (‘Green Giant’) can make a significant difference. Mulching and adequate watering also help stabilize soil temperature and moisture.
Salt Damage
De-icing salts used on roads, driveways, and sidewalks can leach into the soil or splash onto foliage, causing dehydration and chemical burn.
Symptoms:
Edges of leaves turn brown and crispy, progressing inward if exposure continues.
Prevention Strategies:
- Use calcium magnesium acetate or sand instead of traditional rock salt for de-icing.
- In late winter or early spring, flush soil around affected plants with fresh water to dilute accumulated salts.
- Create physical barriers (like burlap or snow fencing) along roadsides to limit salt spray.
Pests and Insects
Even healthy arborvitae can attract pests that feed on their foliage or sap, leading to browning and dieback if left unchecked.
Arborvitae Leafminers
Tiny moth larvae tunnel inside the leaf scales, hollowing out the foliage and disrupting nutrient flow.
Symptoms:
Browning begins at branch tips, and when you break open affected leaves, you’ll see tiny tunnels or larvae inside.
Spider Mites
These microscopic pests thrive in hot, dry weather. They suck out plant juices, leaving a stippled or speckled appearance on the leaves.
Symptoms: Fine webbing on the underside of branches, dull or bronzed foliage, and an overall dusty look.
Expert Tip: Inspect your arborvitae at least once a year, especially in summer. Look deep inside the canopy and at branch junctions for early signs of mites or other pests. Early detection makes treatment much easier.
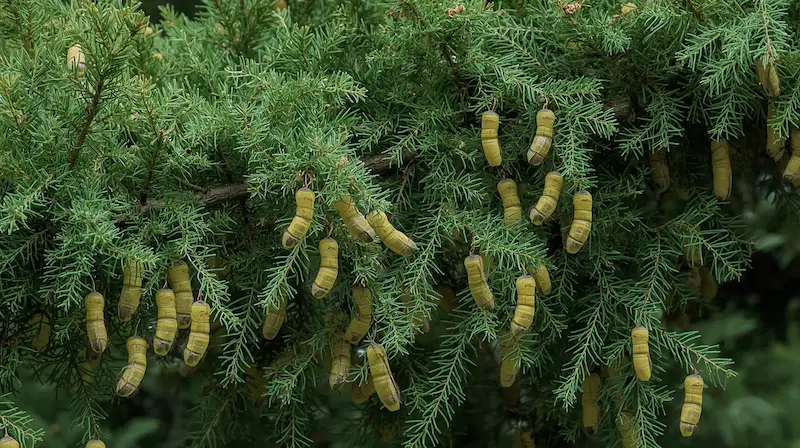
Bag worms
Bag worms are among the most visible and destructive arborvitae pests. The caterpillars create small, cone-shaped bags from silk and plant debris, which hang from branches as they feed.
Symptoms: Visible “bags” hanging from branches, defoliation, and browning that spreads as larvae consume more foliage.
Other Common Pests
- Aphids: Tiny green or black insects that secrete sticky honeydew, leading to sooty mold buildup.
Scale Insects: Small, shell-like pests that attach to stems and suck sap, causing thinning foliage and weak growth.
While usually less severe, infestations can still weaken plants over time and increase vulnerability to other stresses.
Fungal Diseases
Cercospora Leaf Blight
This fungus thrives in warm, humid conditions and typically begins at the base of the plant.
Symptoms:
Browning starts from the inside and works outward and upward. Fine, grayish mold may appear on affected needles.
Fungal spores spread easily through splashing water and high humidity, infecting nearby plants. Regular pruning to improve airflow reduces the risk.
Phytophthora Root Rot
This soilborne pathogen attacks roots in poorly drained soil. It’s often misdiagnosed as simple over watering.
Symptoms:
Yellowing foliage followed by browning of entire branches or sections. The plant may wilt even when the soil feels moist.
Audience Pain Point:
Because symptoms mimic water stress, gardeners often add more water, worsening the problem.
Kabatina Tip Blight
Common in cool, wet spring weather, this fungus infects new growth at branch tips.
Symptoms:
Browning begins at the tips with a sharp line separating healthy and diseased tissue.
Expert Tip:
Proper spacing is essential. Ensure arborvitae are planted far enough apart to allow airflow between plants, reducing humidity and fungal risk.
Planting Issues and Mechanical Damage
Sometimes the cause of browning isn’t environmental or biological but mechanical or structural.
Incorrect Planting Depth
If the root flare is buried below the soil line, roots may suffocate or rot. Replanting at the correct depth or improving drainage can resolve this.
Transplant Shock
Newly planted arborvitae often experience stress as they adapt to their environment.
Symptoms:
Wilting, drooping branches, or mild browning of foliage soon after planting.
Causes:
Root disturbance, insufficient watering, or lack of acclimation to sun exposure.
Root Girdling
In container-grown trees, roots can spiral and eventually strangle the main stem, restricting water and nutrient flow years after planting.
Symptoms:
Gradual decline and browning without clear signs of disease.
Physical Damage
Lawnmower blades, snow buildup, or animal browsing can all physically damage branches.
Symptoms:
Localized browning or broken stems where injury occurs.
The Symptom-Based Detective: Diagnosing the Browning Problem
Before reaching for any treatment, it’s essential to observe how your arborvitae is browning. The pattern, location, and timing of discoloration reveal valuable clues about what’s actually happening beneath the surface. By comparing symptoms carefully, you can narrow down potential causes and take targeted action instead of guessing, and possibly making things worse.
The table below summarizes the most common browning patterns, what they mean, and how urgently you should act. Use it as a quick reference when inspecting your trees.
|
Browning Pattern / Location |
Key Symptoms & Clues |
Likely Causes |
Urgency of Action |
|
Inner foliage, bottom to top |
Older, interior needles turn yellow, then brown, while outer foliage remains green. Usually uniform and seasonal. |
Natural shedding (needle senescence), lack of light in dense plants. |
Low – Normal process; no treatment needed. Light pruning for airflow is optional. |
|
Tips of branches, scattered |
New growth at the ends turns brown; small holes or tunnels are visible inside needles. |
Arborvitae Leafminers. |
High – Treat promptly with insecticidal spray in early summer or prune affected tips. |
|
Entire sections or branches, sudden |
Rapid browning of a full branch, sometimes accompanied by sunken cankers or dead wood. |
Canker diseases, severe pest damage, or physical injury. |
High – Prune affected branches immediately and disinfect tools to prevent spread. |
|
Bottom-up, overall decline |
Yellowing starts near the base, progresses upward; soil feels soggy or emits a sour odor. |
Overwatering, poor drainage, and Phytophthora Root Rot. |
High – Improve drainage, reduce watering, and consider fungicidal soil treatment. |
|
Sun-exposed side, after winter |
Browning occurs on the side facing sun or wind, usually after cold or windy winter days. |
Winter burn or desiccation. |
Moderate – Trim damaged areas in spring, water deeply before winter, use burlap barriers. |
|
Overall dullness, then browning |
Leaves look faded before turning brown; soil is dry and roots are brittle. |
Drought stress or underwatering. |
High – Water deeply and consistently; check root moisture with a soil meter. |
|
Stippling or fine webbing |
Tiny light dots on needles, bronzed or dusty appearance; fine webbing visible under leaves. |
Spider mites. |
Moderate to High – Spray with water or horticultural oil; monitor regularly during dry heat. |
|
Bag-like cocoons |
Small hanging “bags” or cases attached to branches; visible defoliation. |
Bagworms. |
High – Remove bags by hand before larvae hatch (usually late spring); consider Bt or insecticide if infestation is large. |
|
New growth only, distinct line |
Tips of new shoots turn brown with a clear line between healthy and diseased tissue. |
Kabatina Tip Blight. |
Moderate – Prune affected tips, improve air circulation, and avoid overhead watering. |
|
Yellowing, then browning (entire plant) |
Gradual loss of color and vigor; stunted growth; compacted or nutrient-poor soil. |
Nutrient deficiency, soil compaction, or over-fertilization. |
Moderate – Test soil, aerate if compacted, and apply balanced slow-release fertilizer if needed. |
How to Use This Table Effectively:
- Observe Closely: Walk around your arborvitae, noting which areas are affected (top, sides, interior).
- Check Timing: Did it occur after a cold snap, a dry spell, or heavy rain? Timing often confirms the cause.
- Test Soil Moisture: Feel the soil or use a moisture meter to distinguish between drought and drainage issues.
- Inspect for Pests: Look for webbing, small holes, or cocoons, common indicators of insect activity.
- Act Accordingly: Once you identify the likely issue, move to targeted treatment steps rather than broad, generalized fixes.
By diagnosing based on visible symptoms and environmental context, you’ll save time, protect healthy plants, and prevent unnecessary treatments that can stress your arborvitae further.
Actionable Solutions: Step-by-Step Treatment & Recovery
Diagnosing the problem is only half the battle. The next step is taking focused, practical action to bring your arborvitae back to health. The following table outlines proven treatments and preventive measures for each major cause of browning. It’s designed to help you move confidently from problem to solution, using methods that restore balance without overcorrecting or causing additional stress.
|
Cause of Browning |
Immediate Treatment |
Long-Term Prevention |
|
Drought Stress / Underwatering |
Deeply water the plant using a slow, steady soak for several hours to ensure water penetrates the full root zone. |
Establish a consistent watering routine based on weather conditions. Use 2–3 inches of mulch to retain moisture and consider soaker hoses for even distribution. |
|
Overwatering / Poor Drainage |
Stop watering immediately. Aerate compacted soil or create raised beds to improve drainage. If roots are mushy or foul-smelling, remove the affected plant to prevent spread. |
Maintain proper planting depth with the root flare visible. Amend heavy soil with compost or sand to improve structure. Avoid planting in consistently wet areas. |
|
Winter Burn / Desiccation |
Existing damage cannot be reversed. Wait until spring to prune out dead or discolored foliage. |
Water thoroughly in late fall before the ground freezes. Apply anti-desiccant sprays (e.g., Wilt-Pruf) in late fall, and use burlap wraps or screens to protect from harsh winter winds and sun. |
|
Arborvitae Leafminers |
Prune and destroy affected branch tips. Apply horticultural oil or insecticidal soap (e.g., Bonide All Seasons Oil) in late spring when larvae are active. |
Inspect plants regularly during late spring and summer. Maintain plant vigor to attract natural predators such as parasitic wasps. |
|
Spider Mites |
Dislodge mites with a strong stream of water. If infestation persists, use insecticidal soap or horticultural oil (e.g., Safer Brand Insect Killing Soap) according to label directions. |
Avoid dusty conditions by rinsing plants periodically. Keep soil moist during dry heat and monitor for early signs of webbing or stippling. |
|
Bagworms |
Hand-pick and destroy visible bags during fall and winter before larvae hatch. In late spring or early summer, apply Bacillus thuringiensis (Bt) or an approved insecticide when larvae are small. |
Conduct annual inspections, especially on sunny, exposed sites. Encourage natural predators such as birds and beneficial insects. |
|
Cercospora Leaf Blight |
Prune and dispose of affected branches to increase air circulation. Apply fungicides such as Daconil or Copper Fungicide during wet, humid periods. |
Space plants appropriately to allow airflow. Avoid overhead watering, especially in humid climates. Choose disease-resistant varieties when possible. |
|
Phytophthora Root Rot |
Stop watering immediately and improve drainage. In advanced cases, affected plants may not recover and should be removed to prevent spread. |
Plant only in well-drained soil. Avoid excessive watering or poorly drained planting sites. Keep the root flare above grade and maintain moderate moisture levels. |
|
Kabatina Tip Blight |
Prune out diseased shoot tips during dry weather, sterilizing pruning tools between each cut to prevent spreading spores. |
Promote strong growth through proper watering and fertilization. Avoid stressing plants and always prune during dry conditions to reduce infection risk. |
|
Nutrient Deficiency |
Conduct a soil test to identify missing nutrients. Apply a balanced, slow-release fertilizer (e.g., 10-10-10) according to recommendations. |
Test soil every 2–3 years. Maintain organic mulch to enrich the soil naturally and avoid nutrient imbalance. |
|
Over-Fertilization |
Flush the soil with large amounts of water to leach excess salts. Discontinue any fertilizer applications. |
Always follow soil test results before fertilizing. Use slow-release, balanced fertilizers sparingly and keep at least 6 inches away from the trunk. |
Additional Care Tips for Recovery
- Mulch Wisely: Keep mulch two to three inches deep, but pull it slightly away from the trunk to prevent rot.
- Prune Carefully: Remove only visibly dead or diseased branches; over-pruning can slow recovery.
- Monitor Progress: Improvement may take an entire growing season, especially after root-related issues.
- Avoid Overreaction: Resist the urge to apply multiple treatments at once; address one cause at a time for the most accurate results.
Your Arborvitae ‘First Aid Kit’: Essential Tools & Supplies
When browning strikes, having the right tools at hand makes all the difference. A well-prepared gardener can quickly diagnose, treat, and prevent further damage with a few reliable items. Think of these as your first aid essentials for maintaining healthy, resilient arborvitae.
Our Top Pick Product
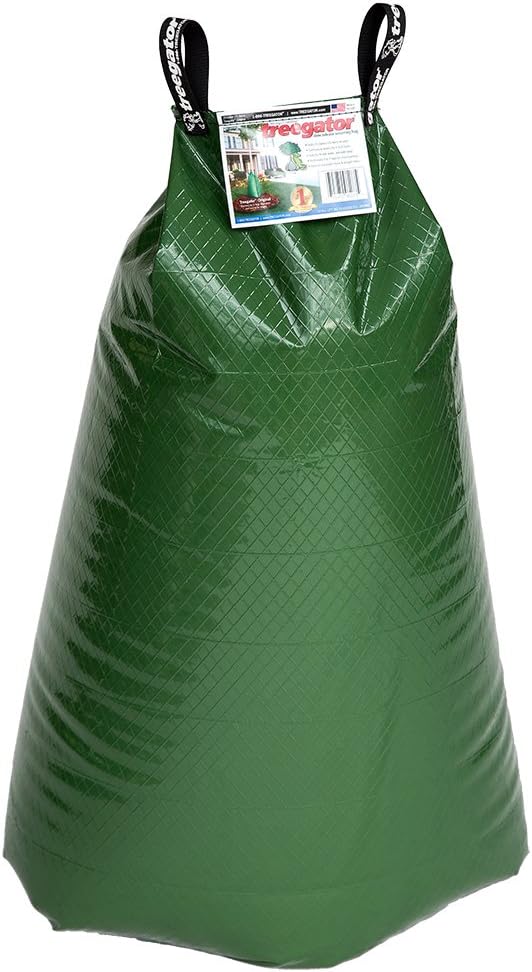
Treegator Original Slow Release Watering Bag for Trees, 1 Bag
Effortless Deep Watering for Healthier Trees
Keep your newly planted or established trees hydrated with ease. The Treegator Original slow-release watering bag delivers consistent, deep watering over 5 to 9 hours, promoting strong root development and reducing transplant and drought stress.
Key Features:
-
Efficient Watering: Holds up to 15 gallons per bag (or 50 gallons when two bags are zipped together) to water trees with trunks from 1" to 8" in diameter.
-
Quick & Easy Setup: Install and fill in under 5 minutes — no tools, digging, or extra parts needed.
-
Long-Lasting Moisture: Refill just once every 5–7 days, depending on soil and weather conditions.
-
Promotes Deep Roots: Ensures slow, even water absorption directly to the root zone, minimizing runoff and evaporation.
-
Simple to Use:
-
Wrap around the tree and zip closed.
-
Fill halfway, lift to expand, then fill completely.
-
Let it release water gradually — and refill when needed.
-
Ideal For: Homeowners, landscapers, and anyone looking for an easy, eco-friendly way to keep trees thriving all season long.
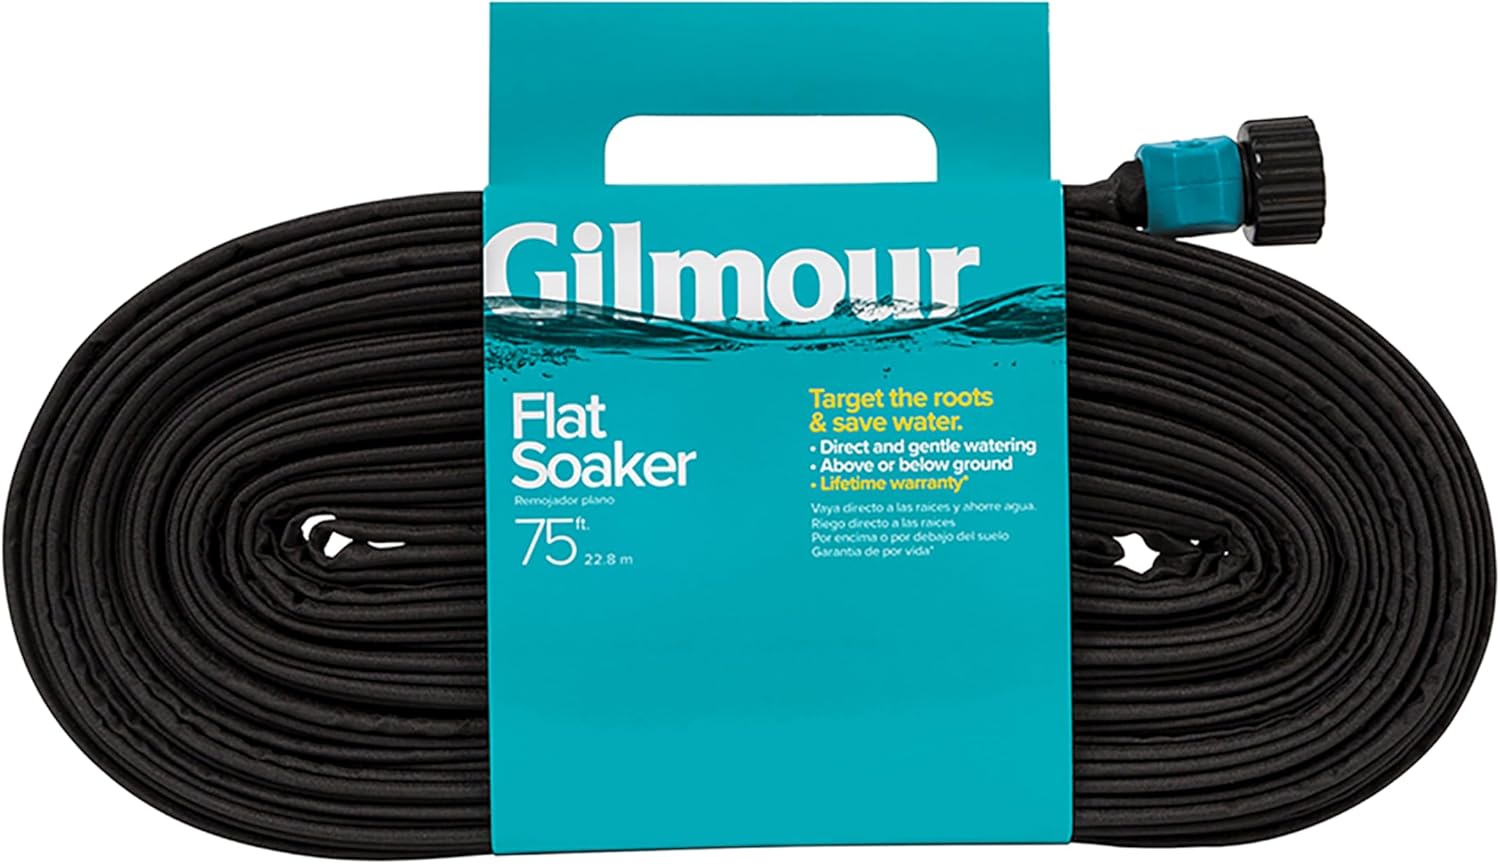
Gilmour 75' Black Flat Weeper Soaker Hose for Garden Beds, Drip Irrigation Outdoor Hose, Flexible Garden Hose for Vegetable Gardens, Flower Beds, Lawns, and Orchards
Eco-Friendly Soaker Hose for Efficient Garden Watering
Keep your garden lush while conserving water with this lightweight, 75-foot flat soaker hose. Designed from 100% recycled vinyl with a clog-resistant fabric cover, it delivers consistent, deep watering directly to your plants’ roots saving up to 80% more water than traditional methods.
Key Features:
-
Water-Saving Design: Provides gentle, even soaking at the root zone ideal for vegetable beds, flower gardens, or foundations.
-
Durable & UV-Resistant: Built to withstand sun exposure and seasonal use without cracking or fading.
-
Customizable Setup: Easily connect multiple hoses to create your own DIY drip irrigation system.
-
Versatile Installation: Use above or below ground for flexible watering solutions.
-
Compact & Easy to Store:
Ideal For: Eco-conscious gardeners, homeowners, and landscapers seeking an affordable, low-maintenance irrigation solution.

4-in-1 Soil Moisture Meter, Digital Plant Temperature/Soil Moisture Test & PH Meter
4-in-1 Multi functional Soil Tester for Smart Gardening 🌿
Take the guesswork out of plant care! This 4-in-1 digital soil tester measures moisture, pH, temperature, and sunlight levels to help you understand your plant’s exact needs ideal for gardens, farms, lawns, and indoor plants.
Key Features:
-
All-in-One Measurement: Accurately tracks soil moisture, temperature, pH level, and light intensity for optimal plant growth.
-
Large Backlit LCD Display: Features a clear screen with white backlight for easy reading day or night.
-
Fast & Accurate Results: Uses upgraded 2024 probe detection technology for quick, precise data within seconds.
-
Adjustable 45° Rotating Head: Convenient screen angle for easy reading without bending or straining.
-
Battery-Powered Convenience: Operates on 4 AAA batteries (not included) with low-battery indicator.
-
Wide Application: Perfect for indoor/outdoor gardens, potted plants, vegetable beds, and succulents.
Usage Tips:
Insert the probe about 4 inches deep into slightly moist soil and wait 10 seconds for accurate readings. Avoid use in dry or liquid environments to prevent damage.
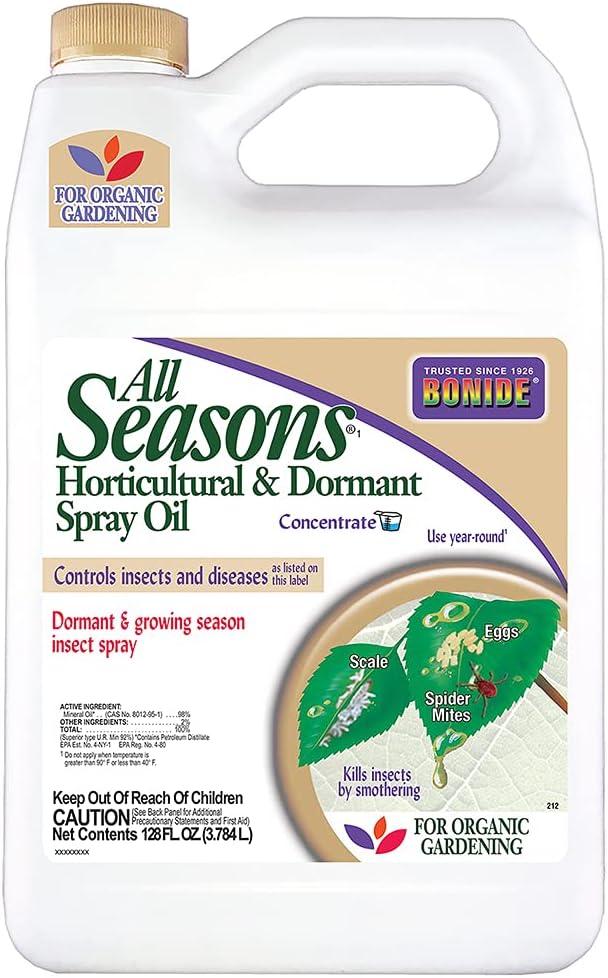
Bonide All Seasons Horticultural & Dormant Spray Oil, 128 oz Concentrate, Disease Prevention and Insect Killer for Organic Gardening
Keep your garden thriving naturally with All Seasons Horticultural & Dormant Spray Oil, a versatile, organic-approved solution for controlling insects and fungal diseases in home gardens, lawns, and orchards.
Key Features:
-
Year-Round Protection: Use during dormant or growing seasons to control listed insects and diseases on fruits, vegetables, nuts, flowers, and ornamentals.
-
Organic Gardening Safe: Made with refined mineral oil, this OMRI-approved formula supports the organic production of healthy, chemical-free crops.
-
Effective Pest Control: Smothers harmful pests like aphids, spider mites, scale, and mealybugs from eggs to adults for complete life-cycle control.
-
Prevents Common Diseases: Helps manage powdery mildew, leaf spot, rust, and other listed fungal issues for stronger, healthier plants.
-
Easy to Mix & Apply: Simply dilute with water as directed and spray evenly over plant surfaces, including the undersides of leaves.
How It Works:
This self-emulsifying oil acts by coating and suffocating pests without leaving harmful residues ideal for eco-conscious gardeners seeking safe, effective plant protection.
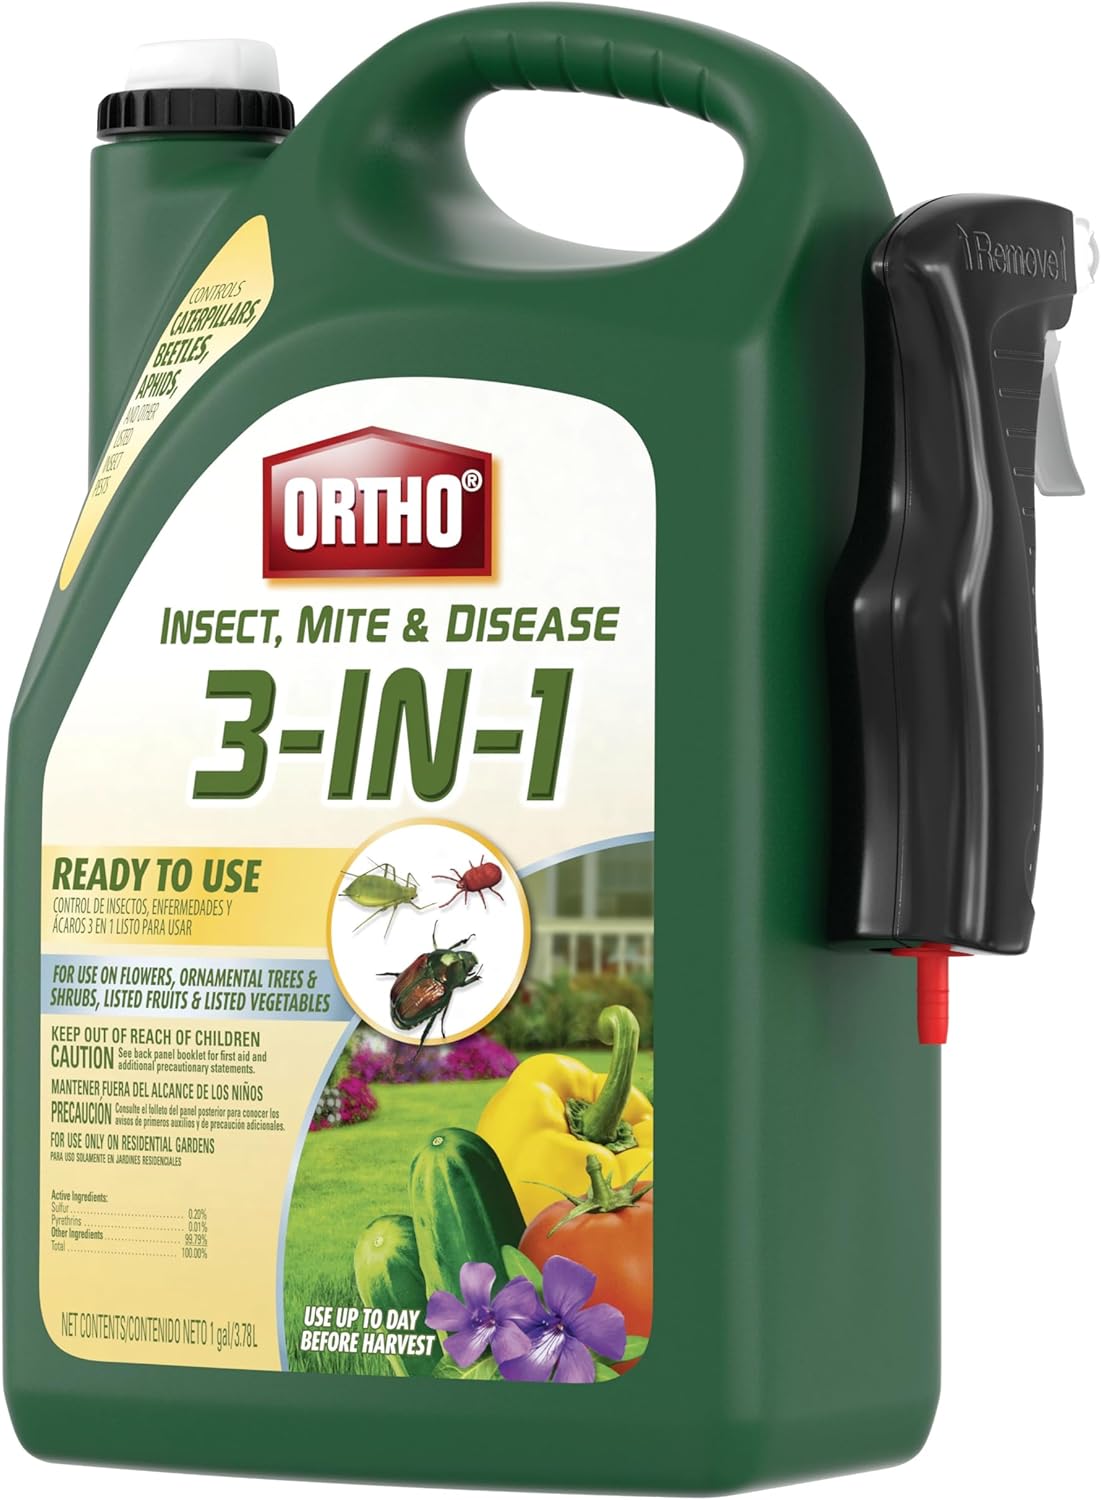
Ortho Insect Mite & Disease 3-in-1 Ready-To-Use 1 gal.
Protect your plants from both pests and fungal diseases with this ready-to-use garden control spray, specially designed for roses, flowers, houseplants, fruits, and vegetables.
Key Features:
-
Dual Action Formula: Effectively controls a wide range of insects and fungal diseases in one easy step.
-
Comprehensive Pest Control: Targets aphids, mites, beetles, caterpillars, crickets, weevils, whiteflies, and silverfish, keeping your plants healthy and vibrant.
-
Fungal Protection: Helps eliminate black spot, powdery mildew, rust, scab, blight, brown rot, and leaf spot, preventing damage and discoloration.
-
Versatile Use: Safe for use on ornamental plants, shrubs, houseplants, fruits, nuts, and vegetables.
-
No Mixing Required: Ready-to-use formula makes application quick, clean, and convenient just shake and spray!
Perfect for: Gardeners seeking a fast, reliable, and mess-free solution to maintain lush, pest-free, and disease-resistant plants all season long.
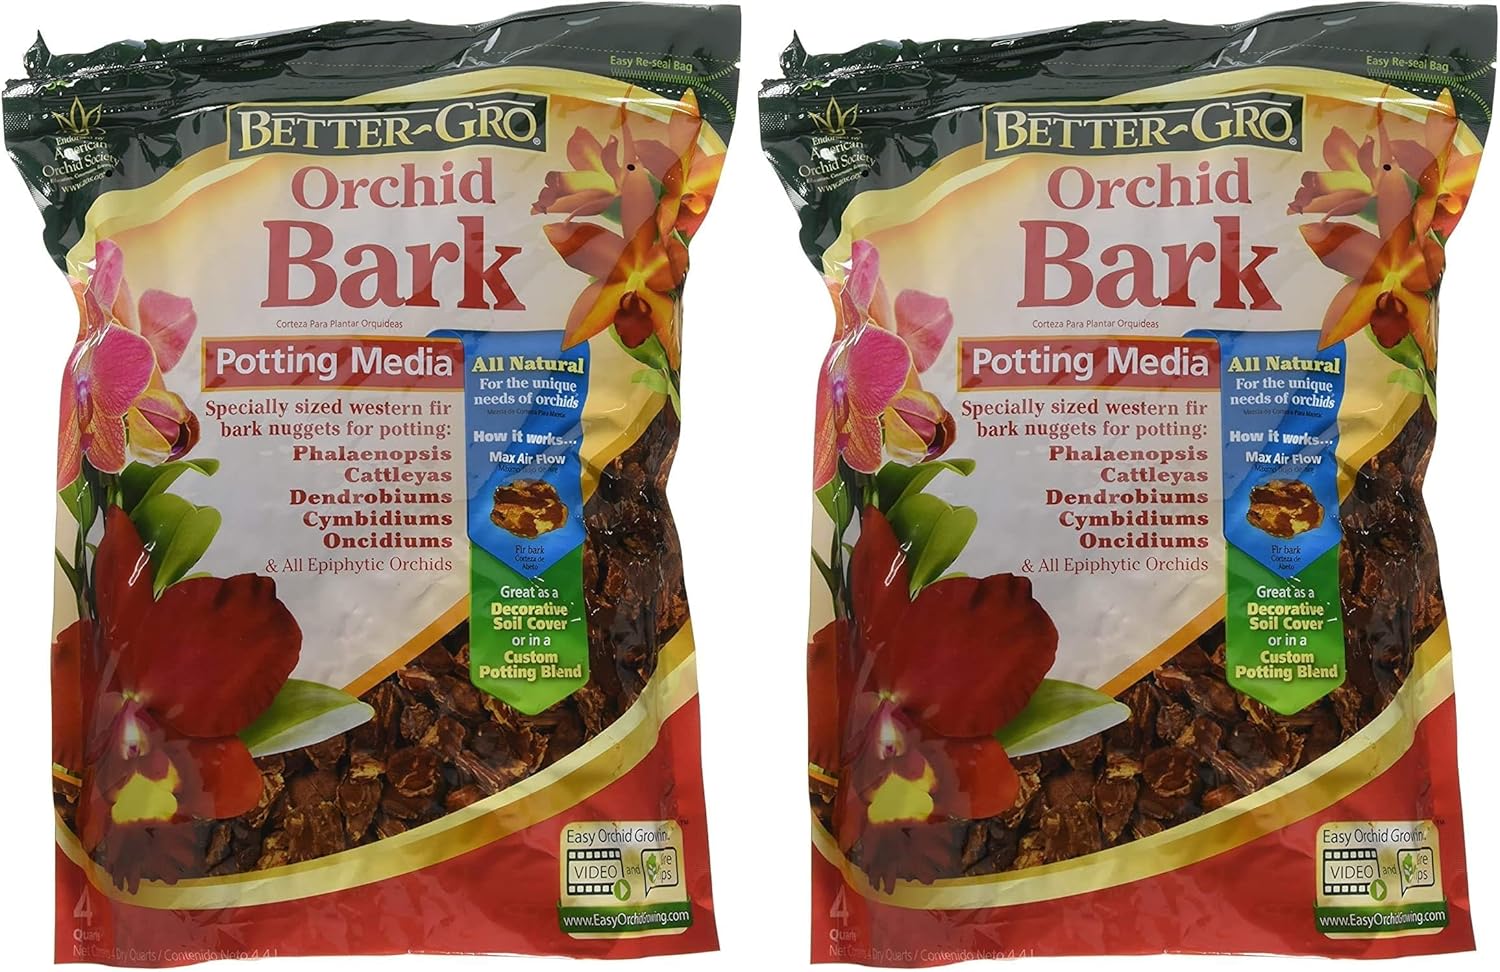
Sun Bulb Company Inc 50180 Better GRO 4-Quart Orchid Bark, Brown (Pack of 2)
Give your orchids and tropical plants the care they deserve with Better-Gro Premium Potting Mix, a professional-grade blend designed for superior aeration, moisture control, and root health.
Key Features:
-
Versatile, Multi-Purpose Blend
-
Ideal for Repotting or Refilling
-
Custom Mix Friendly
-
Promotes Strong Root Growth
-
Trusted Quality
Specifications:
-
Brand: Better-Gro
-
Manufacturer: Sun Bulb Company
-
Customer Rating: ★★★★☆ (4.6/5 from 5,000+ reviews)
Real-Life Case Studies: Learning from Experience
Sometimes the best way to understand how to save your arborvitae is by looking at what others have faced. The following real-life scenarios (based on common homeowner experiences) show how observation, diagnosis, and timely action can make a difference between recovery and replacement
Case Study 1: The Sun-Scorched New Planting
Before:
A homeowner had recently planted a row of young arborvitae along a sunny western fence line. By late winter, the outer tips on several plants began turning brown, especially on the side exposed to afternoon sun. The rest of the foliage looked dry and dull.
Diagnosis:
Closer inspection revealed that the ground around the plants was frozen, and there was little moisture deeper in the soil. This combination pointed to winter burn and drought stress. During winter, frozen soil prevents roots from absorbing water, while the bright sun and dry wind pull moisture from the foliage. The result: dehydration and browning on the exposed sides.
Treatment:
In early spring, the homeowner performed deep, slow watering over several hours to rehydrate the root zone. A burlap screen was installed to shield the plants from harsh wind and afternoon sun. An anti-desiccant spray was applied in late fall to help reduce future moisture loss.
After:
By late spring, new green shoots began appearing, and the damaged tips were pruned back to healthy tissue. Within one growing season, the arborvitae had regained most of its color and vigor. The key lesson here was understanding that new plantings need consistent moisture and protection, especially through their first winter.
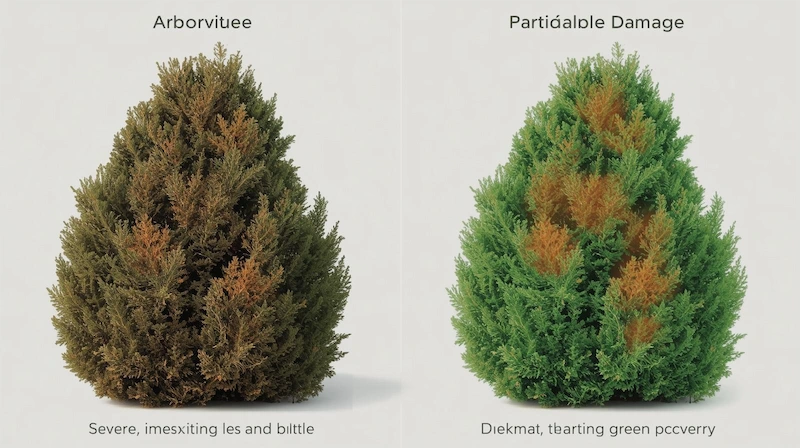
Case Study 2: The Mystery Decline
Before:
An established hedge of mature arborvitae began showing troubling signs: the inner foliage was turning brown and brittle, with the browning slowly spreading outward. Lower branches started dying off, and the soil felt damp even after days without rain.
Diagnosis:
After ruling out pests and visible fungal diseases, the pattern suggested over watering and poor drainage, leading to Phytophthora root rot. The consistently saturated soil was suffocating the roots, reducing their ability to take in oxygen and nutrients.
Treatment:
The homeowner took several corrective steps:
- Improved drainage by aerating the soil and adding coarse organic matter.
- Pruned out the worst-affected branches to reduce stress and improve airflow.
- Adjusted the watering schedule, ensuring the soil could dry slightly between waterings.
After:
Within a few months, some new growth appeared on the upper branches, indicating partial recovery. However, several lower sections never rebounded and had to be removed. The experience reinforced a vital truth: once root rot sets in, recovery can be slow or incomplete. Prevention, through proper soil drainage and watering habits, is far more effective than treatment after the fact.
Takeaway: Diagnosing Before Acting
Both cases highlight the importance of observation and patience. Instead of jumping to solutions, successful gardeners start with careful diagnosis, checking soil moisture, exposure, and drainage conditions before applying treatments. That methodical approach not only saves time and money but also helps your arborvitae recover faster and stay healthy longer.
Proactive Health: Essential Preventive Care for Arborvitae
Healthy arborvitae don’t happen by accident; they thrive because of consistent, thoughtful care throughout the year. With a seasonal routine and a few key best practices, you can keep your trees lush, resilient, and resistant to the most common stressors.
The Arborvitae Health Checklist: A Seasonal Guide
Spring
- Inspect for winter damage. Prune away broken or browned tips, cutting back to healthy green growth.
- Apply a slow-release fertilizer only if a soil test reveals a nutrient deficiency.
- Begin pest monitoring, especially for early signs of leafminers on new growth.
Expert Tip: Avoid over-fertilization. Arborvitae are naturally modest feeders and rarely need heavy fertilizer. If growth appears weak, perform a soil test before adding nutrients; guessing can cause more harm than good.
Summer
- Maintain consistent, deep watering during dry spells to prevent drought stress.
- Inspect regularly for spider mites, which thrive in hot, dusty conditions.
- Keep a mulch layer intact to help retain soil moisture and suppress weeds.
Expert Tip: Check soil moisture using a soil moisture meter before watering. Overwatering in summer can be as damaging as underwatering.
Fall
- Give your arborvitae a deep watering before the ground freezes to reduce winter desiccation.
- Apply protective measures such as burlap wraps or anti-desiccant sprays if you live in areas with harsh winters.
- Clear fallen debris and dead foliage from the base to prevent fungal growth.
Expert Tip: Mulch for moisture and temperature regulation. Apply a 2–3 inch layer of organic mulch, like shredded bark, ensuring proper bark care, or pine needles, around the base.Keep it a few inches away from the trunk to prevent rot while stabilizing soil temperature and retaining moisture.
Winter
- Monitor for snow and ice buildup. Gently brush off heavy accumulation to prevent broken branches, helping avoid sudden branch drop syndrome.
- Protect against animal browsing, especially deer, which may feed on arborvitae during scarce winter months.
Expert Tip: Avoid using salt-based ice melt near arborvitae. Salt runoff can damage roots and cause browning along the foliage edges.
Best Practices for Long-Term Arborvitae Health
Proper Planting (Revisited)
Start with the right foundation. Arborvitae should be planted so the root flare, the point where the trunk meets the roots, is visible just above the soil surface. The planting hole should be twice as wide but no deeper than the root ball. In heavy or clay soil, amend with compost or organic matter to improve drainage.
Watering Wisely
Healthy roots grow deep. Deep, infrequent watering encourages arborvitae roots to extend downward, improving drought tolerance. Frequent shallow watering keeps roots near the surface, making them vulnerable to heat and stress.
Expert Tip: Deep, infrequent watering. Use drip irrigation or a soaker hose to deliver moisture directly to the root zone without wasting water or wetting the foliage.
Strategic Mulching
Choose natural mulch like shredded bark or pine needles, applying a layer about 2–3 inches thick. Keep mulch a few inches away from the trunk to prevent stem rot and discourage pests. Refresh annually to maintain effectiveness.
Mindful Pruning
Prune with intention. Remove only dead, diseased, or damaged branches, and do so during dry weather to reduce the risk of infection. Avoid heavy shearing, as it can cause dense outer growth that traps humidity, creating a perfect environment for fungal issues.
Expert Tip: Prune with purpose. Use sharp, clean pruning shears, and disinfect blades between cuts. Remember that inner browning is often a natural part of the arborvitae’s life cycle and doesn’t require removal.
Pest and Disease Monitoring
Conduct a visual inspection at least twice a year, once in early summer and again in early fall. Look for subtle signs like stippling, webbing, or uneven color changes. Early detection allows for prompt, less invasive treatments before infestations or infections spread.
Regional Adaptations
Your local climate determines how much protection your arborvitae needs:
- Zone 4–5 (colder regions): Prioritize winter protection with burlap wraps, deep fall watering, and anti-desiccant sprays.
- Zone 6–7 (moderate climates): Focus on pest management and heat protection during summer.
- Zone 8 and warmer: Provide afternoon shade for young trees and maintain consistent irrigation to prevent heat stress.
The ‘Save vs. Replace’ Dilemma: When to Intervene and When to Let Go
Watching an arborvitae decline can be tough, especially when it’s been part of your landscape for years. But not every struggling tree can, or should, be saved. Knowing when to step in and when to move on can save time, money, and frustration while helping you maintain a healthy, beautiful landscape overall.
Assessing the Damage: Is Your Arborvitae Salvageable?
Before you grab the pruning shears or fertilizer, take a close, honest look at your plant. The key to making the right decision lies in assessing the extent, location, cause, and recovery potential.
1. Extent of Browning
If more than 50% of the foliage has turned brown, or if the central leader (main upward stem) is dead, the chances of full recovery drop significantly. Minor browning, especially confined to tips or inner sections, is often manageable. But once large sections are dry and brittle, the plant’s vascular system may already be too compromised.
2. Location of Browning
- Inner or lower browning: Often natural shedding or light deficiency, usually recoverable.
- Outer or top browning: Typically indicates more serious issues like drought, sun scorch, or root damage. If the top section dies, it’s difficult for the plant to regain its natural shape, a key to master tree shapes.
3. Age of the Plant
Younger arborvitae are more resilient and adapt better to corrective measures such as replanting or pruning. Mature plants, while valuable, can struggle to bounce back from extensive root or structural damage.
4. Underlying Cause
Identify why the browning started.
- Treatable causes, like drought stress, winter burn, or pest infestations, can often be reversed with proper care.
- Irreversible causes, like severe root rot (Phytophthora) or extensive girdling roots, often mean the plant will continue to decline no matter what you do.
5. Time and Cost Investment
Be realistic about how much effort, time, and money you’re willing to commit. Some treatments require multiple seasons to show results. If your goal is quick visual improvement, replacement might be the better route.
Cost-Benefit Analysis: Treatment vs. Replacement
Making the right call often comes down to weighing value versus effort.
1. Comparative Costs
- Treatment: Costs vary from minimal (watering, pruning, organic sprays) to moderate (fungicides, arborist consultation). While it may be cheaper upfront, it can take time to see results.
- Replacement: A mature arborvitae (5–6 feet tall) can cost significantly more than young saplings but provides immediate visual impact. Planting smaller replacements may save money but require patience.
Example:
If you spend $60–$100 on treatments and still have a 50% chance of losing the tree, that money might be better invested in a healthy replacement, especially if labor and long-term maintenance are factored in.
2. Time and Labor
Consider how long you’re willing to wait for visible improvement. Even with proper treatment, recovery can take one to two growing seasons. If the plant continues to decline despite best efforts, you’ll have lost both time and resources.
3. Long-Term Outlook
Ask yourself: even if the arborvitae survives, will it regain its shape and density?
Some trees never fully recover their symmetry or lushness after major dieback, leaving gaps in hedges or uneven growth that affects curb appeal. In those cases, replacement ensures a healthier, more uniform look.
4. Emotional Investment
Many homeowners form genuine attachments to their landscape plants. A mature arborvitae may have provided privacy, shade, or a sense of permanence. It’s understandable to want to save it. Still, it’s important to separate emotional value from practical viability. Sometimes, replacing a failing plant is the best way to protect the beauty and health of your overall garden.
Balanced Perspective:
- Save if the plant is under 50% damaged, the cause is treatable, and new growth is still visible.
- Replace if browning is widespread, the root system is compromised, or the plant has lost its structure beyond repair.
When Professional Help is Needed: Consulting an Arborist
Sometimes, despite your best efforts, arborvitae problems go beyond DIY solutions. Knowing when to call a professional can save your trees, your time, and money.
Recognizing Severe Issues & Complex Diagnoses
Homeowners often struggle to decide if browning or decline requires professional attention. The following signs indicate that it’s time to consult an expert:
- Widespread or rapidly spreading browning: If the problem affects more than a few branches or multiple plants, professional evaluation is necessary.
- Failure of DIY treatments: When watering adjustments, pruning, or pest control don’t improve the tree over a growing season.
- Unidentified pests or diseases: If you notice unusual symptoms (holes, webs, cankers, or blackened roots) that you cannot confidently diagnose.
- Concerns about structural integrity or safety: For large trees near structures or walkways, unstable branches can pose risks.
- Large, valuable, or established plants: Mature arborvitae represent significant investment and aesthetic value; professional care helps protect that investment.
Expert Tip: For persistent or widespread browning, don’t hesitate to consult a Certified Arborist. An ISA (International Society of Arboriculture) certified professional provides reliable, research-backed guidance and treatment options.
What to Expect from a Certified Arborist
Hiring an arborist ensures a thorough, professional approach to diagnosing and treating arborvitae issues. Their services typically include:
- Initial Consultation:
- On-site visit and full inspection of affected plants.
- Assessment of soil conditions, sunlight exposure, watering practices, and the surrounding environment.
- On-site visit and full inspection of affected plants.
- Diagnosis & Report:
- Detailed findings identifying the cause(s) of browning.
- A written treatment plan outlining short- and long-term interventions.
- Detailed findings identifying the cause(s) of browning.
- Treatment Options:
- Precision pruning and removal of diseased or dead branches.
- Pest and disease management using professional-grade, least-toxic options.
- Fertilization or root-care strategies tailored to soil and climate conditions.
- Precision pruning and removal of diseased or dead branches.
- Preventative Strategies:
- Guidance for ongoing care to reduce future risk, including irrigation plans, mulching, and seasonal monitoring.
- Advice specific to your regional climate and arborvitae variety.
- Guidance for ongoing care to reduce future risk, including irrigation plans, mulching, and seasonal monitoring.
The Value of Certified Expertise
A Certified Arborist combines scientific knowledge with practical experience. They can differentiate between temporary stress, natural shedding, and serious disease, information that is critical for effective treatment. When uncertainty arises, their professional assessment not only protects your trees but also ensures your landscape decisions are informed, safe, and cost-effective.
Conclusion: Restoring Your Arborvitae's Vibrancy
Arborvitae browning can feel alarming, but in most cases, it is a solvable problem. The key lies in accurate diagnosis, understanding the underlying cause, and applying targeted solutions. Whether the issue stems from environmental stress, pests, diseases, or cultural practices, taking the right steps early dramatically improves the chances of recovery.
Proactive care is essential. Seasonal monitoring, proper watering, mindful pruning, and regular inspections help prevent many of the common issues that lead to browning. For severe or persistent problems, don’t hesitate to consult a professional. An ISA Certified Arborist can provide a precise diagnosis and effective treatment plan.
Armed with the guidance in this article, you now have the tools to assess, treat, and prevent arborvitae browning. With attention and care, your trees can regain their lush green vibrancy, enhancing the beauty and privacy of your landscape for years to come.
Take action today: inspect your arborvitae, follow the recommended seasonal care, and intervene promptly when problems arise. The rewards, a healthy, thriving hedge or specimen tree, are well worth the effort
Take action today
Author Bio
Prof. Dr. Salman Raza, a horticulture specialist
at Homes and Looms