


The Ultimate Guide to Shower Head Height Standard Measurements, Custom Solutions & ADA Compliance
December 1, 2025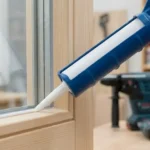
The Ultimate Guide to Caulk Guns Find Your Perfect Tool for Flawless Sealing & Adhesion
December 4, 2025
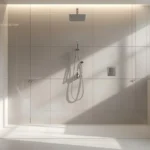
A bathroom should feel welcoming, not stressful. Picture a space where safety isn’t an obstacle you have to think about, where the layout feels open, and every detail works for people of all ages. Traditional showers often fall short. Raised edges become tripping hazards, tight corners make movement difficult, and keeping everything clean can feel like a constant chore. These issues are even more noticeable for anyone aging in place or living with limited mobility, but they can affect anyone who wants a modern, open design.
Barrier-free showers change that experience entirely. They bring together safety, accessibility, and a sleek, contemporary look. They offer a smooth transition into the shower, a spacious feel, and a design that blends into almost any bathroom style. This guide is here to simplify the entire process. You’ll get clear explanations of how curbless systems work, what options you can choose from, and what you need to know about waterproofing and building codes so you can move forward without second-guessing anything.
By the time you finish this guide, you’ll have the knowledge and confidence to plan your own barrier-free shower. You’ll understand how to pick a system that matches your budget and design goals, how to make sure the installation stays leak-proof, and how to meet the standards required for safe and long-lasting results. Most importantly, you’ll be ready to create a bathroom that looks great, functions smoothly, and supports your needs well into the future.
Understanding Barrier-Free Showers: The Foundation of Modern Bathrooms
What Exactly Is a Barrier-Free Shower?
A barrier-free shower is built with a level, curbless entry that blends the bathroom floor with the shower area. There’s no step, no raised edge, and no interruption in the flooring. The result is a smooth, seamless transition that looks modern and works for everyone.
The purpose of this design goes beyond aesthetics. It makes the shower easier to access, especially for people who use mobility aids like wheelchairs or walkers. It also cuts back on fall risks by removing the common tripping point found in traditional curbed showers. At the same time, it gives the bathroom a clean, open look that fits well with today’s design trends.
These showers are becoming more popular for several reasons. More homeowners are planning and choosing features that support aging in place. Universal design has also become a standard in modern construction, with builders and renovators focusing on spaces that work for all ages and abilities. On top of that, minimalist, spa-like bathrooms are in demand, and curbless showers fit that style perfectly. They’re also easier to clean, which appeals to anyone who wants a low-maintenance setup.
Why Go Curbless? Unpacking the Key Benefits
Choosing a barrier-free shower means investing in safety. Removing the curb means one less tripping point, which is important for older adults, children, and anyone with limited mobility. Even for households without those concerns, the ease of stepping in and out of the shower makes daily routines safer and more comfortable.
A big part of the appeal is universal design. More homeowners want spaces that work for every family member, both now and in the future. A curbless shower supports that goal and adds long-term value. Homes that blend accessibility with great design often stand out in the market because they’re practical and attractive at the same time.
These showers also boost home value. Buyers appreciate bathrooms that feel modern, open, and well thought out, especially when accessibility is built in without taking away from the overall look. A curbless design makes the room feel larger and more luxurious because nothing breaks up the visual flow. It’s a feature that feels high-end and functional.
Cleaning becomes easier, too. Without ledges, corners, or grout-heavy transitions, there’s less space for mold or grime to hide. The smooth surface lets you wipe everything down quickly, which is a relief for anyone tired of scrubbing around tight edges.
For many people, the worry is that accessibility will make the bathroom look clinical. A barrier-free shower is the opposite. It delivers safety and convenience while improving the style of the entire room. It’s a smart upgrade that supports comfort today and adds value for years to come.
Decoding Barrier-Free Shower Pan Systems
Pre-fabricated Pans: The Ready-Made Solution
Pre-fabricated pans are one of the most straightforward options for building a barrier-free shower. These pans come pre-sloped, waterproof, and sized for quick installation, which takes much of the guesswork out of the process.
They’re available in several materials. Composite pans are strong and lightweight, and many include built-in slopes and drains. PVC and ABS pans offer good waterproofing, tend to be budget-friendly, and are easy to trim to fit the space. Acrylic and fiberglass pans are smooth and non-porous, often used in multi-piece kits for faster installs.
The benefits are clear. Installation is faster, the slope is consistent, and the built-in waterproofing reduces risks during the build. They also come in a range of sizes, which makes planning easier. The trade-offs include limited customization and compatibility with specific drains. The look of some materials can also be limiting unless the surface is tiled over.
Because these pans are lightweight and pre-engineered, both DIYers and professionals appreciate how quickly they can be installed. They’re a strong fit for renovation projects where time matters and for new builds where efficiency is a priority.
Reliable options include Wedi Fundo bases, Tile Redi pans, and Freedom Showers level-entry systems. Each offers dependable waterproofing and simple installation paths.

Barrier-free shower pans
Integrated Waterproofing Systems: The Custom Tile Approach
If you want complete design freedom, an integrated waterproofing system offers a custom solution beneath a tiled surface. These systems use sheet or liquid waterproofing membranes, sealing bands, foam trays, and dedicated drains to create a fully bonded, watertight layer under the shower floor.
The big advantage here is flexibility. You can build nearly any size or shape, choose any type of tile, and tailor the design to fit the rest of your bathroom. It’s a popular direction in modern remodeling because it blends long-term performance with complete creative control.
Systems like Schluter KERDI-SHOWER-ST, Laticrete Hydro Ban, and RedGard are well-known for their reliability. They combine strong waterproofing with materials that work well with tile, which makes them a trusted choice among professionals.
Material science snapshot
PVC and ABS pans are light and waterproof, but they can flex slightly under stress. Composite pans tend to be more rigid and durable while offering good thermal stability. Waterproofing membranes vary, too. Polyethylene sheets are strong, stable, and consistent in thickness, while rubberized asphalt membranes bond tightly and offer excellent waterproofing, but can be heavier and require careful handling. Each material has strengths, so choosing the right one depends on how much durability, flexibility, or thermal performance you need.
Traditional Mortar Bed Systems: The Time-Tested Method
The mortar bed approach is the oldest and most customizable method. A contractor hand-shapes a cement-based bed over a waterproof liner, creating the slope needed for proper drainage. It’s highly flexible and can be built to fit any layout or tile choice.
The downside is the skill required. Hand-sloping a mortar bed takes experience, and mistakes can lead to drainage issues or uneven tile. It’s labor-intensive and requires longer drying times, which can add days to a project. Still, for seasoned installers, it remains a dependable way to achieve a perfect fit.
Choosing the Right Pan Type for Your Project
The right shower pan depends on a mix of budget, skill level, and design goals. Pre-fabricated pans are more affordable and easier to handle, especially for DIY installations. Custom waterproofing systems cost more but offer unlimited design options. Mortar beds are the most flexible and often the most economical for skilled builders.
Tile choice matters too. Large-format tiles work best with smooth, stable surfaces, while mosaic tiles can follow slopes more easily. The size and shape of your bathroom can also influence your decision, especially if you’re dealing with tight corners or unusual angles.
Most homeowners struggle to compare all these options, but breaking them down by budget, layout, and design goals makes the choice easier. Once you know what matters most in your project, the right system becomes much clearer.
Essential Drainage Solutions for Curbless Showers
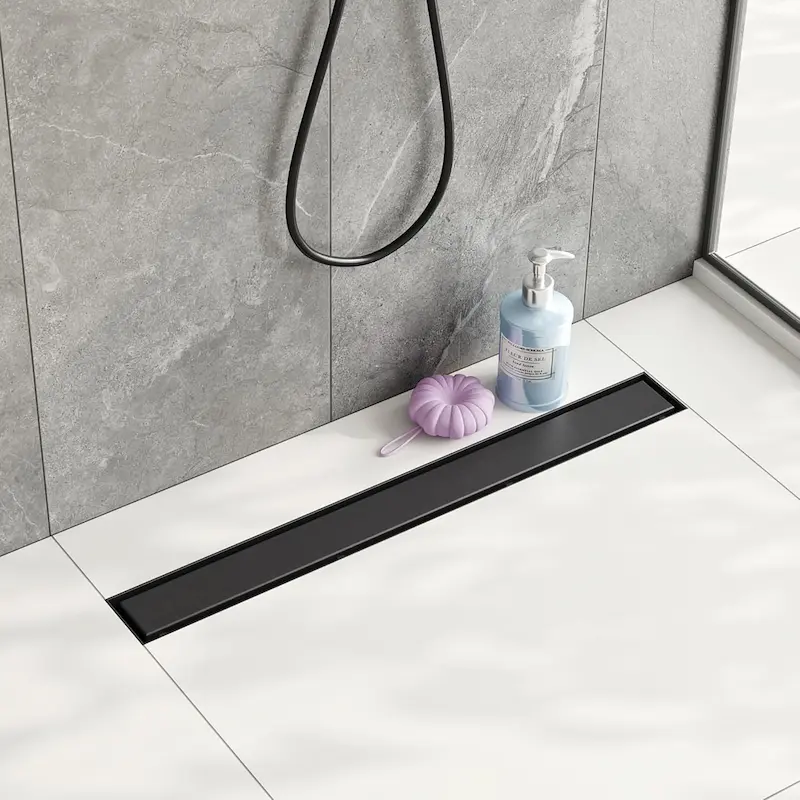
Linear Drains: Sleek Design, Efficient Flow
Linear drains have become a top choice for curbless showers because they pair well with modern design and make water management much simpler. Since the floor slopes in only one direction, you can use large tiles without worrying about complicated angles or cuts. This creates a clean, seamless look that fits well with open, contemporary bathrooms.
These drains can sit along the back wall, the side wall, or right at the shower entry. Their long, narrow shape blends into the floor, giving the space a minimalist feel. Designers often prefer them because they allow more layout flexibility and help keep the shower floor visually consistent.
Installation does require precision. The subfloor needs to be modified to house the drain body, and the waterproofing must tie into the drain correctly. Any misalignment can cause issues down the line, so planning is essential. For homeowners prioritizing design freedom and a smooth tile layout, linear drains are worth considering.
Reliable options include QM Drain and ACO linear systems, both known for strong performance and clean aesthetics.
Point Drains: The Classic Choice
Point drains are the traditional round or square drains placed in the center or near the back of the shower. They require a four-way slope so water flows evenly from all sides into the drain. This means the tile layout has to accommodate that “envelope fold” pattern, which is why smaller mosaic tiles are usually the best match. Their size and flexibility make it easier to follow the slope without lippage or awkward cuts.
These drains are simple, familiar, and versatile. The main challenge is achieving a smooth, accurate slope in all directions. If the angles aren’t right, water can collect around the drain instead of flowing into it. With proper installation, though, point drains remain a dependable and budget-friendly option.
Ensuring Effective Water Management
Proper drainage is one of the most important parts of a curbless shower. The floor must slope at least 1/4 inch per foot toward the drain to keep water moving. Anything less increases the risk of pooling, slow drying, and long-term damage.
Weep holes are another critical detail. They give any moisture trapped under the tile a path to the drain. If these holes get blocked, water can sit inside the shower bed, leading to mold, stains, and structural issues over time.
A well-built drain assembly ties everything together. Every layer must be sealed correctly, from the waterproofing membrane to the drain flange, to keep the system watertight. Even small gaps can create leaks that go unnoticed until they’ve already caused damage.
Homeowners often worry about leaks or standing water in curbless showers, but careful planning and proper installation eliminate those risks. With the right slope, a secure drain connection, and an open path for water to escape, a curbless shower performs reliably for years and stays hygienic, clean, and low maintenance.
Top Barrier-Free Shower Pan Brands & Systems: A Comparative Review
How We Evaluated These Systems
To compare barrier-free shower pan systems fairly, we focused on the factors that matter most during installation and long-term use. Each product was evaluated on material durability, waterproofing performance, and how easily it integrates with different drain types. We also considered how straightforward each system is to install, whether it supports custom tile layouts, and how well it fits into modern curbless shower designs. Expert installer feedback, manufacturer data, and user reviews helped confirm performance and reliability so you can make decisions based on clear, objective information.
Leading Systems for Your Curbless Shower
Below is a simplified breakdown of the top systems used in today’s barrier-free showers. This comparison highlights their construction, best uses, strengths, and limitations to help you choose the right fit for your project.

Wedi Fundo Primo Waterproof Shower Kit
Wedi Fundo Primo Waterproof Shower Kit (3 Ft x 4 Ft) Complete Waterproofing Board Installation System with Central Square Drain Grate Assembly
Type: Pre-fabricated
Material: XPS foam with cement resin
Key Features:
- Lightweight.
- fully waterproof.
- pre-sloped.
- available in many shapes and sizes.
Drain Compatibility: Wedi proprietary drains.
Ideal Application:
- Renovations.
- new builds.
- fast tile-ready installs
Pros
- Easy to cut.
- installs quickly.
- strong waterproofing.
- good insulation.
cons
- Requires Wedi drain.
- higher upfront cost

Schluter Kerdi-Drain PVC Classic Shower Drain Kit with Integrated Bonding Flange
Type: Integrated system (pre-sloped tray + waterproof membrane)
Material: Polystyrene tray with Schluter KERDI polyethylene membrane
Key Features:
-
Fully bonded waterproofing system
-
Supports various custom tile layouts
-
Compatible with KERDI waterproofing accessories
-
High-precision leveling and sealing
Drain Compatibility: Schluter KERDI-DRAIN
Ideal Application:
-
Custom shower builds
-
Complex layouts
-
High-precision installations
Pros:
-
Outstanding waterproofing reliability
-
Flexible layout and design options
-
Industry-proven system
-
Durable and tile-ready
Cons:
-
More installation steps than pre-fabricated bases
-
Membrane placement requires careful attention to prevent leaks
Tile Redi USA Niche Single Recessed Shower Shelf
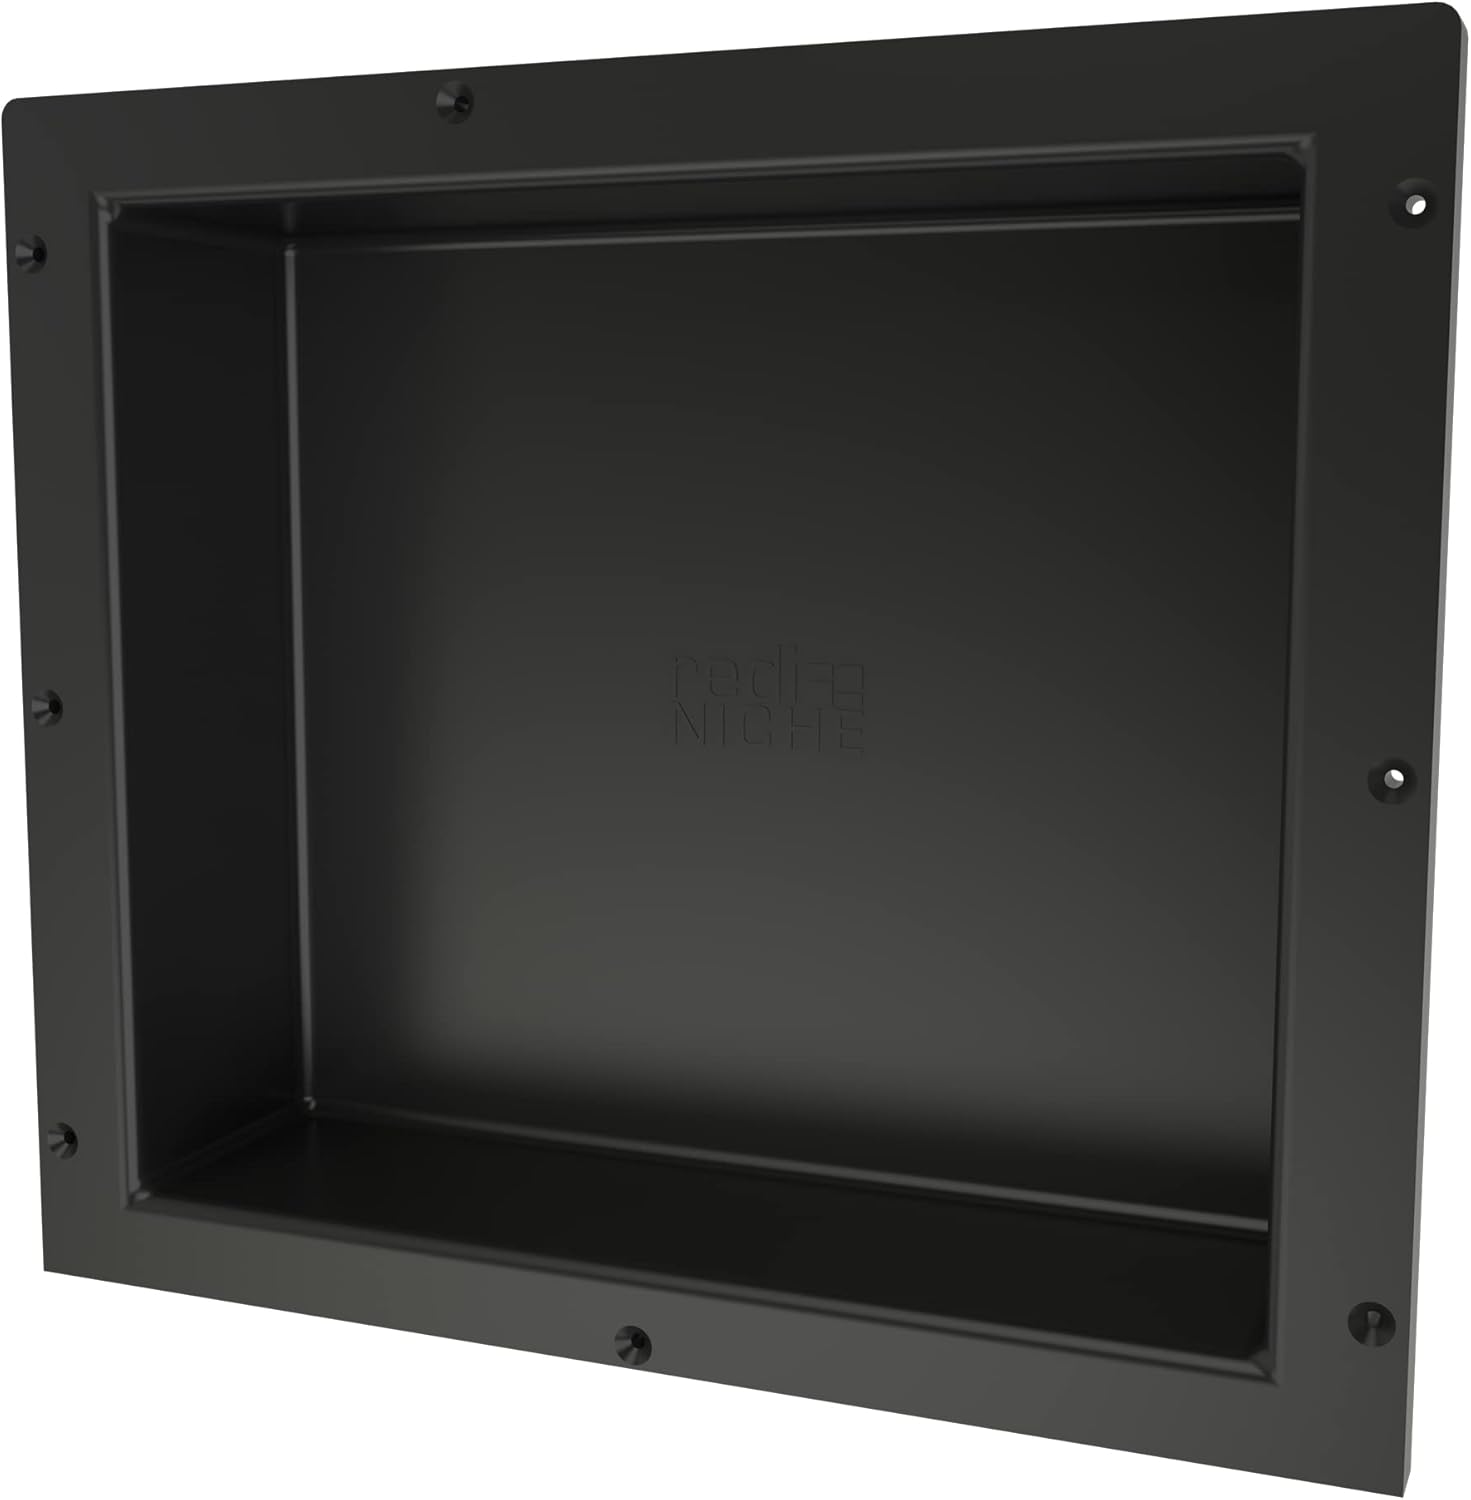
Single Recessed Shower Shelf
Type: Pre-fabricated shower pan
Material: ABS/PVC composite with integrated drain
Key Features:
-
Completely leak-proof and pre-sloped
-
Integrated drain included
-
Tile-ready out of the box
-
Factory-tested for durability
Drain Compatibility: Built-in integrated drain (included)
Ideal Application:
-
Fast shower installations
-
Standard bathroom sizes
-
Projects requiring minimal construction time
Pros:
-
Extremely fast installation
-
Pre-waterproofed and durable
-
No need to install a separate drain
Cons:
-
Limited ability to customize size or shape
-
May require floor modification to achieve flush entry
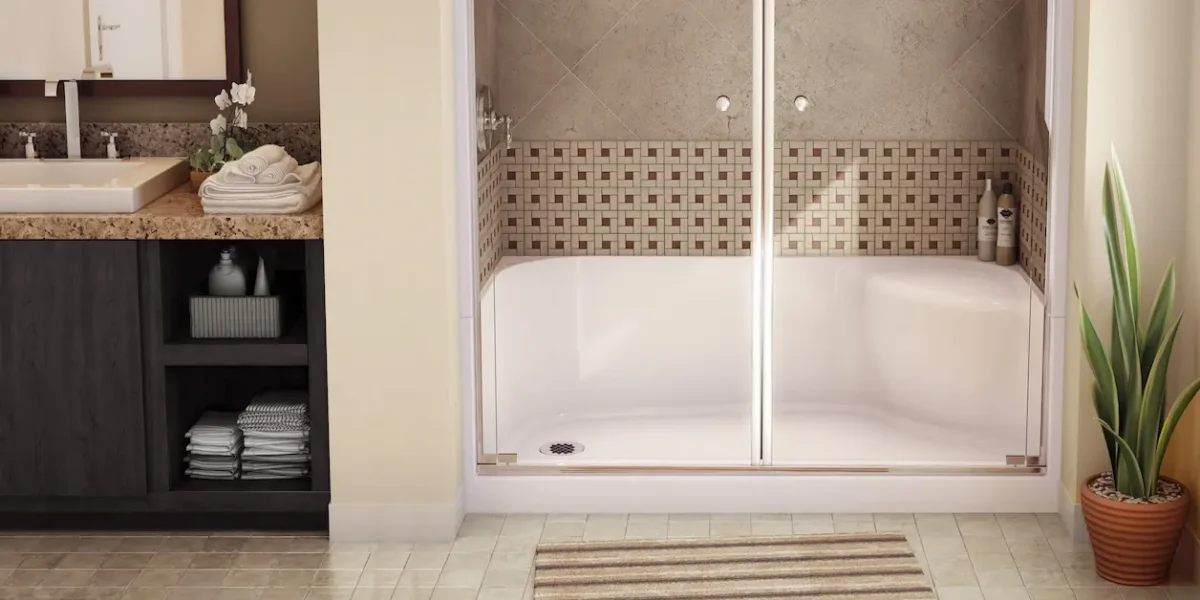
Neodrain 24-Inch Linear Shower Drain,with 2-in-1 Flat & Tile Insert Shiny Black Cover
Type: Pre-fabricated level-entry (curbless) shower pan
Material: Composite, acrylic, or fiberglass
Key Features:
-
ADA-compliant design
-
Multi-piece kits available
-
Wheelchair-friendly level entry
-
Reinforced areas for benches and mobility devices
Drain Compatibility: Fits standard 2" or 3" PVC drains
Ideal Application:
-
Accessibility remodels
-
ADA-compliant bathrooms
-
Mobility-focused renovations
Pros:
-
Strong accessibility features
-
Compatible with various shower layouts
-
Sturdy construction supports mobility aids
Cons:
-
Appearance is basic unless tiled
-
Heavier and more difficult to maneuver than foam bases
Beyond the Pan: Essential Accessories and Components
The shower pan is only one part of a successful barrier-free shower. The following components play an equally important role in long-term performance:
Waterproofing membranes and kits:
Products like Laticrete Hydro Ban and RedGard protect walls, corners, and transitions. They form a continuous barrier that keeps moisture from reaching the structure behind the tile.
Shower bases and substrates:
Pre-sloped trays can replace traditional mortar beds and offer a predictable pitch, reducing installation mistakes and improving drainage reliability.
Sealants and adhesives:
High-quality sealants are crucial for bonding membranes, securing seams, and creating watertight transitions between the pan, walls, and drain assembly.
Mastering Barrier-Free Shower Installation: From Subfloor to Finish
Critical Subfloor Preparation
A flawless curbless shower starts with the floor beneath it. The subfloor has to be stable, level, and strong enough to support tile, fixtures, and long-term use. Any movement in the framing or sheathing can lead to cracked tile, shifting grout, or drainage problems later on, so it’s worth taking the time to get the base right.
A key rule: sort out all subfloor issues before bringing in the pan. If the base isn’t properly prepared, even the most advanced system won’t perform as intended.
Joists often need attention during this stage. Some showers require reinforcement, especially when large-format tile or heavy stone will be installed. If the plan includes recessing the shower area for a flush transition, the joist cavity may need modification to accommodate the dropped subfloor. This is where structural support becomes important. The International Residential Code provides guidelines for notching, drilling, and reinforcing joists so the framing remains sound during these adjustments.
Recessing the subfloor is one of the most effective ways to achieve a true level-entry shower. Depending on the home’s framing, this can be done by lowering the subfloor between joists or by using thinner substrates that preserve strength without adding height. Proper pre-sloping is equally important, especially in mortar-bed systems, to make sure water moves consistently toward the drain.
Expert note: A stable, level foundation reduces the risk of cracks, drainage issues, and uneven tile later on.
The Art of Waterproofing: Your Leak-Proof Guarantee
Waterproofing is the core of a long-lasting barrier-free shower. Even with pre-sloped pans, every inch of the enclosure needs careful protection. The goal is simple: eliminate any path where moisture could sneak into the structure.
High-quality waterproofing products make this easier, but they still require proper technique. Liquid membranes need even coverage and full curing time. Sheet membranes must overlap correctly, bond tightly, and be sealed at every seam. Corners, edges, and transitions tend to be the first points of failure, so extra care is crucial there.
Walls deserve as much attention as the floor. Cement board and foam board both work well, but they must tie directly into the floor’s waterproofing. The membrane should run continuously from the shower base up the wall so water can’t sit behind tile or grout. Penetrations, such as valves, showerheads, and niches, should be sealed with gaskets or membrane patches to keep them watertight.
Common mistakes include rushing drying times, damaging the membrane during tile work, or missing small gaps around pipes. These small errors can lead to leaks that stay hidden for years before finally showing up as rot or mold.
This is the step homeowners worry about most, but when done correctly, a modern waterproofing system provides decades of protection.
Achieving the Perfect Slope and Drain Integration
Once the waterproof base is set, the pan and drain need to be installed so water moves quickly and smoothly. This starts with placing the pan correctly and ensuring the drain connection is secure and sealed to the membrane.
Center drains require a four-way slope, while linear drains allow for a single-plane pitch. Both options work well when installed with care. Linear drains also give more freedom for tile selection and bench placement because the slope stays consistent across the floor.
Drain placement affects both function and accessibility. A drain along the back wall makes slope planning easier. A drain near the entrance lets water drop away immediately. Offset drains can simplify tile layout around benches or grab bars. Whatever the layout, the slope should be steady and consistent.
A smooth transition between the bathroom floor and the shower is what makes a barrier-free design work. This usually involves combining subfloor recessing, careful tile height planning, and clean finishing at the entry point.
Wall Materials and Integration
For the shower walls, choose a solid, moisture-resistant backer board. Cement board offers strength and stability, while foam board adds waterproofing and insulation with a lighter weight. Both need to be installed according to the manufacturer's specs.
Seams should be taped and covered with thinset or sealed with membrane bands. This ensures the walls act as a unified surface rather than a set of independent panels.
Common Installation Challenges and How to Avoid Them
Even experienced installers can run into problems. Uneven subfloors are one of the most common issues, but can be solved with leveling compounds or shimming. Drain failures often come from loose connections or poor sealing, so double-checking the assembly saves trouble later. Membrane damage happens more often than you’d think, especially after waterproofing is done and other trades come in. Protecting the floor with foam panels or cardboard helps avoid punctures.
These challenges highlight why barrier-free showers need careful planning and patient installation. A small oversight can lead to bigger complications, but most problems are easy to prevent with the right approach.
Installers often mention the same “gotchas.” In their words:
“Don’t rush waterproofing. Most leaks come from corners where someone didn’t seal a seam tight enough.”
“Protect the membrane after it’s installed. A single dropped tool can pierce it.”
“Slope and drain alignment make or break a curbless shower. Take your time there.”
These insights reinforce what many homeowners already suspect: finding a contractor skilled in curbless showers matters. With good planning, careful waterproofing, and proper structure, the result is a seamless, modern, and durable shower that will perform reliably for years.
Integrating Design and Aesthetics: Curbless, Not Compromised
A well-designed curbless shower proves you can have accessibility without losing style. The key is choosing finishes, fixtures, and layouts that look good and support safe, easy use.
Tile Selection for Safety and Style
When you’re designing a barrier-free shower, flooring matters more than almost anything else.
Choose tiles with a solid grip. Look for non-slip options or surfaces with a higher COF rating. Mosaic sheets are another smart choice because the extra grout lines help your feet hold steady.
Large tiles create a clean, modern look, but they can make slope transitions tougher to pull off. Smaller tiles follow the floor pitch more naturally and give you better traction. A good middle ground is using mosaics in the shower area and larger tiles outside it for a smooth, blended look across the room.
A curbless shower works best when the floor feels continuous. Pick colors and finishes that flow from the main bathroom into the shower zone so everything reads as a single space.
Glass Enclosures and Open Concepts
Clear sightlines make any bathroom feel more open. Frameless glass is the go-to choice because it keeps the shower light and spacious without adding visual bulk.
If you want a bit more privacy or a more defined layout, half walls and pony walls do the job without closing things in. Some homeowners skip enclosures altogether and go for a simple walk-in layout. It works especially well when the room is wide enough to keep splashing under control.
Fixture Choices and Ergonomics
Your fixtures should match both your layout and your long-term needs. A combination of a fixed shower head and a handheld gives you flexibility and makes cleaning easier. Place them where they’re comfortable to reach, whether you’re standing or seated.
Make sure the controls sit at a height where they can be used without leaning or stretching. This small detail makes a big difference in daily comfort.
Built-in benches or fold-down seats add convenience and stability. Even if you don’t need grab bars today, plan by adding blocking inside the walls while the room is open. It’s a low-cost step that prevents headaches later.
Lighting and Ventilation
Good lighting helps a curbless shower feel bright and clean. Recessed lights keep the ceiling uncluttered, and incorporating natural light, through a window, transom, or skylight, creates a fresh, open feel.
Ventilation is non-negotiable. Showers are naturally humid, and barrier-free layouts often cover more floor area. A strong, well-sized exhaust fan helps prevent mold and mildew before they start and protects your finishes over time.
Designing for Future-Proof Living
A curbless shower shouldn’t feel clinical. With the right choices, it becomes one of the most stylish spots in your home. The goal is simple: design a space that works for every stage of life without giving up the warmth, texture, or luxury you want.
Drawing from real projects is helpful here. Before-and-after examples and case studies show how small bathrooms can be opened up, how thoughtful tile transitions keep everything smooth, and how barrier-free layouts can still look high-end. Seeing real results helps homeowners get past the idea that accessible design means boring or restrictive.
The beauty of a curbless shower is that it can match any style, from clean minimalism to warm traditional spaces. When the design is done right, it feels intentional, modern, and easy to use for anyone.
Navigating ADA Compliance and Building Codes
Building a barrier-free shower isn’t just about good design. It has to follow the rules that protect safety and accessibility. Knowing the basics of ADA guidelines and local codes helps you move through your project with confidence.
Understanding Accessibility Guidelines
If your project involves accessibility needs or commercial spaces, ADA guidance becomes essential. Key sections outline what’s required for clear floor space, turning radius, and accessible approach. Standards like the Uniform Plumbing Code and the International Residential Code also cover structural support, waterproofing, and drainage for shower areas.
One important consideration is space. Wheelchair users need room to move in, turn, and approach fixtures comfortably. This usually means a clear area that allows at least a full turning circle or a three-point turn, depending on the layout.
Slope rules matter too. Accessible showers use gentler pitches than standard installations, so wheels can roll smoothly into the space without tipping or resistance. This is one of the main reasons curbless designs work so well for accessibility.
Local Building Codes: Your First Step
Even if you understand federal guidelines, your project always starts with local code checks. Every city and state handles accessibility and plumbing rules a little differently.
Before you begin, confirm whether you need a permit and what the inspection process looks like. Some areas require rough-in inspections for plumbing, waterproofing checks, and a final sign-off before the bathroom is considered compliant.
Skipping compliance can create bigger problems later. It affects safety, increases liability for contractors and homeowners, and can even reduce resale appeal if the work doesn’t meet local or universal standards.
How Barrier-Free Pans Aid Compliance
Barrier-free pans simplify the technical side of compliance. With built-in slopes and level entries, they already meet many of the slope and drainage criteria that codes require. They help eliminate guesswork and reduce mistakes that often happen when slopes are built manually on-site.
For homeowners, this removes a major stress point. Many people worry that they’ll fall out of compliance without even realizing it. A well-designed barrier-free system supports safe use and makes it easier to meet the expectations of inspectors and accessibility standards.
Cost Analysis: Investing in Your Barrier-Free Shower
A curbless shower is one of the most appealing upgrades you can make in a bathroom, but it’s important to understand the costs before you dive in. A proper budget helps you avoid surprises and make choices that fit your goals.
Breaking Down the Expenses
A barrier-free shower includes several moving parts, and each one contributes to the total cost.
Materials
You’ll need the shower pan or pre-sloped system, the drain, waterproofing products, tile, grout, and fixtures such as the shower head and controls. If you’re planning for accessibility, grab bars or a built-in seat become part of the materials list as well.
Labor
Labor tends to be the biggest expense. It can include demolition, subfloor adjustments, rough plumbing, installation of the pan, waterproofing, tile work, and final finishing. Projects that require structural changes or subfloor recessing will push this number higher.
Potential Hidden Costs
Even well-planned remodels can reveal surprises. Repairing a damaged subfloor, dealing with mold, or adding electrical work for floor heating are common add-ons. Custom glass enclosures may also cost more than standard panels.
Budget Tiers: From Entry-Level to Luxury
Your final price depends on how you approach the project.
DIY vs. Professional Installation
DIY saves on labor, but only works if you’re confident with waterproofing, tile work, and plumbing. A professional installer adds cost but usually comes with warranties and experience that reduce the chance of leaks or structural issues. For many homeowners, the time saved and long-term peace of mind justify the extra expense.
Cost-Saving Tips
Choosing durable but affordable materials, skipping luxury fixtures, or simplifying the layout helps keep the budget under control. Buying tile or accessories in bulk or choosing standard-size glass panels can also reduce costs.
A full cost breakdown is often missing from online guides, so consider this general snapshot based on real installations:
- Entry-level DIY: Lower cost, relies on simpler materials and a basic layout.
- Mid-range professional: Includes quality tile, a pre-sloped pan, and a licensed contractor handling waterproofing and installation.
- Luxury tier: High-end stone, custom glass, designer fixtures, built-in seating, and advanced drainage systems.
This range helps homeowners understand where their project might fall and what trade-offs to expect.
Ensuring Longevity: Maintenance and Future-Proofing Your Shower
A barrier-free shower lasts for years when it’s maintained properly. A little routine care keeps the space clean, safe, and mold-free.
Daily Care and Cleaning
Good ventilation is one of the best ways to prevent moisture buildup. Run the fan during and after showers, or add a stronger exhaust if mold tends to appear.
Use cleaning products that match your tile and pan materials. Harsh chemicals aren’t always necessary and may damage finishes over time. Keeping the walls and floor dry after each use also makes a big difference.
Protecting Your Waterproofing System
Even the best waterproofing systems need regular checks. Look for cracked grout, loose tiles, or damaged caulk at corners and transitions. These early signs are easy to repair and prevent bigger problems. Avoid abrasive scrubbers or strong solvents that can weaken membranes or break down seals.
Drain Maintenance
A clear drain keeps water flowing properly and prevents pooling. Clean the grate often, especially in homes where long hair or soap buildup is common. If the drain slows down, try simple clearing methods first instead of forceful tools that could disturb the waterproof layer beneath.
A long-term maintenance plan is one of the biggest advantages you can offer readers. Many people worry about durability and how barrier-free designs hold up over time. Clear instructions help them feel confident about their investment.
(FAQs) About Barrier-Free Showers
Standard showers: Traditional stall or alcove showers with a curb.
Walk-in or barrier-free showers: Curbless, level-entry showers.
Tub-shower combinations: Showers built over bathtubs for multi-use functionality.
Your Journey to a Perfect Curbless Shower
Barrier-free showers offer a rare combination of safety, modern aesthetics, and long-term value. They make bathrooms easier to navigate, open up space visually, and are a smart investment for both current comfort and future resale potential.
Success relies on proper planning, meticulous waterproofing, and strict adherence to building codes. Whether you’re installing a pre-fabricated pan, a custom tiled tray, or a mortar-bed system, each choice affects both performance and longevity. Similarly, selecting the right drainage solution, linear or point drain, ensures water flows efficiently while complementing your design vision.
With so many options available, it’s easier than ever to tailor a solution that meets your unique needs, style, and budget.
Choosing the Best System for Your Needs
When deciding on a barrier-free shower, consider:
- Budget: Entry-level versus premium systems.
- DIY Comfort Level: How confident are you in handling plumbing, waterproofing, and tile installation?
- Accessibility Needs: Will this shower serve long-term mobility or aging-in-place requirements?
- Design Goals: From minimalist and modern to warm and traditional finishes.
For a personalized approach, interactive tools can help. A “Build Your Curbless Shower” planner or quiz lets you input bathroom dimensions, desired features, and budget to get tailored system recommendations and material estimates. Likewise, a system selector tool can narrow choices based on your priorities, helping you make confident, informed decisions.
Empowering Your Renovation Project
Whether you plan to tackle the installation yourself or hire a professional, preparation is key. DIY projects are achievable with the right knowledge, careful planning, and attention to waterproofing, but partnering with experienced contractors often reduces risk and ensures a flawless finish.
The advice in this guide is informed by industry professionals with expertise in home renovation, accessible design, and plumbing. Their experience underscores the importance of combining quality materials, proper installation, and adherence to codes for a shower that performs beautifully for years.
Next steps: consult local contractors, visit showrooms to see systems in action, or download a comprehensive planning checklist. Taking these steps equips you to confidently begin your transformation, creating a safe, stylish, and future-proof barrier-free shower that suits your home and lifestyle.