
The Ultimate Guide to Caulk Guns Find Your Perfect Tool for Flawless Sealing & Adhesion
December 4, 2025
The Complete Guide to Close Coupled Toilets Choosing the Best for Your Home & Bathroom
December 11, 2025
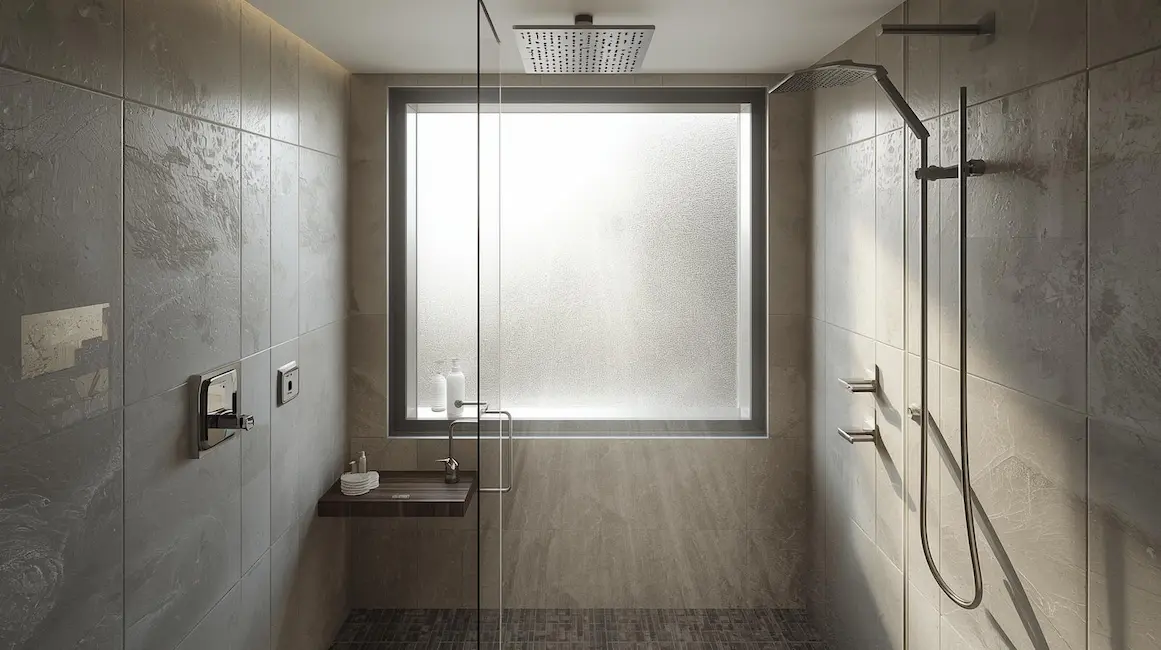
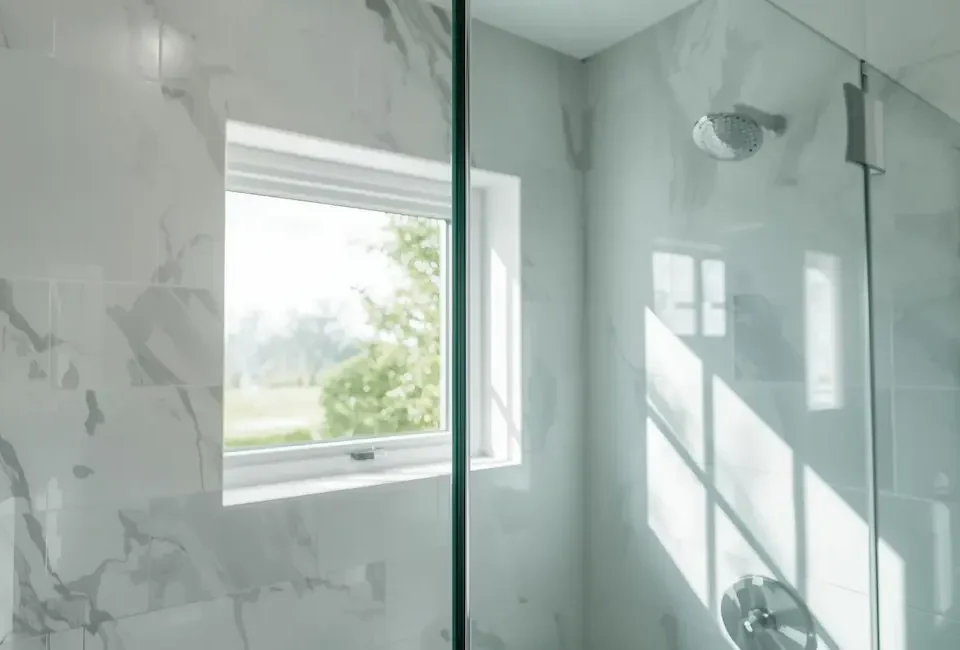
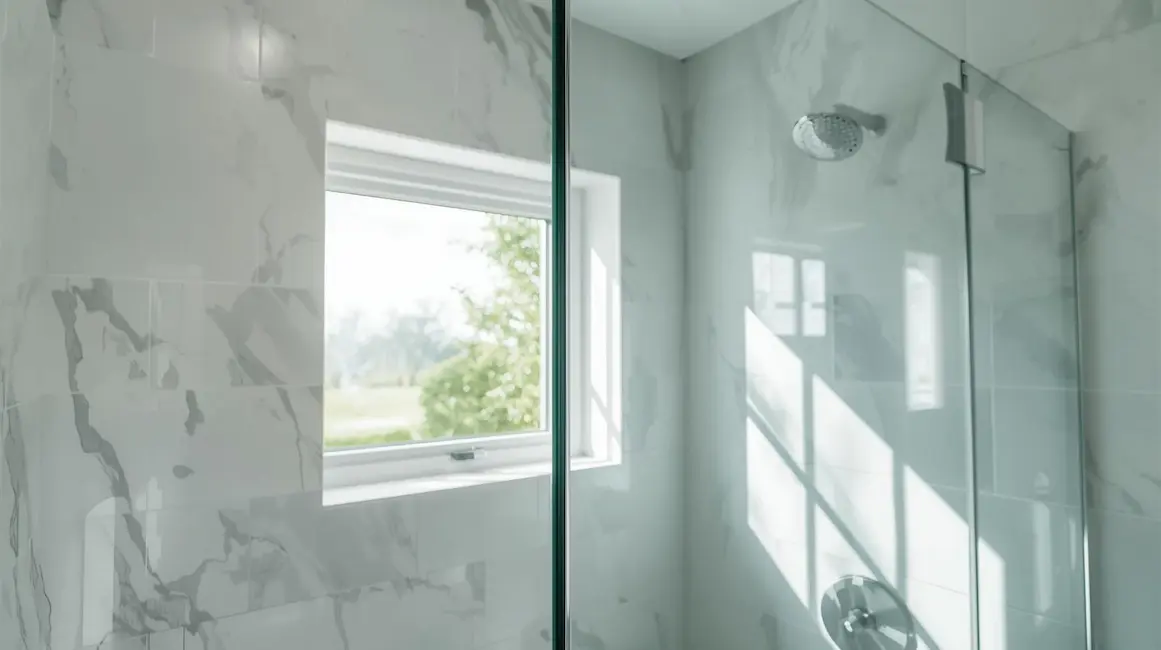
Your Shower Window Dream, Demystified
If you’ve been picturing a bright, airy shower filled with natural light, you’re not alone. Plenty of homeowners love the idea, but the fear of mold, leaks, and privacy issues often stops them in their tracks. A shower window sounds simple, yet the risks can feel intimidating when you’re trying to protect your home from moisture and long-term damage.
These concerns are valid. The truth is that a poorly chosen or poorly installed window can create real problems, from structural issues to uncomfortable humidity. This guide is here to clear away the confusion. You’ll find practical advice, expert guidance, and easy steps that help you choose the right window, waterproof it correctly, and enjoy the look and comfort you’re aiming for.
By the end, you’ll understand how to bring natural light and ventilation into your shower while keeping privacy, durability, and moisture protection firmly in place. You’ll learn about the materials that work best, the installation methods that actually hold up, and the waterproofing strategies that give you confidence. With the right approach, your shower can become a bright and safe retreat that feels as good as it looks.
Why a Regular Window Won’t Do: The Unique Challenges of Shower Environments
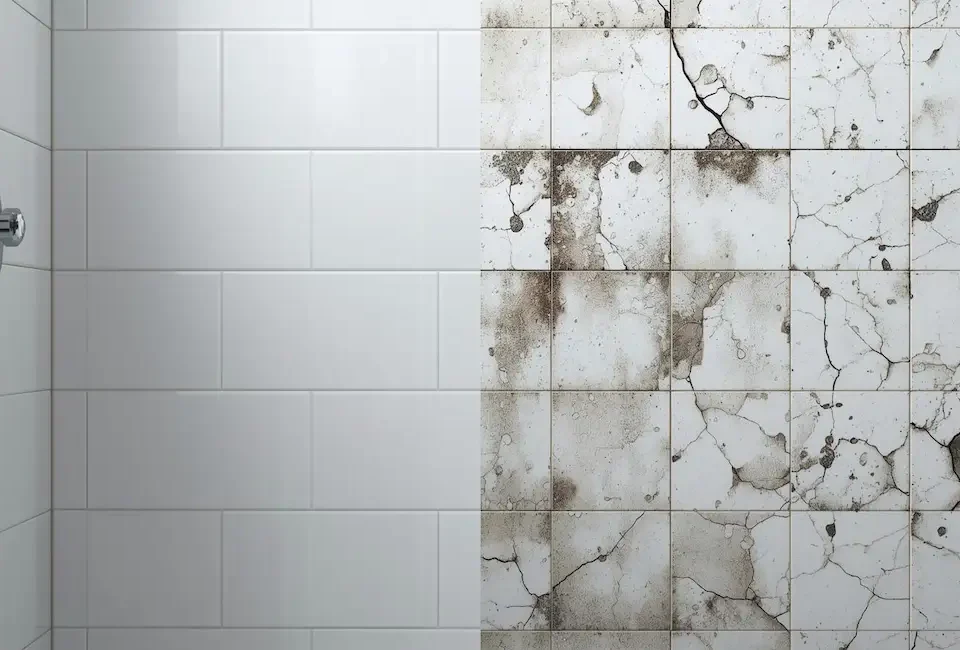
A shower might seem like a simple place to add a window, but the environment inside that space is tougher on materials than most people realize. Daily showers create waves of humidity, direct water spray, and constant temperature changes that push ordinary windows past their limits. Understanding these conditions is the first step to choosing a window that won’t fail over time.
Constant Moisture Exposure
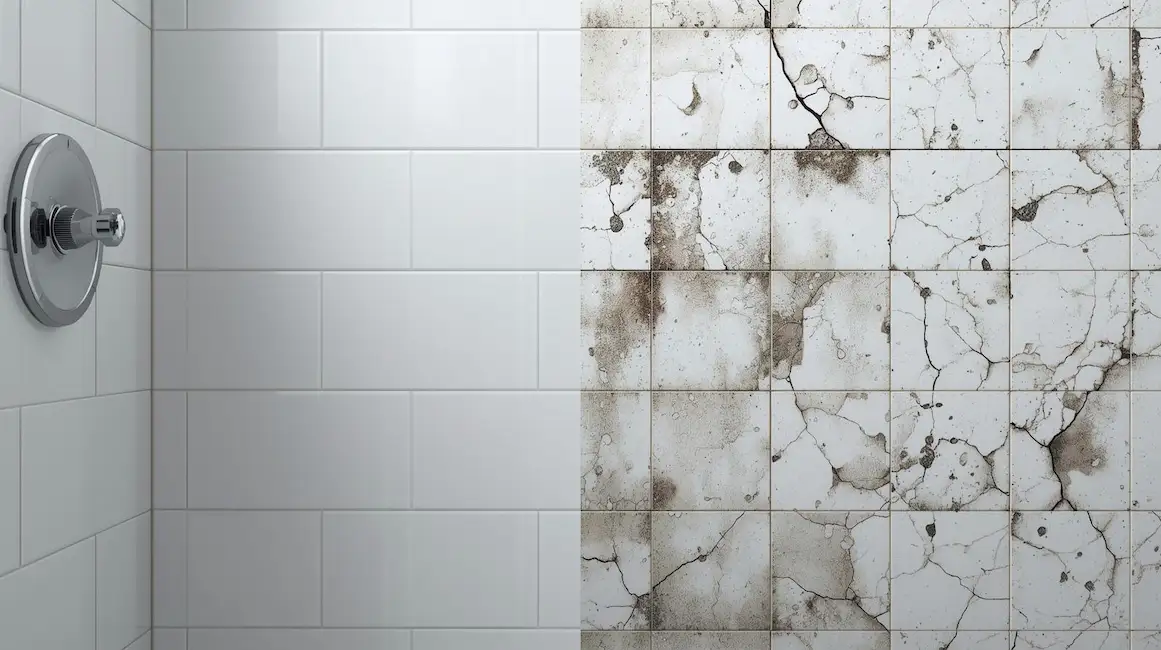
Every shower generates heavy steam and high humidity. Add direct spray from the showerhead, and you have a window that stays damp far longer than anything installed in a typical room. Regular window frames, seals, and wall materials aren’t designed for this level of exposure. When moisture reaches the wrong places, it can lead to mold, mildew, wood rot, and even the peeling or delamination of materials that weren’t built for wet conditions.
This is where a deeper moisture-management strategy becomes valuable. A proper shower window should work alongside tools that keep humidity in check. Humidity sensors, smart exhaust fans, and dedicated timers help remove moisture quickly, reducing the strain on the window system and extending the life of everything around it.
Temperature Fluctuations
Hot showers raise the temperature inside the shower enclosure fast, which puts stress on window materials and seals. If the window can’t handle the heat, you’ll see condensation buildup, dripping, and moisture collecting in corners where it doesn’t belong. Over time, this can damage insulation and increase the chances of mold.
Energy efficiency is another concern for many homeowners. A poorly selected or poorly installed window becomes a weak spot where heat escapes in winter and enters in summer. Choosing the right glazing and ensuring proper sealing helps maintain comfort and keeps utility costs predictable.
Privacy Requirements
A shower is the one place where privacy can’t be optional. Standard curtains or stick-on films don’t hold up well in a wet environment, and they quickly become difficult to clean. In a shower, privacy should be built in. Textured glass, frosted glass, privacy coatings, or high-positioned windows give you long-term seclusion without adding parts that need constant maintenance.
Structural Integrity and Building Codes
Adding a window in a shower means opening up a section of the wall that’s supposed to be fully waterproof. That makes the moisture barrier and wall structure even more important. The window, frame, and surrounding surfaces must be installed with materials rated for continuous water exposure.
Industry guidelines back this up. The International Residential Code (IRC) outlines requirements for safety glazing, wet-area installations, and structural support. Local building codes may also specify ventilation rules, minimum sill heights, and approved window types for shower zones.
Expert tip: Always review your local building and plumbing codes before starting. Some areas require specific types of tempered or laminated glass, certain installation heights, or mechanical ventilation systems when a window is placed inside a shower. Knowing this ahead of time helps you avoid costly changes later and ensures the installation meets safety standards.
Key Considerations When Choosing a Shower Window
Choosing a window for a shower isn’t the same as picking one for any other room. The stakes are higher because moisture, heat, and privacy concerns all play a part. Taking time to understand what matters will help you choose a window that looks good and holds up for years.
Privacy Levels
Most people want a bright shower without feeling exposed, which makes privacy one of the top priorities. The goal is to let in natural light while blocking visibility from outside. Different types of glass offer varying degrees of opacity, from lightly frosted to fully textured designs that blur movement and detail.
Myth vs. Fact
Myth: All obscure glass provides the same level of privacy.
Fact: Privacy levels vary widely depending on texture, pattern depth, and translucency. Some glass types soften silhouettes, while others nearly eliminate them. This is why comparing samples is worth the effort before making a decision.
Moisture Resistance and Durability
Materials matter more in a shower than anywhere else. Constant exposure to moisture and heat can break down frames, seals, and finishes if they aren’t built for wet environments. Over time, unsuitable materials can swell, crack, warp, or corrode.
When recommending window types, glass options, or waterproofing materials, the criteria should be clear. A good recommendation should be based on moisture resistance, durability, energy efficiency, and overall cost-effectiveness. These factors ensure that the window performs well long-term, not just on the day it’s installed.
Ventilation and Airflow
Natural light is great, but it won’t keep humidity under control on its own. A window should always be paired with a strong exhaust fan. The fan should be properly sized for the room and positioned to pull moisture out quickly before condensation forms on walls, ceilings, or the window surface.
Expert tip: Even the best shower window won’t solve humidity problems alone. A high-quality exhaust fan is essential for keeping the space dry and preventing water buildup around the window.
Window Placement Within the Shower
Where the window goes is just as important as what kind you choose. Smart placement can help reduce direct water exposure, which makes waterproofing easier and extends the life of the window. It also affects how much natural light reaches the shower throughout the day. Angles, exterior obstructions, and the layout of the bathroom all play a part.
Expert tip: Try to avoid placing the window directly under the shower head. Minimizing direct spray helps reduce long-term wear and makes sealing the window much more straightforward.
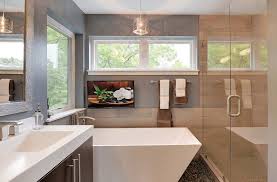
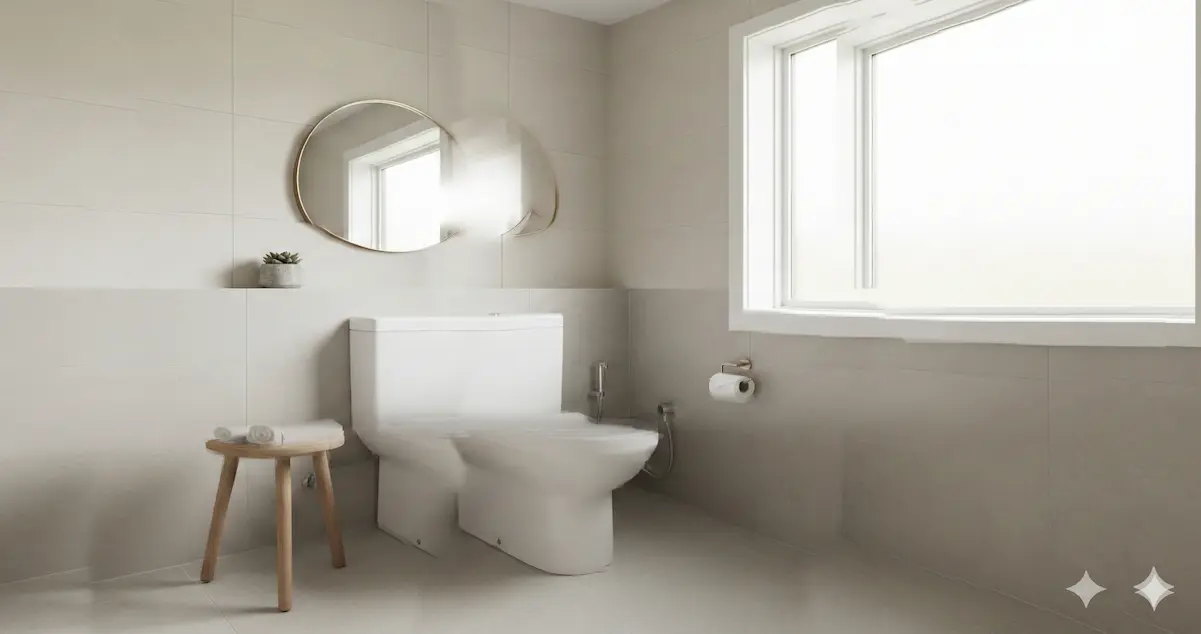
Aesthetics and Design Integration
A shower window should fit into the overall design of the bathroom. Frame styles, colors, and grid patterns all influence how the window looks and how well it blends with the space. Some bathrooms benefit from clean, frame less styles, while others shine with more decorative options.
Different styles can guide your design choices. A minimalist bathroom might pair well with clear lines and simple frames. A farmhouse bathroom might call for divided grids. A spa-inspired space may lean toward frosted or textured glass that softens the light. Each style offers different product options and design reasoning, making it easier to match the window to your vision.
Building Codes and Safety Standards
Windows in wet areas must meet strict safety rules. Glass needs to be rated for impact and moisture, and installations must protect the structure behind the wall. The International Residential Code (IRC) and local building regulations outline requirements for safety glazing, ventilation, and structural integrity.
Following these standards isn’t optional. It protects your home, keeps the installation compliant, and ensures that your shower window is both safe and durable. Always check local guidelines before you commit to a design or product.
Types of Windows Best Suited for Showers
Not every window can handle the demands of a shower. High moisture, constant temperature changes, and the need for privacy make it important to choose materials and designs built for this environment. Below is a clear breakdown of the most reliable options, along with when each one makes the most sense.
Fixed or Picture Windows
Fixed windows are sealed tight, which makes them one of the most reliable choices for moisture-heavy areas. With no moving parts, there’s nothing to warp or fail, and they let in the most natural light. The trade-off is that they don’t offer ventilation, so you'll depend entirely on an exhaust fan. They also rely on the glass type for privacy, since they can’t be covered easily inside a shower.
Best for: Homes where you want maximum light and already have strong mechanical ventilation.
Casement Windows
Casement windows swing outward and allow generous airflow. When closed, they create a tight seal that keeps moisture out of the frame. They’re also easy to clean from inside the bathroom. The downside is that their hinges can be exposed to moisture and may need maintenance.
Best for: Situations where ventilation is important, and the window won’t sit directly in the path of the shower spray.
Awning Windows
Awning windows open outward from the bottom, which gives you ventilation even during light rain. They shed water well and offer good security. The opening is smaller compared to a casement, and cleaning the exterior can be a bit harder.
Best for: Higher wall placements where privacy matters and some ventilation is needed without letting in outdoor elements.
Hopper Windows
Hopper windows open inward from the top, which works well for small or elevated spaces. They provide solid ventilation and keep the window secure. The inward angle means water or dust can collect on the sash when open, and size options tend to be limited.
Best for: Compact bathrooms where you need controlled airflow and strong privacy.
Vinyl Windows
Vinyl is one of the most practical materials for a shower window. It performs well in constant moisture, doesn’t require heavy maintenance, and comes at a reasonable cost. It can expand slightly with temperature swings, but far less than wood.
Best for: Most modern bathroom installations where durability, affordability, and moisture resistance are priorities.
Fiberglass Windows
Fiberglass is a top-tier material for wet environments. It offers excellent stability, energy efficiency, and long-term durability. It handles temperature shifts well and can be painted to match your bathroom style. The only drawback is the higher upfront cost.
Best for: Premium installations or homes in harsher climates where you want maximum performance.
Clad Wood Windows
These windows combine the natural warmth of wood inside with a protective cladding outside. They look beautiful, but they need careful installation to ensure no interior wood is left exposed to moisture. If water reaches the wood, it can cause swelling or deterioration over time.
Best for: Bathrooms where design and aesthetics are important and the window isn’t in direct contact with heavy spray.
Important: The interior components of any clad wood window must be fully sealed if they sit within the shower enclosure.
Casement Windows
Specific Material Recommendations
Vinyl Windows: A dependable choice for most shower applications thanks to their moisture resistance, low upkeep, and cost-effectiveness.
Fiberglass Windows: Ideal for premium builds or demanding climates due to their strength, stability, and energy performance.
Expert tip: Always choose tempered glass for shower windows. This safety requirement isn’t optional. Tempered glass prevents dangerous shards if the window ever breaks and is required by building codes for any glazing inside a wet area.
Park Ridge Products VBSI3214PR Window, 32" x 14", White
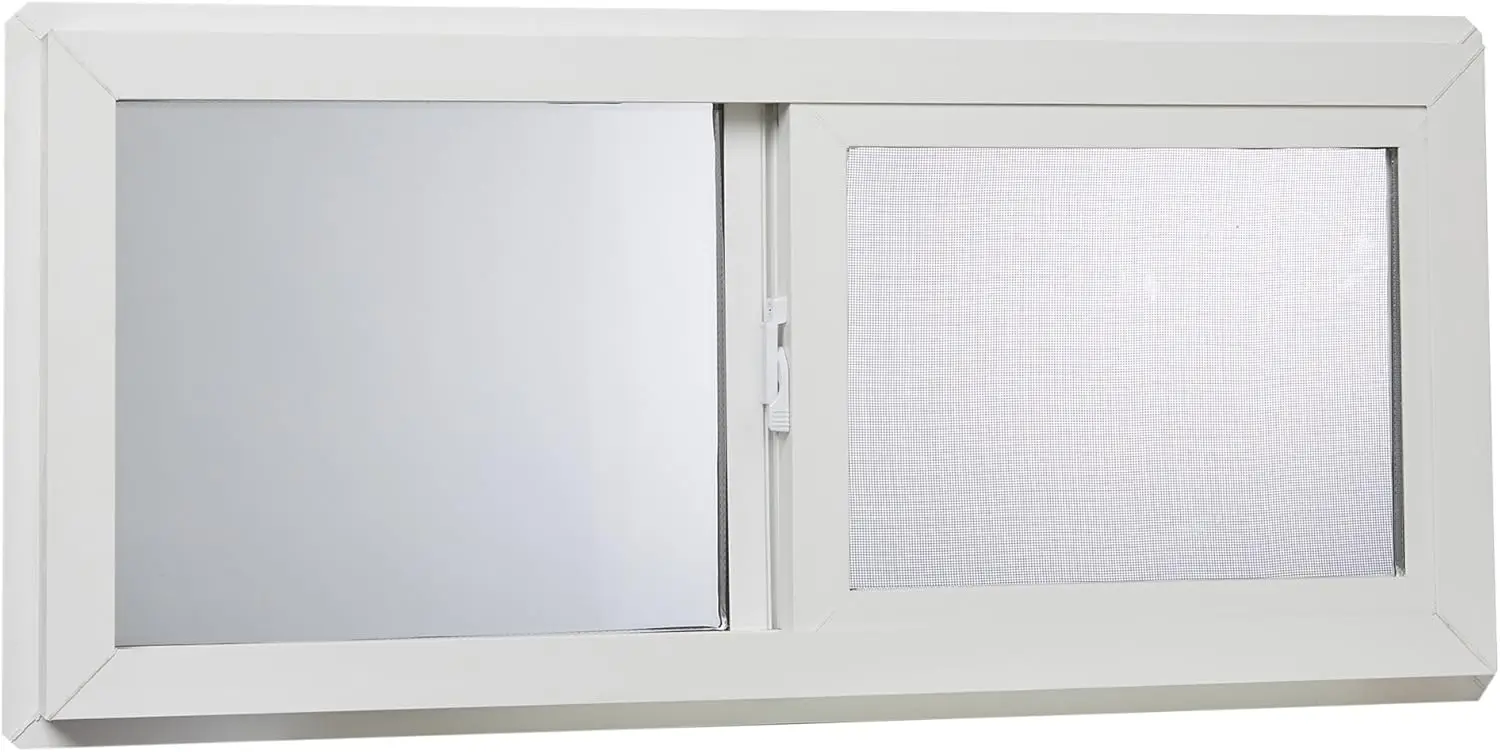
Park Ridge Window, 32" x 14", White
Mesh, Fiberglass Window Screen
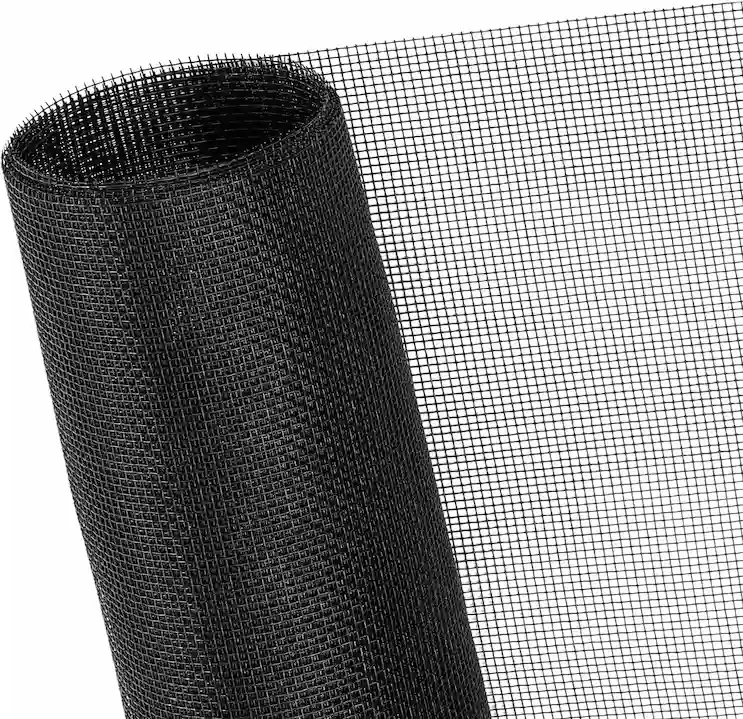
Mesh, Fibre glass Window Screen
The Absolute Must: Waterproofing Your Shower Window
Installing a window inside a shower can be a great design upgrade, but it also introduces one of the biggest potential leak points in the entire bathroom. Waterproofing isn’t optional. It’s the only way to protect your walls, prevent mold, and ensure your new window lasts for decades instead of a few years. The methods below work together to form a complete, reliable system.
Sloped Sill
A properly sloped sill is one of the simplest but most important details. The interior sill should angle slightly downward toward the shower, usually around 5 to 10 degrees. This prevents water from sitting at the base of the window or seeping into the framing.
Key benefits:
- Helps water drain into the shower instead of pooling
- Protects the frame, seals, and wall cavity
- Reduces the risk of mold, rot, and sealant failure
Considerations:
A clean, continuous slope is essential. This is usually formed with a mortar bed or a specialized waterproofing component before tile is installed.
Continuous Waterproofing Membrane
A waterproofing membrane protects the wall behind the tile and creates a sealed system around the window. This can be a liquid-applied product like RedGard or Hydro Ban, or a sheet membrane like Schluter Kerdi or Wedi.
Key benefits:
- Creates a fully sealed moisture barrier
- Stops water from entering framing, insulation, or drywall
- Provides long-term protection against leaks
Considerations:
The membrane must be applied carefully, without gaps or pinholes. Overlaps, corners, and seams are critical. Always confirm that the membrane you choose is compatible with your thinset or tile adhesive.
Industry reference: TCNA guidelines provide detailed instructions for applying membranes around window openings and other fenestrations.
Flashing Techniques (Interior and Exterior)
Flashing is your window’s shield at its most vulnerable points. It redirects water away from the frame and ensures that even if water reaches the edge of the window, it has no way to enter the wall.
Key benefits:
- Protects the sill, jambs, and head from water intrusion
- Creates a shingle-style layering system so water flows downward and outward
- Prevents both interior shower leaks and exterior weather infiltration
Considerations:
Proper sequencing is essential. Interior flashing must integrate with the waterproofing membrane, while exterior flashing must prevent outdoor moisture from entering.
Expert tip: Flashing is non-negotiable. Treat it as one of the core components of the waterproofing system, not an optional step.
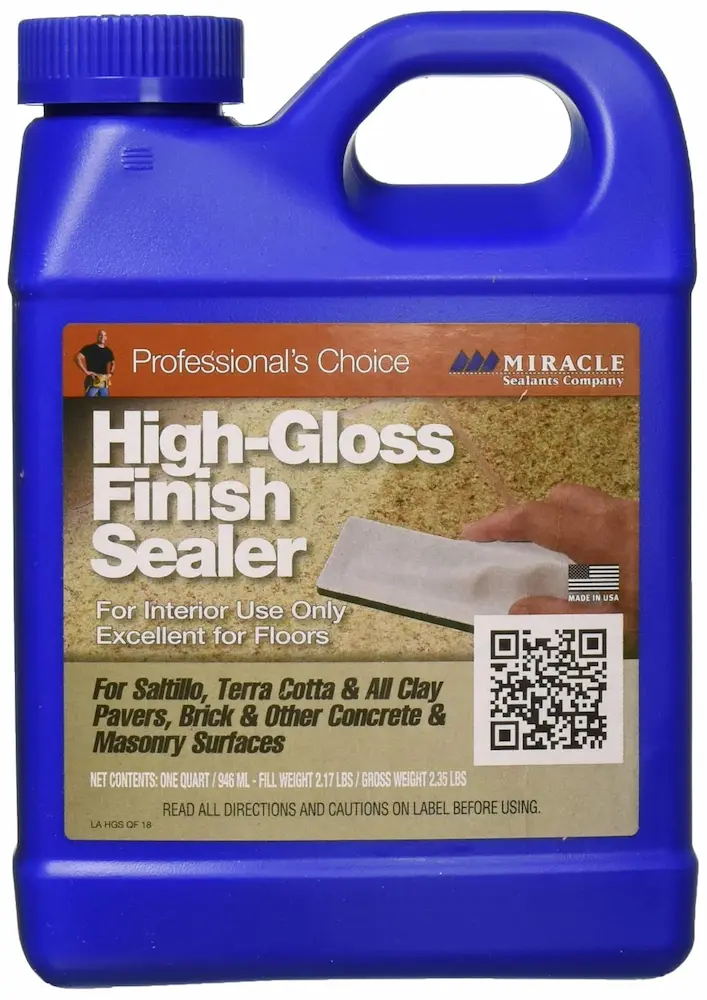
High-Quality Sealants
Even the best membranes and flashing need backup. A professional-grade sealant fills small gaps or transitions where water could sneak through.
Key benefits:
- Acts as the final protective layer against moisture
- Moves with the structure to prevent cracking
- Blocks water from entering tiny openings around the window and tile edges
Considerations:
Use 100 percent silicone or polyurethane sealants designed for wet environments. The surfaces should be clean and dry, and periodic reapplication may be needed over time.

Understanding Where Water Sneaks In
The most common leak points around a shower window include:
- The sill, where water often sits the longest
- The jambs and head of the frame
- Grout lines, which are not waterproof
- Areas where old or failing sealant has opened up
Knowing these vulnerable areas helps you focus your waterproofing efforts where they matter most.
Step-by-Step Waterproofing Process
Here’s how a proper shower window installation should be waterproofed:
- Prepare the rough opening and substrate
Make sure the framing is solid and the wallboard is approved for wet areas. - Install the sloped sill treatment.
Create a smooth downward slope toward the shower interior. - Integrate flashing with the waterproofing system.m
Install sill pan flashing, then side and head flashing in the correct sequence. - Apply the waterproofing membrane.
Use either a liquid or sheet membrane and wrap it carefully around the window opening and surrounding walls. - Tie the membrane to the tile backer board.
This creates a continuous waterproof layer from the window to the rest of the shower wall. - Install tile and seal all joints.
Use high-quality silicone or polyurethane sealants to finish the system.
Expert tip: Don’t rush the prep work. A perfect waterproofing job depends on surface readiness just as much as the materials you use.
Material Spotlight
Waterproofing membranes:
Products like Schluter Kerdi, RedGard, and Laticrete Hydro Ban are industry favorites because they create dependable moisture barriers around windows and other high-risk areas.
Moisture-resistant sealants:
Use specialized silicone or polyurethane formulas designed for continuous water exposure.
Expert tip: Always slope the sill. A flat sill is one of the most common reasons shower windows fail early.
Common Failure Points to Avoid
- Poor overlap between flashing and membranes
- Using non-waterproof materials such as green board or standard drywall
- No sill slope or a slope that directs water the wrong way
- Skipping sealant in transition areas
- Relying on grout as a waterproofing layer (it’s not)
Ensuring Privacy: Glass Options and Other Smart Solutions
Privacy is one of the biggest concerns homeowners have when adding a window inside a shower. The good news is that you can enjoy natural light without feeling exposed. With the right glass, technology, and design choices, your shower window can feel open and secure at the same time.
Obscure Glass Types
Obscure glass remains one of the most reliable ways to maintain privacy while letting in plenty of daylight.
Frosted glass
This type is etched or sandblasted to blur visibility. It softens the view both ways, creates an even glow, and still feels bright.
Patterned glass
Textured designs like rain, reeded, or glue-chip scatter light and distort shapes. These patterns add character while making it nearly impossible for anyone to see inside clearly.
Tinted glass
Tinted glass reduces glare and limits visibility from outside. It doesn’t hide as much as frosted or patterned glass, but it adds privacy while maintaining a modern aesthetic.
If you want a simple, low-maintenance option that blends privacy with natural light, obscure glass is usually the first choice.
Smart Glass Technology
Electrochromic smart glass is a modern solution that lets you adjust privacy whenever you want. With a switch or remote, the window goes from clear to opaque instantly.
Why homeowners like it:
• Full control over clarity and privacy
• No cords, slats, or fabric
• No risk of mold growth in moving parts
• Clean, minimalist look
Smart glass is ideal if you want a window that adapts to different lighting needs throughout the day.
Integrated Privacy Features
Some homeowners prefer built-in privacy options rather than relying on glass alone. Between-the-glass blinds or shades are sealed inside the window frame, protected from moisture and humidity.
Benefits:
• Blinds stay dry and clean
• No risk of mildew buildup
• Easy operation with a slider or remote
Drawbacks compared to smart glass:
• Blinds can wear out over time
• They don’t offer the same seamless look
• Light control is more limited
These solutions work best when you want adjustable privacy without adding anything on the wet side of the shower.
Rabbitgoo Window Privacy Film Rainbow Film Decorative Window Sticker

Rabbitgoo Window Privacy Film Rainbow Film
KESPEN Window Privacy Film One Way Daytime Privacy Static Cling Sun Blocking Anti UV Reflective Window Tint for Home and Office
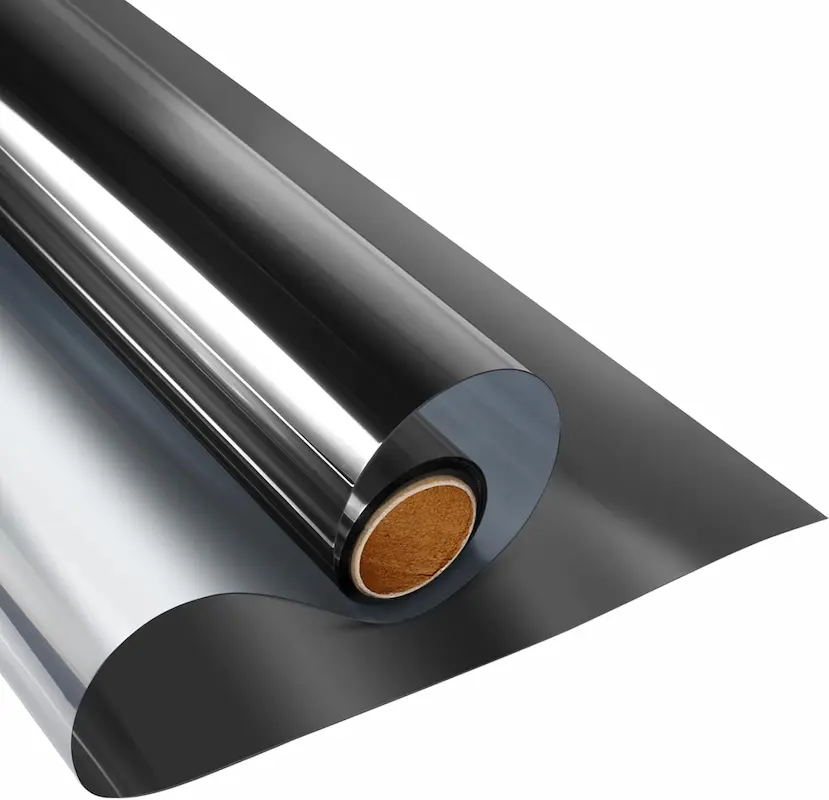
Window Privacy Film One Way Daytime Privacy
Architectural and Landscape Solutions
Privacy doesn’t always have to come from the window itself. Exterior design plays a big role, too.
Strategic planting:
Tall shrubs, bamboo, or small trees placed outside the window can soften sightlines while keeping the light flowing in. Just make sure the plants don’t block too much sun or require heavy upkeep.
Screens or fences:
Outdoor privacy screens or decorative fencing can shield the window from direct views. These options are helpful when you need instant privacy but don’t want to alter the glass.
The key is balancing outside obstructions with the amount of daylight you want indoors.
Myth vs. Fact: “You can’t have a window in a shower because of privacy.”
Myth.
Many people believe shower windows automatically compromise privacy.
Fact.
With the right glass, placement, and privacy features, a shower window can be one of the safest and most comfortable additions to a bathroom. Today’s materials and technology allow you to enjoy natural light without sacrificing discretion.
Installation Best Practices for Long-Lasting Performance
A shower window only performs as well as its installation. Even the best materials can fail if the opening isn’t framed correctly or if waterproofing isn’t done with care. These steps help ensure the window stays watertight, stable, and trouble-free for years.
Framing the Opening
Start with the right rough opening size based on the manufacturer’s specifications. A tight or oversized fit can lead to poor sealing and long-term leaks. Reinforce the framing with moisture-resistant lumber or treated studs. Wet areas need extra rigidity because constant exposure to heat and humidity can weaken standard framing over time.
Pre-Installation Waterproofing
Before the window goes in, the sill needs complete protection. A sill pan flashing is the safest way to direct any accidental moisture to the outside instead of letting it seep into the wall cavity. Products like Schluter Kerdi-Board, Laticrete Hydro Ban sheet membrane, or traditional metal and PVC pan flashings work well.
Tie the exterior house wrap or weather barrier directly into the window flanges. This step creates a continuous shield against wind-driven rain. It’s one of the most overlooked steps, but it makes a big difference in long-term durability.
Window Setting and Shimming
The window must sit plumb, level, and square. Any twist in the frame can affect how the window locks, seals, and drains. Use composite or plastic shims since they don’t absorb moisture. Wood shims inside a shower wall can swell, rot, and eventually push the window out of alignment.
Exterior Sealing and Flashing
Once the window is in place, seal the outside perimeter with a high-quality silicone or polyurethane sealant. Brands like GE Silicone 2+, Sika, or OSI Quad Max are good choices for wet areas and exterior exposure.
Install head flashing above the window to divert water outward. This small step protects the upper framing from water intrusion, especially in areas with heavy rainfall.
Interior Waterproofing Integration
The interior waterproofing is where shower-specific techniques matter most. The membranes around the window need to tie into the overall shower waterproofing system without gaps or breaks. Liquid membranes such as RedGard and Hydro Ban or sheet systems like Kerdi and Durock create a continuous barrier.
Build the interior sill with a slight forward slope using mortar or a pre-made sloped pan. This keeps water from sitting against the window frame. Pooling water is one of the leading causes of rot and mold around shower windows.
Tile Integration
When it’s time to tile, follow the best practices outlined by the Tile Council of North America. Use a thin-set mortar rated for wet areas and a high-quality grout that resists cracking. Where the tile meets the window frame, switch from grout to a flexible, mold-resistant sealant so the joint can handle movement without breaking.
Precision matters around corners, edges, and the sloped sill. Any gaps can compromise waterproofing.
Expert Tip: Always Slope the Sill
A properly sloped sill is one of the simplest ways to extend the life of a shower window. Even a small angle helps water drain off the surface instead of creeping into seams or sitting along the edge. It’s a small detail that earns big returns in durability.
Maintenance and Care for Shower Windows
A well-installed shower window still needs regular upkeep to stay clean, safe, and leak-free. Consistent maintenance not only keeps the window looking good but also protects the surrounding walls and framing from long-term moisture damage.
Regular Cleaning for Mold Prevention
Moisture builds up quickly in a shower, so keeping the window clean is essential. Use gentle, non-abrasive cleaners for both the glass and the frame. Harsh products can scratch tempered glass or damage sealants over time.
Daily habits go a long way. Squeegeeing the glass after each shower helps keep water spots and mildew at bay. Running the exhaust fan during and after your shower reduces humidity and minimizes condensation on the window. A high-quality fan is one of the most effective tools you can add to prevent moisture buildup.
Inspecting and Re-Sealing Grout and Caulk
Grout and silicone don’t last forever. Plan to check the joints around the window at least once a year. Look for cracking, gaps, peeling, or dark discoloration. These are signs the sealant has broken down and is no longer watertight.
Removing old caulk is simple, but it must be done with care. Cut it away with a utility knife or caulk remover, clean the joint thoroughly, and let it dry before applying a fresh bead of mold-resistant silicone. Keeping these seals intact is one of the easiest ways to prevent leaks.
Checking for Water Ingress
Even with good waterproofing, leaks can still develop if materials age or seals fail. Watch for staining on the wall, bubbling paint, or soft areas in the drywall around the window. These issues should be addressed immediately. Catching small problems early prevents expensive repairs down the road.
Window Hardware Maintenance
If the window opens, give the hardware a quick check every few months. Hinges and locks can stick when exposed to humidity for long periods. A small amount of silicone-based lubricant keeps everything moving smoothly.
Make sure the drainage weep holes on the window frame stay clear. These openings allow water to escape from the frame. When they clog, moisture can build up and cause internal damage.
Long-Term Durability Tips
Experienced contractors often emphasize that long-term success comes down to two things: proper waterproofing from the start and quality materials. Cutting corners on membranes, sealants, or the window itself almost always leads to problems later.
A contractor’s advice is simple: invest in materials that are designed for wet environments, maintain them regularly, and react quickly if something looks off.
Expert Tip: Inspect Grout and Sealant Often
A quick annual inspection of grout lines and silicone joints is one of the easiest ways to keep your shower window protected. Small cracks can let in a surprising amount of moisture, so keeping these areas sealed makes a big difference.
Cost Factors: What to Budget for Your Shower Window Project
Adding a window to your shower can elevate the space with light and style, but it’s important to understand the full range of costs. From materials to installation and long-term maintenance, budgeting carefully ensures you get a window that performs well and lasts.
Window Unit Cost
The type of window you choose has the biggest influence on the base price:
- Vinyl windows: Typically, the most affordable, moisture-resistant, and low-maintenance option. Ideal for standard installations.
- Fiberglass windows: Higher upfront cost but offer superior strength, durability, and energy efficiency. Good for premium or long-term installations.
- Clad wood windows: The most expensive option due to the interior wood finish combined with protective exterior cladding. Offers high-end aesthetics but requires careful installation to avoid moisture damage.
Glass options also affect price. Obscure or frosted glass adds a modest premium, while smart glass or electrochromic glass can significantly increase costs. Larger windows, custom shapes, or integrated blinds will further raise the price.
Waterproofing Materials
Waterproofing is essential and comes with its own costs. Consider:
- Liquid-applied membranes: Products like RedGard or Laticrete Hydro Ban
- Sheet membranes: Options like Schluter Kerdi or Wedi panels
- Flashing tapes and pans
- Specialized silicone or polyurethane sealants
The total cost depends on the square footage to be protected, but investing in quality waterproofing prevents expensive repairs later.
Installation Labor
Professional installation is highly recommended. Costs vary based on:
- Complexity: Installing a window in a new opening is simpler than replacing one in an existing wall with unknown framing conditions.
- Scope: Proper waterproofing, flashing, and tile integration require skilled labor.
- Regional rates: Labor costs differ depending on location and contractor expertise.
A lifetime cost analysis is worth considering. Spending more upfront on high-quality materials and careful installation can reduce long-term maintenance, energy loss, and repair costs compared to cheaper, lower-quality options.
Tiling and Finishing Costs
The surrounding tile adds to the total budget. Consider:
- Labor and materials for the tile
- Grout, caulk, and trim pieces
- Integration with the window frame for watertight finishing
Proper tile installation ensures the waterproofing system works correctly and adds to durability and aesthetics.
Additional Considerations
- Permit fees: Some areas require permits for altering wall openings.
- Exhaust fan: If you need to upgrade or install a new fan for humidity control, include that in your budget.
- Unexpected repairs: Replacing a window in an older bathroom may reveal hidden water damage or framing issues, which can increase costs.
Audience Tip: Balancing cost and quality is key. Cheaper windows or cutting corners on waterproofing may save money initially but often lead to costly failures. Focusing on quality materials, skilled installation, and proper maintenance ultimately saves money and stress over time.
FAQs About Choosing and Installing Shower Windows
Conclusion: Your Ideal Shower Window Awaits
Adding a window to your shower is more than just a design upgrade, it’s an opportunity to bring natural light, ventilation, and a sense of openness to one of the most personal spaces in your home. To achieve a lasting, functional, and beautiful result, focus on three key areas: choosing the right materials, implementing meticulous waterproofing, and ensuring proper installation.
The balance between light, privacy, and durability is crucial. Obscure or patterned glass, tempered for safety, combined with high-quality vinyl, fiberglass, or clad wood frames, creates a window that enhances both style and function. Pairing this with a well-executed waterproofing system, sloped sills, membranes, flashing, and mold-resistant sealants, protects your walls and structure from long-term moisture damage. These are the “unseen” details your contractor may not emphasize, but they are essential for longevity and peace of mind.
With the right planning and professional guidance, installing a shower window doesn’t have to be stressful. You can confidently select a design that suits your bathroom’s aesthetics while meeting all building codes and industry standards. A well-executed window project is not just a functional improvement; it’s an investment in comfort, safety, and home value.
Next Step: Ready to find your perfect shower window? Try our interactive Shower Window Selector quiz to receive personalized recommendations based on your bathroom layout, privacy needs, and style preferences. Then, consult certified professionals to ensure your project is executed flawlessly, for a shower that’s as safe and durable as it is beautiful