


Grow Your Own Climate Solution A Definitive Guide to Fast-Growing Trees for Ultimate Cooling & Green Living
October 26, 2025
Mastering Tree Shapes A Homeowner’s Guide to Choosing, Creating, and Maintaining Pyramids, Lollipops, and Vases
October 28, 2025
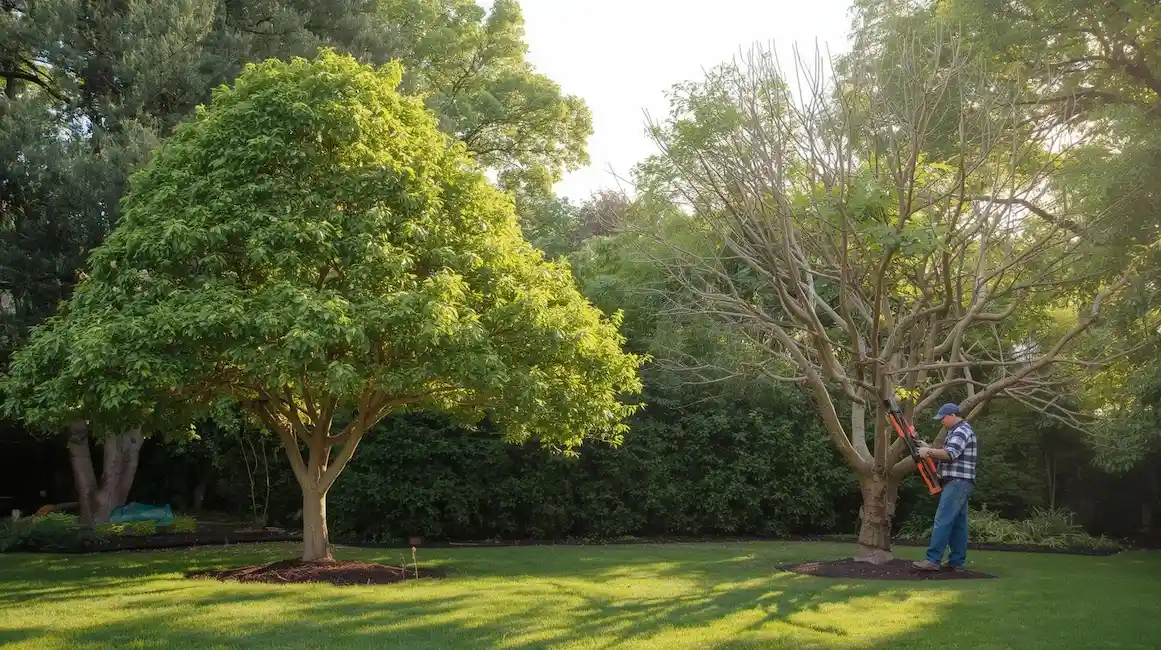
Are your trees looking sparse on the inside, with tufts of foliage clustered only at the branch tips? Do branches snap easily in storms or seem weak? If so, your trees might be suffering from a common yet often overlooked pruning mistake known as "lion's tailing."
Many homeowners, eager to give their trees a neat appearance, unintentionally strip away too much interior foliage. The result is long, bare branches with dense clusters of leaves at the ends, much like a lion’s tail. While this may look tidy from the outside, it drastically undermines a tree’s health, stability, and long-term growth.
This guide will unravel the dangers of lion's tailing and show you how to prune correctly. You’ll learn how to protect your trees, enhance their strength, and ensure they flourish for years to come. By the end, you’ll confidently identify lion's tailing, understand the biological reasoning behind proper pruning, master essential techniques, choose the right tools, and know when it’s time to call a professional. With these skills, you can safeguard your trees and elevate your landscape’s beauty through informed, expert-level care.
Understanding Lion's Tailing: The Hidden Danger to Your Trees
What Is Lion’s Tailing? A Clear Definition
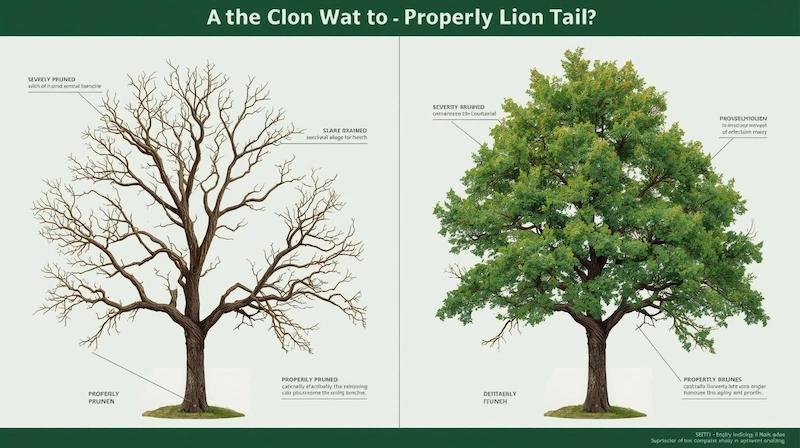
Lion’s tailing is a pruning mistake that happens when too many interior branches and leaves are removed from a tree, leaving only foliage and small shoots at the outer tips of the limbs. This creates long, bare branches that end in tufts of leaves, giving the tree a “lion’s tail” appearance.
It usually occurs when someone tries to make a tree look cleaner or lighter without understanding its natural growth structure. Homeowners and even some inexperienced pruners often remove interior foliage to “open up” the canopy, thinking it will improve air circulation or reduce weight. Instead, this over-thinning disrupts the tree’s balance and causes more harm than good.
Visual cues are easy to spot: the interior canopy looks empty, the branches appear unnaturally long and bare, and the ends are crowded with thick clumps of leaves. From a distance, the tree may take on a “pom-pom” or “broccoli” shape, with most of its greenery pushed to the edges.
Why Lion’s Tailing Harms Your Trees: The Biological and Structural Consequences
Weakened Branches
When interior foliage is stripped away, the weight of the branch shifts outward, concentrating stress at the ends. This imbalance makes branches much more prone to breaking during wind, snow, or ice storms. Without inner growth to distribute weight and support, the entire structure becomes fragile.
Expert Tip: Prioritize structural pruning. Instead of removing inner growth for appearance, focus on building a strong, well-spaced scaffold of branches by selectively trimming weak, crossing, or poorly attached limbs.
Increased Wind Resistance
Those thick tufts of leaves at the branch tips act like small sails. During windy conditions, they catch more wind and increase drag, putting even greater strain on the already weakened limbs. In severe cases, this added resistance can cause major limb failure or even uproot the entire tree.
Sunscald and Stress
When you remove too much interior foliage, you also remove the natural shade that protects the bark. Suddenly exposed to direct sunlight, inner branches and trunk sections can suffer from sunscald, a condition where the bark overheats and cracks. This damage not only weakens the tree but also creates easy entry points for pests, fungi, and disease.
Expert Tip: Follow The 1/3 Rule: Never remove more than 25–30% of a tree’s live crown in a single year. Over-pruning causes stress that leads to weak regrowth and long-term decline.
Rapid Compensatory Growth (Water Sprouts and Suckers)
When a tree loses too much foliage at once, it panics. In an effort to regain its ability to photosynthesize, it quickly pushes out new shoots known as water sprouts along the branches and suckers from the base. While this might seem like healthy growth, these shoots are actually weakly attached, fast-growing, and structurally unsound. Over time, they make the tree even more vulnerable to damage.
Reduced Overall Tree Health and Longevity
Repeated lion’s tailing causes chronic stress. Each time the tree is over-thinned, it uses up stored energy to replace lost foliage instead of focusing on healthy growth or defense against pests. Over time, this energy drain weakens the tree’s immune system, making it more susceptible to disease and significantly shortening its lifespan.
Identifying & Diagnosing Lion’s Tailing on Your Own Trees
Visual Cues: Spotting the Signs of Improper Pruning
Lion’s tail can sneak up on you. At first, your tree may look cleaner or more open, but over time, the damage becomes clearer. The good news is that you can diagnose this problem yourself with just a careful look and a few simple checks.
Here’s a step-by-step way to assess your tree:
Step 1: Stand Back and Observe
Take a few steps back and look at your tree as a whole. Does the canopy look thin and “empty” near the trunk, with most of the foliage pushed to the outer edges? If the tree resembles a lollipop or umbrella shape, with dense greenery only at the ends, it may have been lion’s tailed.
Step 2: Examine Individual Branches
Move closer and look along a few major limbs. You’re looking for long, bare stretches of wood that end in thick clumps of leaves. Think of it like a bottle brush or a poodle’s tail, smooth along the handle and fluffy at the end. That uneven foliage pattern is a classic sign of over-thinning.
Step 3: Check for Water Sprouts and Suckers
Scan the trunk and main branches for lots of fast-growing, upright shoots. These are water sprouts (on branches) and suckers (from the base). Their presence means your tree is trying to replace lost leaves, a stress reaction caused by too much pruning.
Step 4: Assess Branch Strength
If it’s safe to do so, gently shake a few mid-sized branches. Do they feel flexible and top-heavy, bending more at the tips? This can indicate weak structure caused by weight being concentrated too far out on the limb.

DIY Tree Health Report Card & Action Plan
To help homeowners assess their trees more confidently, consider creating a DIY Tree Health Report Card, a simple, interactive PDF or online quiz that walks you through your tree’s condition.
How It Works:
You answer a few short questions about your tree’s species, age, and pruning history, then evaluate its current appearance using visual checklists. Based on your responses, the tool generates a personalized “report card” and action plan tailored to your tree’s needs.
Possible Outcomes:
- Mild Lion’s Tailing: Minimal structural issues; focus on restoring balance with careful structural pruning.
- Moderate Lion’s Tailing: Noticeable canopy imbalance; consider a gradual pruning correction over a few seasons.
- Severe Lion’s Tailing: Major structural weakness and stress; consult a certified arborist for professional intervention.
Key Sections in the Report Card:
- Tree Species & Approximate Age
- Pruning History (when, how often, and by whom)
- Visual Checklist (bare interior, dense tips, water sprouts, etc.)
- Severity Rating
- Recommended Next Steps
This tool helps you move from “something looks wrong” to a clear, informed plan for action.
Severity Assessment Checklist for Homeowners
For quick, on-site evaluation, you can use a Severity Assessment Checklist, a simple, printable guide that helps you categorize the level of damage and decide what to do next.
Checklist Items:
- Estimated percentage of internal foliage removed
- Presence and number of water sprouts or suckers
- Density of foliage at branch ends
- Overall canopy balance (even vs. top-heavy)
- Signs of stress (e.g., yellowing leaves, dead branches, bark cracks)
Action Tiers:
- Green (Minor): Light thinning, no major structural damage. DIY pruning adjustments are safe.
- Yellow (Moderate): Noticeable imbalance and stress; proceed slowly and avoid further heavy pruning this year.
- Red (Severe): Major structural weakening, extensive sprouting, or canopy dieback. Contact a professional arborist immediately.
This quick-reference tool makes it easy for homeowners to spot issues early and act before long-term damage occurs.
The Science Behind the Cut: Tree Biology for the DIY Pruner
How Trees Respond to Pruning: Understanding CODIT
Before picking up pruning shears, it helps to understand how trees actually respond to cuts. Trees are living systems, and every branch you remove affects how they grow, protect themselves, and heal. Knowing a few basics about tree biology can make all the difference between a clean, healthy cut and one that leads to decay or disease.
What Is CODIT?
CODIT stands for Compartmentalization of Decay in Trees. It’s the tree’s built-in defense mechanism that works a bit like an internal quarantine. When a branch is damaged or pruned, the tree doesn’t heal the wound the way human skin does. Instead, it walls off the injured area by forming barriers that prevent decay and pathogens from spreading into healthy tissue.
Over time, the tree grows new wood over the wound, slowly enclosing it. That’s why proper pruning placement is so critical; the closer your cut is to where the tree can naturally compartmentalize the wound, the faster and more effectively it can protect itself.
The Importance of the Branch Collar
At the base of every branch, where it joins the trunk or a larger limb, you’ll notice a slightly swollen area. That’s the branch collar, one of the most important parts of a tree’s anatomy when it comes to pruning. It’s where the tree’s healing and defense compounds are concentrated.
If you cut just outside this collar, you’re giving the tree the best chance to seal off the wound quickly and prevent decay from spreading inward.
Expert Tip: Learn to Identify the Branch Collar. It’s often ring-shaped or slightly raised. When making your cut, angle your saw or pruner just outside the branch collar and the branch bark ridge (the rough, raised bark line that runs along the top of where the branch meets the trunk). This placement encourages fast wound closure and minimizes decay.
The Branch Bark Ridge
The branch bark ridge is the narrow strip of rough bark that forms at the junction between a branch and the trunk. It runs diagonally upward and marks the outer edge of the branch’s attachment point. Along with the branch collar, it helps you find the correct location for your pruning cut.
When you cut just beyond the ridge and collar, not through them, you preserve the tree’s natural defense system. Think of it as working with the tree’s biology instead of against it.
Healing vs. Sealing
A common misconception is that trees “heal” wounds like people do. In reality, they don’t heal; they seal. Instead of regenerating the same tissue, a tree isolates damaged wood and grows new layers over it. If a cut is made correctly, the tree can form a smooth, circular callus that eventually covers the wound completely.
If a cut is made poorly, too close, too far, or at the wrong angle, the wound remains open for much longer, exposing the tree to decay, fungi, and insect damage.
Why Flush Cuts Are Harmful
It might seem tidy to cut a branch flush with the trunk, but this is one of the most damaging pruning mistakes. A flush cut slices through the branch collar, removing the tissue that the tree needs to compartmentalize and seal the wound. Without that natural barrier, decay can spread into the main stem, compromising the tree’s structure and health.
Flush cuts also leave a larger, flatter wound that takes much longer to close, a perfect entry point for disease and pests.
Expert Tip: Avoid All Flush Cuts. Always cut just outside the branch collar and bark ridge, leaving a small stub that the tree can naturally grow over. This simple habit supports CODIT and keeps your tree’s defenses strong.
Mastering Correct Pruning Techniques to Prevent Lion’s Tailing
Pruning is one of the most rewarding parts of tree care when it’s done correctly. The goal isn’t just to make a tree look neat; it’s to support strong structure, healthy growth, and long-term stability. By following proper techniques, you can shape your tree naturally, avoid lion’s tailing, and encourage resilience against wind, disease, and decay.
Core Principles Before You Begin
Expert Tip: Always “Think Before You Cut.”
Before making any cut, pause and consider its long-term impact. Every branch plays a role in the tree’s stability, food production, and overall health. Don’t focus only on appearance; think about balance and biology.
Expert Tip: Start Small, Cut Conservatively.
If you’re unsure, make smaller cuts first. You can always remove more later, but you can’t reattach a branch once it’s gone. Conservative pruning protects your tree from unnecessary stress and gives you time to assess results before continuing.
1. Thinning Cuts (Reduction Cuts)
Goal: To reduce canopy density or branch length by removing entire branches back to a main stem or a lateral branch that’s at least one-third the diameter of the one being removed.
Steps:
- Identify the target branch that’s too dense, crossing, or growing in an undesirable direction.
- Locate a suitable lateral branch or the main trunk that’s at least one-third the diameter of the branch being removed.
- Cut just beyond the branch collar (never into it), ensuring a clean edge to promote rapid sealing.
Thinning cuts help open the canopy slightly for light and air, without stripping the interior foliage. This is the correct way to “thin” a tree without creating the bare, top-heavy look caused by lion’s tailing.
2. Structural Pruning
Goal: To establish a strong, balanced framework of branches and improve the tree’s natural architecture.
Targets: Focus on removing branches that are weak, crowded, or poorly attached, specifically those that:
- Cross or rub against others
- Have narrow, V-shaped unions
- Grow inward toward the trunk instead of outward.
- Compete with the central leader (in species that have one)
Steps:
- Identify the central leader (main vertical stem) if appropriate for the species.
- Select well-spaced scaffold branches with wide, U-shaped angles from the trunk. These are structurally strong and help distribute weight evenly.
- Remove competing leaders and any crossing or inward-growing branches. This encourages the tree to form a natural, open structure that resists wind damage and supports healthy growth.
Structural pruning is especially important in young trees. A little attention early on can prevent major problems later, like lion’s tailing or structural failure as the tree matures.
3. The Three-Cut Method (for Larger Branches)
When removing heavier branches, making a single cut can tear bark and damage the trunk. The three-cut method prevents that and ensures a clean, healthy wound.
Steps:
- Undercut: About 6–12 inches away from the trunk or parent limb, cut the underside of the branch, going about one-third of the way through. This stops bark from tearing when the branch falls.
- Top Cut: Move a few inches outward (1–2 inches beyond your undercut) and cut through the top of the branch. The branch will break cleanly away.
- Final Cut: Remove the remaining stub by cutting just outside the branch collar, preserving the tree’s natural healing tissue.
Image Suggestion: A simple diagram series showing each stage of the three-cut method, with arrows marking the undercut, top cut, and final collar cut.
Comparison of Good vs. Bad Pruning Cuts
|
Pruning Cut Type |
Correct Technique |
Incorrect Technique (Leads to Lion’s Tailing) |
Why It Matters |
|
Thinning Cut |
Remove the entire branch back to a larger branch or trunk, just outside the branch collar. |
Randomly remove interior branches without regard for size ratio or collar location. |
Promotes natural tree form and strong compartmentalization. Improper thinning causes bare interiors, forcing growth to the tips and leading to weak, top-heavy branches. |
|
Reduction Cut |
Shorten a branch back to a lateral branch at least one-third the diameter of the one being removed. |
Make stub cuts or cut too close to the leader, leaving bare stubs or open wounds. |
Maintains structure and redirects growth naturally. Poor reduction cuts trigger weak water sprouts and decay since stubs lack active foliage for healing. |
|
Removal of Small Branches |
Cut just above an outward-facing bud or lateral branch. |
Flush cuts against the trunk or leaving long stubs. |
Encourages outward growth and faster closure. Flush cuts destroy the branch collar, while stubs die back and invite pests or rot. |
|
Removal of Large Branches |
Use the three-cut method; final cut just outside the branch collar. |
Make one heavy top cut or cut flush with the trunk. |
Prevents bark tearing and large wounds. Incorrect cuts damage vascular tissue, slow healing, and weaken the tree structurally. |
Common Pruning Mistakes that Lead to Lion’s Tailing (and How to Avoid Them)
When it comes to pruning, most DIY gardeners start with good intentions but often end up unintentionally weakening their trees. Lion’s tailing is one of the most common results of overzealous or misinformed pruning, where too many inner branches are removed, leaving long, bare limbs with foliage only at the ends. The result is a tree that looks tidy in the short term but becomes unstable and unhealthy over time. To help you avoid this, let’s take a “reverse-engineering” approach: start with the most frequent mistakes and work backward to understand the right techniques.
Mistake 1: Removing Too Much Interior Foliage
Why it happens: Many homeowners aim for a “clean” look or believe that stripping interior branches improves airflow and sunlight penetration. While this might seem beneficial, it actually disrupts the tree’s energy balance and structural stability.
The biological consequence: Leaves are the tree’s food factories. When interior foliage is removed, the tree loses a significant portion of its photosynthetic surface. This forces it to push out new growth at the ends of branches, making them long, thin, and weak, classic signs of lion’s tailing.
Correction: Focus on outer canopy thinning and structural pruning instead of gutting the interior. Retain small interior branches that provide balance and shade for the trunk and inner wood. The goal is a layered canopy where sunlight filters through, not a skeletonized one.
Mistake 2: Only Tip Pruning
Why it happens: Some people try to control a tree’s size or shape by only cutting back the tips, assuming it’s the safest approach. Unfortunately, this creates a dense shell of foliage at the outer edge and starves the interior of light and nutrients.
The biological consequence: Tip pruning stimulates multiple buds near the cut, leading to clusters of weak, fast-growing shoots. These water sprouts are structurally unstable and prone to breakage, increasing the risk of lion’s tailing and storm damage.
Correction: Instead of shearing the tips, use thinning cuts, remove entire branches back to a lateral branch that’s at least one-third the diameter of the one being removed. This technique opens up the canopy naturally, maintains structure, and prevents overgrowth without stressing the tree.
Mistake 3: Flush Cuts
Why it happens: Many DIYers don’t recognize the importance of the branch collar, the slightly swollen area where a branch meets the trunk. Cutting too close, right up against the trunk, might seem cleaner, but it actually damages the tree’s natural defense system.
The biological consequence: A flush cut removes the protective tissues that help the tree seal the wound. This leaves an open pathway for decay and disease to enter the trunk, compromising the tree’s long-term health.
Correction: Always make cuts just outside the branch collar, never through it. The small ridge or raised area should remain intact; it’s the tree’s natural barrier against decay. When done correctly, the wound seals quickly, reducing infection risk and promoting faster recovery.
Mistake 4: Leaving Stubs
Why it happens: This mistake often comes from hesitation or uncertainty about where to cut. Instead of pruning back to a lateral branch or bud, some leave long stubs dangling from the trunk or main limbs.
The biological consequence: Stubs die back because they no longer receive nutrients from the tree. As they decay, they become entry points for insects, fungi, and bacteria. Over time, this can lead to rot spreading deeper into the limb.
Correction: Always cut back to a lateral branch or outward-facing bud. This encourages healthy new growth in the right direction and allows the tree to close the wound efficiently. If you’re unsure, it’s better to make a slightly conservative cut and revisit it later than to leave a stub.
The “Pruning Decision Tree” for DIYers
To make pruning easier and more foolproof, imagine a visual Pruning Decision Tree, a step-by-step guide that helps you choose the right cut based on your goal and the condition of the branch.
Concept Overview:
This flowchart begins with a simple question: “What is your pruning goal?” From there, it guides you through logical steps to determine the correct action.
Example Structure:
- Start: What is your pruning goal?
- Reduce canopy density → Go to Step 2
- Remove dead/diseased wood → Go to Step 3
- Control shape or size → Go to Step 4
- Reduce canopy density → Go to Step 2
- Step 2: Are you removing live branches?
- Yes → Use thinning cuts back to strong laterals.
- No (just deadwood) → Cut at the branch collar.r
- Yes → Use thinning cuts back to strong laterals.
- Step 3: Is the branch larger than 2 inches in diameter?
- Yes → Use the three-cut method to avoid bark tearing.ng
- No → Use standard pruning shears for a clean, angled cut.
- Yes → Use the three-cut method to avoid bark tearing.ng
- Step 4: Are you cutting back to a lateral branch or bud?
- Yes → Proceed; encourages proper regrowth.h
- Yes → Proceed; encourages proper regrowth.h
No → Stop and reassess the cut location.on
Essential Tools & Safety for the DIY Tree Pruner
Before making the first cut, every successful pruning session begins with the right tools and a solid approach to safety. Having proper equipment not only makes pruning more efficient but also protects both you and your tree from unnecessary damage. This section breaks down the essential tools every DIY tree pruner should have, how to maintain them, and the safety measures you should never skip.
Selecting the Right Tools for the Job
Pruning isn’t about brute force; it’s about precision. Each tool serves a specific purpose, and using the right one makes your work cleaner, faster, and safer.
1. Bypass Pruners (Hand Pruners)
Use: Ideal for small branches up to ¾ inch in diameter.
Selection: Choose bypass pruners, which use a scissor-like cutting action for clean, smooth cuts. Avoid anvil-style pruners for live wood; they tend to crush and tear rather than slice cleanly. Look for ergonomic handles and a durable steel blade for long-term comfort and performance.

Expert Tip: When shopping, test how the pruners feel in your hand. If you need to use excessive grip strength, try a smaller or lighter pair. Comfort directly affects control and precision.
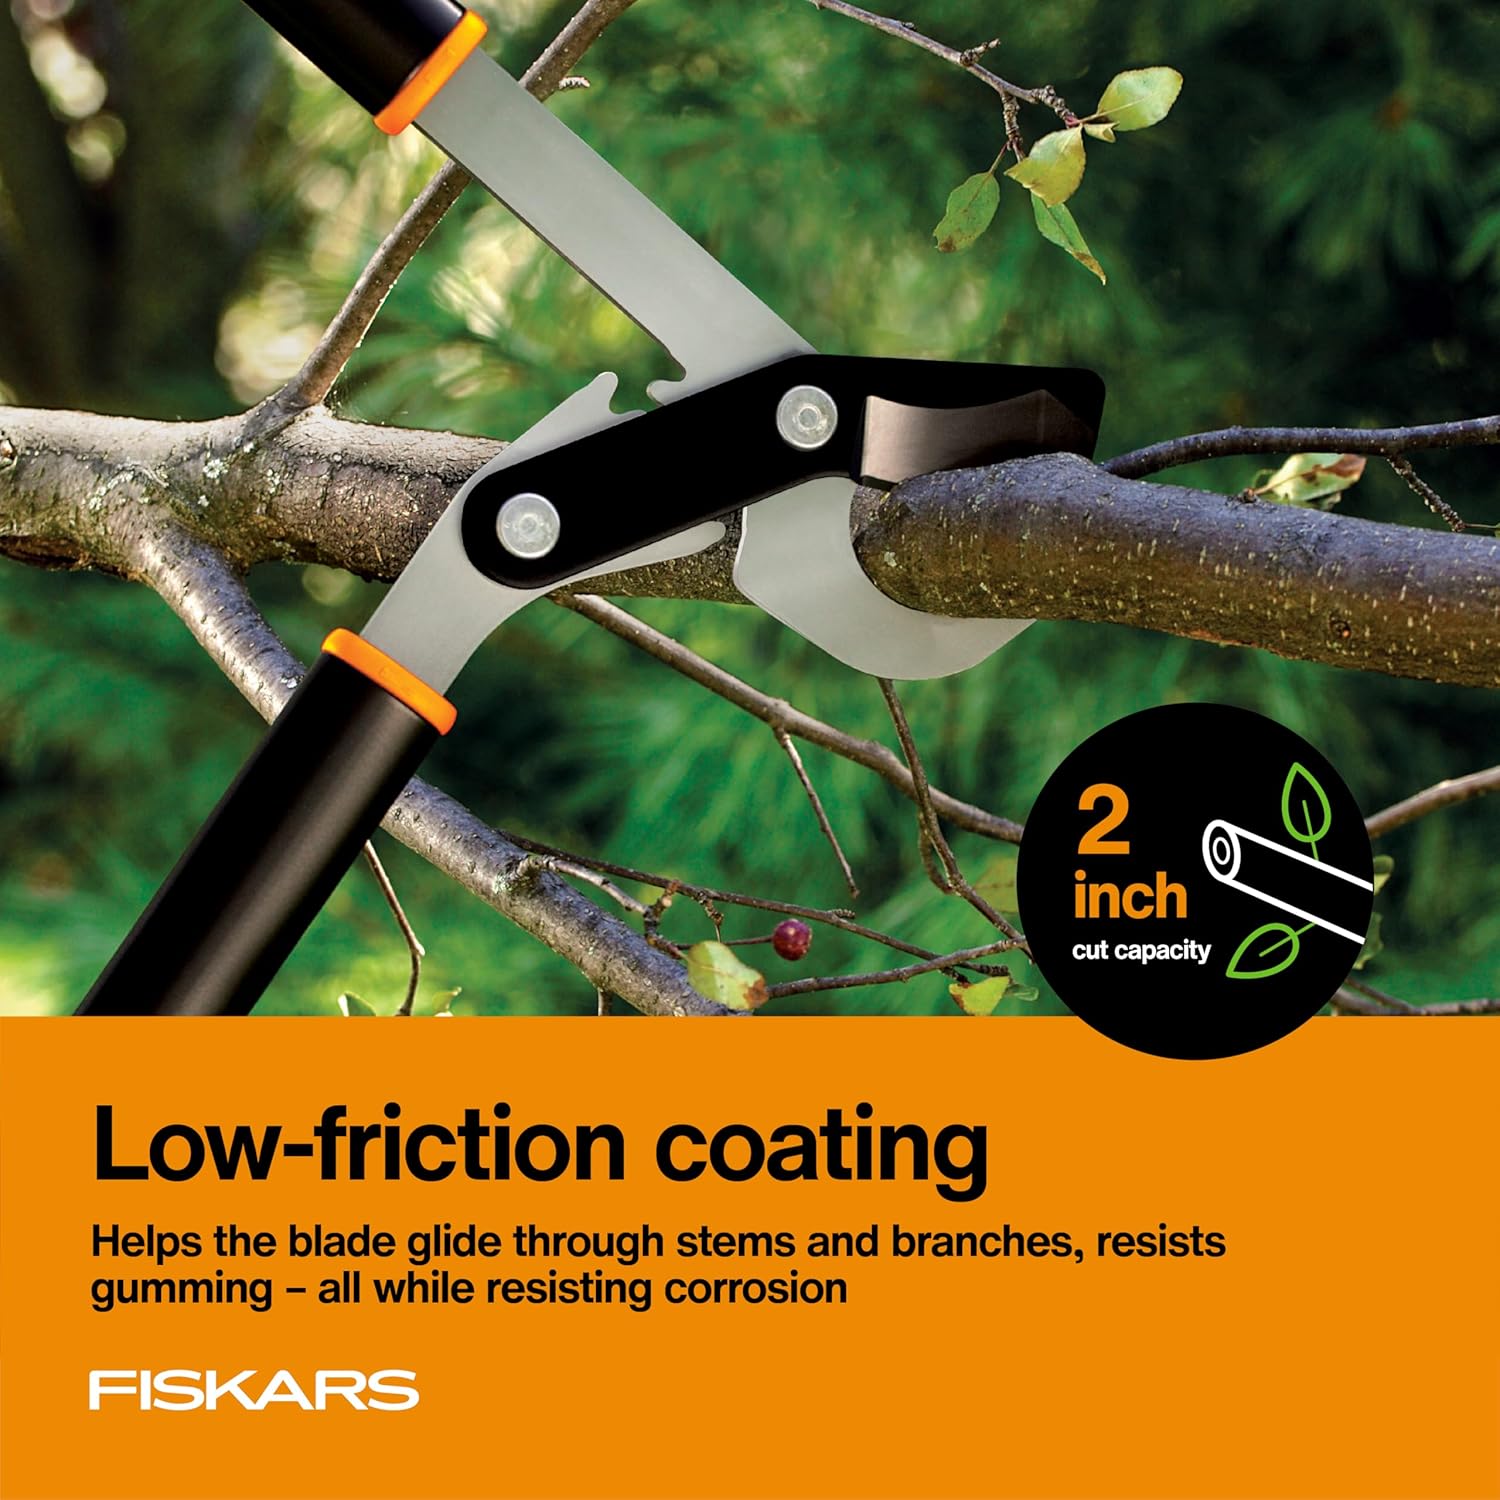
2. Loppers
Use: Designed for medium branches up to 1.5–2 inches in diameter.
Selection: Opt for bypass-style loppers with long handles for better leverage. Telescoping handles are a plus; they help you reach higher without sacrificing cutting power. Carbon steel or hardened steel blades stay sharp longer and are easier to maintain.
Pro Tip: Don’t force loppers through wood that’s too thick; this can damage both the tool and the branch. If you find yourself straining, switch to a pruning saw.
3. Pruning Saw (Folding or Pole Saw)
Use: For larger branches that exceed lopper capacity.
- A folding pruning saw is perfect for ground-level work.
- A pole saw helps reach high branches safely without needing to climb or overreach.
Selection: Look for a sharp, curved blade that cuts on the pull stroke; this gives you greater control and efficiency. Replace dull blades promptly to ensure clean, non-tearing cuts.

Expert Tip: Always store saws folded or with blade guards on. Exposed teeth can easily tear clothing or cause injury.
Tool Maintenance
Your tools are an investment, and proper care keeps them performing like new for years.
- Keep Your Tools Razor Sharp:
Sharp blades make precise cuts that heal faster and reduce the risk of tearing bark or crushing plant tissue. Dull tools create ragged cuts that take longer to close and expose the tree to pests and disease. Use a sharpening stone or file regularly, and replace worn parts when needed. - Sanitize Your Tools Frequently:
Always clean your blades with rubbing alcohol or a diluted bleach solution between trees, and especially after working on diseased branches. This simple habit prevents the spread of pathogens that can infect healthy trees.
Store Properly:
After cleaning, dry your tools thoroughly and apply a light coat of oil to metal parts to prevent rust. Store them in a dry location, ideally hanging, to protect the blades.
Crucial Safety Precautions for DIY Pruning
Even with the best tools, safety should always come first. Tree pruning can involve sharp equipment, heavy limbs, and sometimes heights, all of which require care and attention.
1. Safety Glasses or Goggles
Importance:
Eye protection is non-negotiable. Branches can snap unexpectedly, and sawdust or bark fragments can cause serious injury.

2. Work Gloves
Importance:
A solid pair of gloves shields your hands from blisters, thorns, and splinters while improving grip. Choose heavy-duty leather or synthetic gloves with reinforced palms for durability and comfort.
Leather Work Gloves for Men or Women. Large Glove for Gardening, Tig/Mig Welding

3. Stable Ladder (A-frame or Extension)
Importance: Essential for reaching higher branches safely. Never prune from an unstable or improvised platform.
Proper Usage:
- Set your ladder on stable, level ground; avoid soft soil or sloped surfaces.
- Maintain three points of contact at all times (two hands and one foot, or two feet and one hand).
- Never overreach. If a branch is out of reach, climb down and reposition the ladder.
Avoid metal ladders near power lines to eliminate the risk of electrocution.
Telescoping Ladder, SocTone 12.5 FT Aluminum Lightweight Extension Ladder with 2 Triangle Stabilizers

4. General Safety Rules
- Be aware of your surroundings: Check for nearby power lines, buildings, fences, or people before starting.
- Plan your cuts: Know where each branch will fall before you cut. Have a clear escape path.
- Stay alert: Never prune when tired, distracted, or under the influence of alcohol or medication that affects balance or judgment.
- Dress appropriately: Wear long sleeves, sturdy shoes with good traction, and avoid loose clothing that can get caught in branches.
Optimizing Your Pruning Schedule for Tree Health
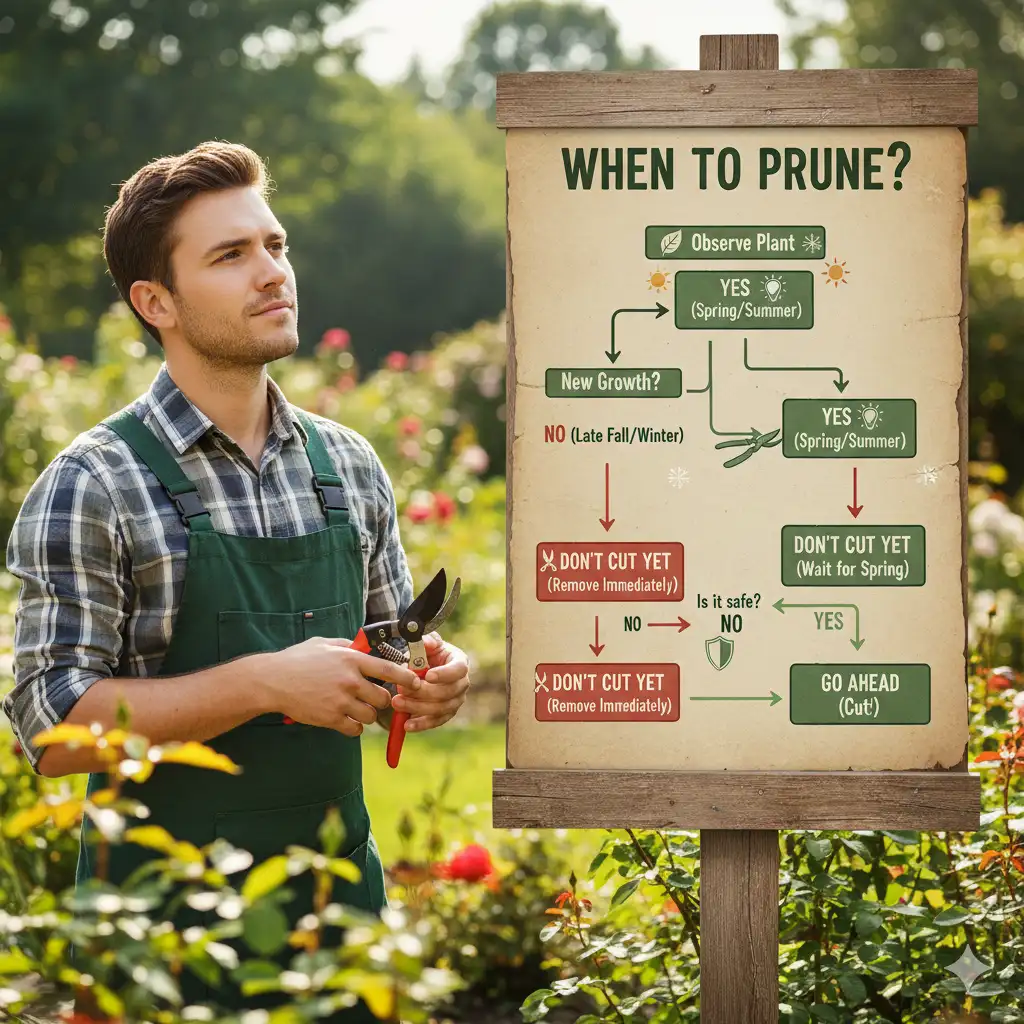
Pruning at the right time is just as important as pruning the right way. Every cut affects a tree’s growth, energy use, and overall resilience, so timing can determine whether your work helps or harms. Understanding when to prune different tree types helps you avoid unnecessary stress, disease exposure, and structural problems like lion’s tailing.
When to Prune: Optimal Timing for Different Tree Types
General Rule: Dormant Season Pruning
Best Time: Late winter to early spring, after the harshest cold but before bud break.
Why It Works:
- The tree is in a dormant state, meaning less energy is lost to pruning wounds.
- With no leaves in the way, you can clearly see the structure, making it easier to spot crowded branches or early signs of lion-tailing.
- Diseases and pests are less active in cold weather, reducing infection risks.
- Cuts made now encourage strong, balanced growth once spring arrives.
Example: Oak, apple, ash, and maple trees all benefit from structural pruning in late winter before new growth begins.
Summer Pruning (Use Sparingly)
Purpose: To slow vigorous growth, refine shape, or remove dead, damaged, or diseased wood.
Timing: Early to mid-summer, once leaves have fully expanded.
Caution:
While light summer pruning is fine, avoid aggressive thinning, especially removing too much interior foliage. Heavy summer pruning can trigger stress responses and make trees more prone to sunscald, pests, or weak compensatory shoots.
Best Practice: Limit summer cuts to 10–15% of the live canopy. Focus only on problem areas or crossing branches, not widespread thinning.
When to Avoid Pruning
- Fall: Avoid pruning in the fall since it can encourage new growth that won’t harden before winter. These tender shoots are easily damaged by frost, leaving the tree vulnerable to disease and dieback.
- Very Early Spring: Some trees, like maples, birches, and elms, “bleed” sap heavily if pruned before leaf-out. This doesn’t usually harm the tree, but it’s messy and can attract pests. For these species, prune in late summer or fall instead.
Expert Tip: Always research your specific tree species before pruning. Some trees, such as flowering varieties, depend on pruning at precise times to avoid cutting off next season’s blooms. Local arborist associations, university extension guides, or reputable tree identification apps can help you determine the ideal schedule.
Product Recommendation: Consider using an Arborist Reference Guide or Tree ID App (such as “PictureThis” or a local university’s extension publication). These tools help you identify tree species, understand their growth cycles, and pinpoint the safest, most effective pruning windows.
Seasonal Pruning Calendar for Lion’s Tail Prevention
To make timing easier, here’s a simple, season-by-season reference guide designed specifically to help homeowners avoid lion’s tailing and maintain balanced, healthy growth.
|
Season |
Recommended Actions |
What to Avoid |
Why It Matters |
|
Late Winter (Jan–Mar) |
Perform major pruning and structural corrections. Remove crossing branches and weak attachments. |
Avoid pruning during hard freezes. |
The tree is dormant, making it easier to see its structure and reducing disease risk. Encourages balanced spring growth and prevents over-thinning later. |
|
Spring (Apr–May) |
Light corrective pruning only, remove small dead branches or damage from winter. |
Avoid major thinning or shaping. Don’t prune sap-bleeding species like birch or maple. |
Heavy pruning can stress trees during active leaf-out. Minimal pruning helps energy go toward healthy new growth. |
|
Summer (Jun–Aug) |
Conduct selective pruning for shaping, light thinning, or removing diseased/dead wood. |
Avoid removing large amounts of interior foliage. |
Heavy pruning now increases heat stress and can trigger lion’s tailing by forcing regrowth at the branch tips. |
|
Fall (Sept–Dec) |
Focus on cleanup only, remove dead wood or hazards. |
Avoid structural pruning or canopy thinning. |
Late pruning encourages tender growth that winter frost can kill, weakening the tree long-term. |
The Biological Connection: Why Timing Affects Lion’s Tailing
Lion’s tailing often occurs when people prune too aggressively at the wrong time of year, usually during active growth. Trees under stress respond by producing rapid, weak shoots at the branch tips (a classic sign of lion’s tailing). By pruning during dormancy, you reduce this stress and encourage stronger, more evenly distributed growth.
Think of it as working with your tree’s natural rhythm rather than against it. Dormant pruning supports structure. Summer pruning controls shape. Fall and early spring are rest periods, best left undisturbed.
Beyond DIY: Knowing When to Call a Professional Arborist
While pruning smaller trees or basic branches can be a satisfying and manageable DIY project, there are times when the safest and smartest decision is to call a certified professional. Trees are complex, living systems, and improper pruning, especially at scale, can lead to costly damage, safety risks, and long-term decline. Knowing your limits helps protect both you and your trees.
Criteria for Professional Intervention
Here are clear situations where it’s best to hand the work over to a qualified arborist:
1. Large Branches
If a branch is more than 2 inches in diameter, especially if it requires a pruning saw rather than hand pruners or loppers, professional help is recommended. Larger branches are heavier and more likely to tear bark or cause structural damage when removed improperly.
Why it matters:
Heavy cuts can cause significant wounds that take years for a tree to compartmentalize. An arborist knows where and how to make these cuts to protect the branch collar and minimize decay.
2. Height and Access
If the job involves climbing a ladder above the second or third rung or using a pole saw near power lines, stop and call a pro. The risk of falls or electrical hazards is far too high for DIY work.
Why it matters:
Most pruning injuries happen from overreaching, unstable ladders, or misjudged cuts. Arborists are trained and equipped to handle work at height safely, using ropes, harnesses, and insulated tools when needed.
3. Large or Mature Trees
Once trees outgrow easy ground access, pruning becomes significantly more complicated. Mature trees may require structural corrections or selective canopy thinning that demands both skill and knowledge of the species’ growth habits.
Why it matters:
Mature trees often represent major landscape investments. A poorly placed cut can lead to decay pockets or weaken limbs that take years to recover, or never do.
4. Complex Structural Issues
If your tree shows signs of lion’s tailing, severe branch imbalance, or extensive deadwood, these are not simple fixes. The tree may need staged pruning over several years to restore proper structure, and that requires a professional plan.
Why it matters:
Overcorrecting a lion-tailed tree too quickly can shock the system. Certified arborists know how to gradually reintroduce balance while protecting overall health.
5. Proximity to Hazards
If the tree is near your home, a fence, parked cars, sidewalks, or power lines, don’t risk it. Even small branches can cause significant property damage or personal injury when they fall unpredictably.
Why it matters:
Professional tree companies carry liability insurance and use controlled rigging techniques to lower branches safely, something DIY equipment can’t replicate.
6. Uncertainty or Safety Concerns
If you’re not completely confident in where or how to cut, that’s your signal to step back.
Expert Tip: When in doubt, hire a pro. Arborists don’t just cut; they assess tree health, diagnose disease, and provide pruning plans that protect your investment long-term. One consultation can prevent years of damage.
Benefits of Hiring a Certified Arborist
Working with a certified arborist (look for credentials from the International Society of Arboriculture (ISA)) ensures your trees are handled with expertise and care. Here’s what you gain:
- Expert Knowledge: Arborists understand tree biology and pruning physics, ensuring every cut supports health and structure.
- Specialized Equipment: They use climbing harnesses, pole pruners, and aerial lifts to access difficult areas safely.
- Liability Coverage: Professional services carry insurance that protects you from potential damage or accidents.
- Long-Term Tree Health: Their work promotes stability, balanced growth, and resilience against storms and disease.
Hiring an arborist isn’t just about convenience; it’s about protecting both your trees and your safety.
Tree Care: DIY vs. Professional Calculator
Make informed decisions about your tree care projects. Calculate costs, risks, and benefits to determine the best approach.
Your Analysis Will Appear Here
Enter your project details to see whether DIY or professional work makes more sense.
Recommendation
Based on your inputs, here's our recommendation...
DIY Approach
✅ Advantages
- Cost savings
❌ Considerations
- Time investment
Professional Service
✅ Advantages
- Professional expertise
❌ Considerations
- Higher upfront cost
Safety Considerations
Tree Care Safety Guidelines
✅ DIY Safe Zone
- Small branches (under 1 inch diameter)
- Accessible from ground or small ladder
- No nearby power lines or structures
- Healthy trees with no signs of decay
👷 Professional Recommended
- Branches over 2 inches diameter
- Work above 6 feet height
- Within 10 feet of structures
- Complex pruning or shaping
🚨 Hire Immediately
- Work near power lines
- Large trees with visible decay
- Storm damage assessment
- Tree removal near buildings
Long-Term Tree Health: Post-Pruning Care & Monitoring
Pruning doesn’t end when the last branch hits the ground. What happens in the weeks and months afterward determines how well your tree recovers and whether it continues to thrive or struggles under stress. Proper post-pruning care is about helping your tree redirect its energy, heal efficiently, and maintain balanced, healthy growth for years to come.
Maintaining Tree Vigor After Pruning
After pruning, trees enter a recovery phase. They need consistent support to rebuild strength and restore energy reserves lost through the removal of leaves and branches. Here’s how to help your tree stay resilient:
1. Watering
Adequate hydration is critical for healing. Pruning can temporarily disrupt a tree’s balance between its roots and canopy, increasing water demand.
- What to do: Deeply water the root zone, allowing moisture to reach 8–12 inches into the soil.
- When to water: Once a week during dry periods, or more frequently for young or recently pruned trees.
- Avoid: Overwatering or shallow, frequent watering, which encourages weak surface roots.
Pro Tip: Use a slow soaker hose or drip system to ensure deep, even moisture penetration.
2. Mulching
Mulch acts like a natural buffer between the tree and environmental stress. It keeps the soil cool, retains moisture, and helps prevent weeds from competing for nutrients.
- How to apply: Spread a 2–3 inch layer of organic mulch (such as shredded bark, compost, or wood chips) in a wide circle around the base.
- Important: Keep mulch 3–6 inches away from the trunk to prevent rot and pest infestations.
Why it matters: Mulching creates a stable, nutrient-rich environment that promotes healthy root growth and supports recovery after pruning.
3. Fertilization
Resist the urge to fertilize immediately after pruning. Trees under stress don’t need a burst of nutrients; they need stability.
- Best practice: Only fertilize if a soil test indicates a deficiency or an arborist specifically recommends it.
- Avoid quick fixes: Over-fertilizing can trigger weak, fast-growing shoots (water sprouts) that are prone to breakage and disease.
Remember: Healthy soil supports healthy trees. Focus on organic matter and moisture management before reaching for fertilizer.
Monitoring for Problems
Keeping a close eye on your tree after pruning helps catch small issues before they become serious. Regular observation ensures the pruning work supports growth rather than causing unintended stress.
1. Healing Wounds
Healthy pruning cuts seal naturally through callus formation, the raised tissue that develops around the edges.
- Normal: Callus tissue should gradually expand and cover the wound within one to two growing seasons.
- Warning Signs: Slow healing, oozing sap, cracking bark, or fungal growth can indicate infection or decay.
Tip: Avoid painting pruning wounds. Trees are biologically equipped to seal themselves without sealants, which can trap moisture and disease.
2. New Growth
Watch how the tree responds in the first growing season after pruning.
- Healthy Response: Steady, balanced new shoots distributed throughout the canopy.
- Problem Indicators: Excessive water sprouts (thin, vertical shoots) or uneven growth suggest stress or over-pruning.
Balanced regrowth is a sign that the tree’s energy reserves are stabilizing and it’s adapting well to the new structure.
3. Signs of Stress
Stress can appear weeks or months after pruning, especially if too much foliage was removed.
- Common symptoms:
- Wilting or curling leaves
- Yellowing or browning foliage
- Premature leaf drop
- Pest infestations (borers, aphids, or scale)
- Fungal growth on bark or near wounds
- Wilting or curling leaves
Response: Adjust watering, remove affected branches if necessary, and contact a certified arborist for diagnosis if symptoms persist.
4. Regular Inspections
Even once your tree appears healthy, make it a habit to inspect it seasonally.
- Check for:
- Cracks or cavities developing in older wounds
- Branch unions that look weak or are splitting
- New deadwood, decay, or pests
- Changes in canopy density or shape
- Cracks or cavities developing in older wounds
Why it matters: Early detection allows for small corrections before they become safety or structural hazards. Preventive care always costs less than emergency removal or repair.
Sustaining Long-Term Health
Trees are dynamic organisms that respond to environmental shifts, pruning practices, and soil conditions over time. Your role is to guide that process, not rush it. Consistency is more important than intensity; gentle, informed maintenance keeps your trees resilient and stable year after year.
Simple Long-Term Routine:
- Water deeply during droughts.
- Replenish mulch annually.
- Schedule visual inspections every spring and fall.
- Consult a professional arborist every few years for a health assessment.
These small, regular actions extend the life of your trees, protect your property, and keep your landscape looking strong and natural.
Frequently Asked Questions (FAQs)
Conclusion: Empowering You to Prune for Health & Beauty
Proper pruning is more than a seasonal chore; it’s an investment in the long-term health, strength, and beauty of your trees. By understanding tree biology, recognizing the dangers of lion’s tailing, and applying the right pruning techniques, you can confidently care for your landscape while avoiding common mistakes that compromise structure and vigor.
You now have the tools to:
- Identify lion’s tailing before it becomes a serious problem.
- Make informed pruning cuts that support natural growth and structural integrity.
- Select and maintain the right tools for every task safely and efficiently.
- Know when to call a certified arborist, ensuring safety and professional guidance when needed.
Trees are living investments, enhancing your property value, providing shade, and supporting local ecosystems. With the knowledge from this guide, you are empowered to make decisions that protect these vital assets while promoting their health and resilience for years to come.
